


Contents: Removal ⬇ Installation ⬇
Removal
1. The clutch master cylinder is attached to the rear bulkhead of the engine compartment. In order to ensure adequate access, it is necessary to first remove some components installed in the engine compartment - depending on the layout, it may be necessary to remove the expansion tank, the battery with the tray, and sometimes the fuse box.
2. Thoroughly wipe the outside surface of the master cylinder and place a rag underneath it to collect any spilled brake fluid.
3. Use a clamp to pinch the feed hose connecting the reservoir to the master cylinder (see accompanying illustration).
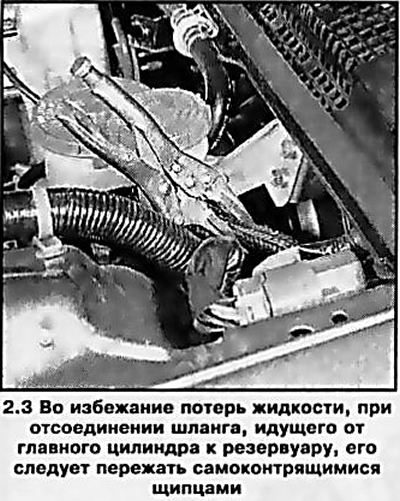
Note: The hose should be pinched at a distance of approximately 5 cm from the cut end of the cylinder pulled onto the nipple.
Immediately plug the hole in the cylinder to prevent dirt from entering the tract.
4. Remove the retaining ring, slide the clamp and disconnect the hydraulic tube from the master cylinder - to minimize the loss of hydraulic fluid, wrap the union with a rag. Immediately plug the open ends of the line and union to prevent dirt from getting into the system.
Caution: To avoid damage to the paintwork, do not allow brake fluid to come into contact with painted surfaces of body panels!
Remove the sealing ring from the nipple connector - it must be replaced during assembly.
5. In the passenger compartment, disconnect the return spring from the clutch pedal. Remove the lower left section of the instrument panel trim (see Chapter 11), release the lock, remove the pin and disconnect the split pin of the hydraulic master cylinder pusher from the clutch pedal.
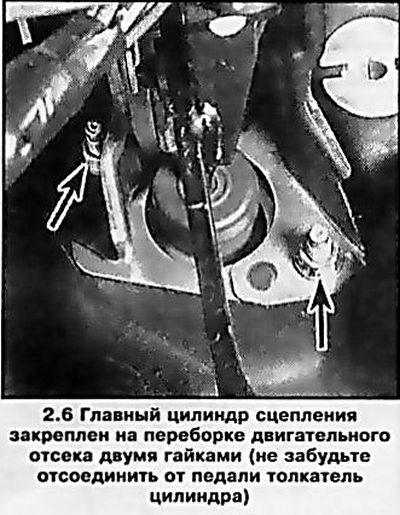
6. There, remove the two nuts securing the master cylinder to the engine compartment bulkhead/pedal support bracket (see accompanying illustration). Go to the engine compartment and remove the master cylinder assembly with the sealing gasket.
Installation
Note: Prepare a new O-ring for the hydraulic tube master cylinder connection nipple.
7. Make sure that the mating surfaces of the clutch master cylinder assembly and the engine compartment bulkhead are absolutely clean and dry.
Replace the sealing gasket.
8. Place the master cylinder in its regular place and secure it with bolts, hand tightening the nuts.
9. Restore the original connection of the hydraulic lines - do not forget to replace the sealing elements and ensure that the nipple connections are securely fastened. Tighten the cylinder mounting nuts to the required force.
10. Connect the cylinder push rod to the clutch pedal and reinstall all removed parts and components.
11. Finally, "pump" the hydraulic system to remove air locks (see Section 4).
Visitor comments