


Contents: Adjustment ⬇ Replacement ⬇
Adjustment is necessary after replacing the drive lever, as well as when gear shifting is unclear.
Adjustment
1. Prepare the car for work (see "Preparing the car for maintenance and repair").
2. Remove the top lining of the floor tunnel (see "Parking brake actuator lever - replacement").
3. Shift into neutral.
4. Loosen the clamp of the lever rod and the gear shift mechanism drive (see "Gearshift Drive - Removal, Repair and Installation").
5. Turn the gear shift mechanism rod clockwise until it stops and press the lock.
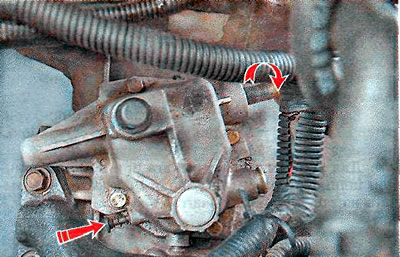
6. Move the lever to the left until it stops (without lifting the reverse gear lock ring up) and insert a pin with a diameter of 5 mm.
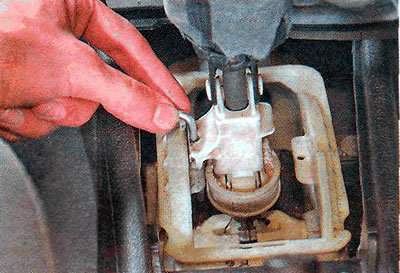
Note: The pin must pass through the holes in the lever and its body.
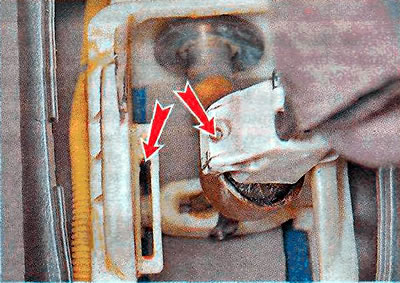
7. Tighten the clamp of the lever rod and the gear shift mechanism drive
8. Remove the pin and retainer from the gear shift mechanism housing.
9. Check the ease of gear shifting. If necessary, repeat the adjustment.
Replacement
Depending on the fault, the drive lever can be replaced as a whole with the frame and rod or separately from them.
1. Prepare the car for work (see "Preparing the car for maintenance and repair").
2. Lift up the gear shift lever cover (see above).
3. Remove the front ashtray and cigarette lighter unit (see "Cigarette lighter - adjustment and replacement of the socket, replacement of the backlight lamp").
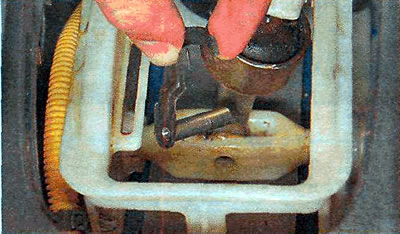
4. To replace only the lever, use a long slotted screwdriver to disengage the lever axle retainer from engagement with the lever.
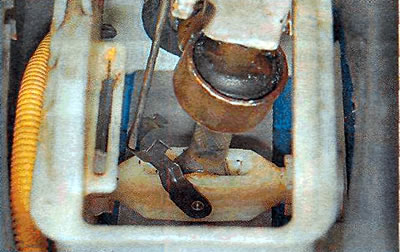
We take out the axle and, pulling it up, remove the lever.
5. To replace the lever assembly, disconnect the lever rod from the gear shift mechanism drive (see "Gearshift Drive - Removal, Repair and Installation").
6. Remove the floor tunnel lining (see "Parking brake actuator lever - replacement").
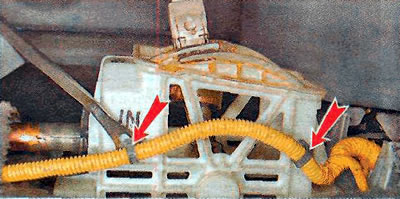
7. Disconnect the two wire harness holders from the gear shift lever frame.
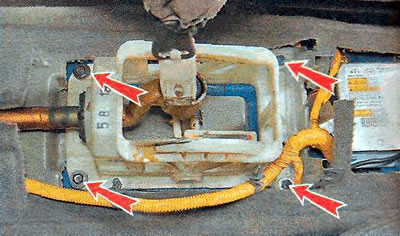
8. Using a 10 mm socket wrench, unscrew the two bolts and two nuts securing the gear shift lever frame and, pulling it back (removing the lever rod from the hole in the engine shield), remove the drive lever assembly.
9. Install the parts in the reverse order. Lubricate all the hinge joints with consistent grease.
(Text was copied from the portal: «OpelBook.ru»)
Note: After replacing the lever assembly, it is necessary to adjust it.
Visitor comments