
OpelBook.ru
Cars AvtoVAZ Cars Mitsubishi Cars BMW Cars Mercedes Cars Nissan Cars Toyota Cars Chevrolet
English Русский
Български
Беларускі
Український
Српски
Hrvatski
Română
Polski
Slovenský
Magyar
 |  Sitemap  |  Contacts  |    


Main Astra Corsa Insignia Kadett Omega Vectra Zafira Others Articles
Zafira A (1999-2005, petrol)
  • Main
  • Zafira
  • Zafira A
  • Transmission
  • Mechanical gearbox
  • Gearshift Drive — Removal, Repair and Installation

Gearshift Drive — Removal, Repair and Installation (Opel Zafira A)

            0

Contents: Removal ⬇ Repair ⬇ Installation ⬇
The operation must be performed during the removal of the gearbox, as well as if there is a need to replace the plastic bushings of the drive mechanism when they are worn out.

To perform the work you will need a snap ring plier (for drive repair).

Removal


1. Prepare the car for work (see "Preparing the car for maintenance and repair").

2. Shift into neutral.

3. Mark the relative position of the traction and the gear shift mechanism drive (if replacement of the drive lever is not planned) and using a TORX T50 key, unscrew the clamp tightening bolt.
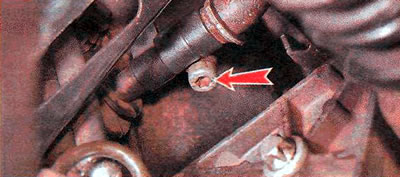
3. Mark the relative position of the traction and the gear shift mechanism drive (if replacement of…


4. Disconnect the rod from the drive.

5. Remove the spring clamp of the gear shift mechanism axle.
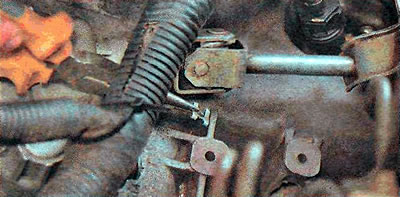
5. Remove the spring clamp of the gear shift mechanism axle.


6. Remove the gear shift mechanism axle.
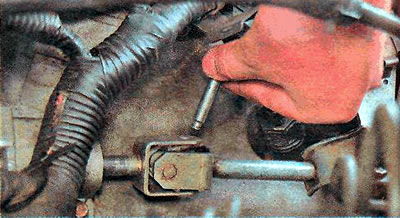


6. Remove the gear shift mechanism axle.


7. Disconnect the drive from the gear shift mechanism.
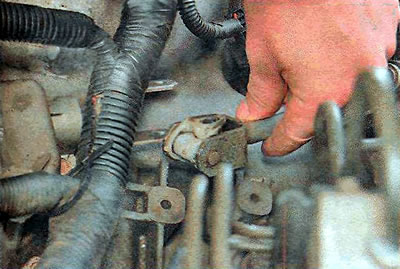
7. Disconnect the drive from the gear shift mechanism.


8. Using a slotted screwdriver, remove the retainer of the right fastening of the gear shift mechanism drive bracket.
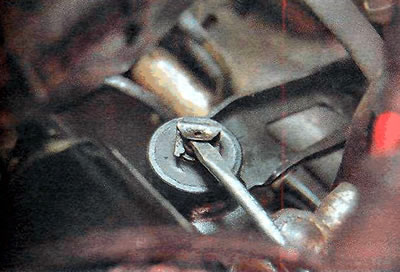
8. Using a slotted screwdriver, remove the retainer of the right fastening of the gear shift…


9. Remove the left mount retainer in the same way.
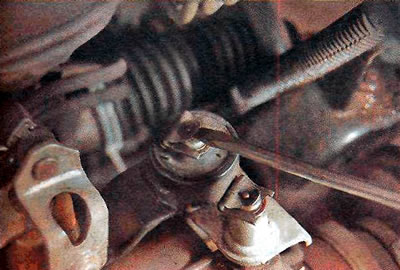
9. Remove the left mount retainer in the same way.


10. Remove the gear shift drive assembly with the bracket.


Repair


Further operations are necessary to repair the gearshift drive. In this case, perform only those operations that are necessary to replace worn or damaged elements directly in your case. The malfunction of the elements is determined by the presence of mechanical damage and the presence of play in the connections of the gearshift drive levers.

1. To replace the gearshift drive rod, use a screwdriver to pry open the lock...
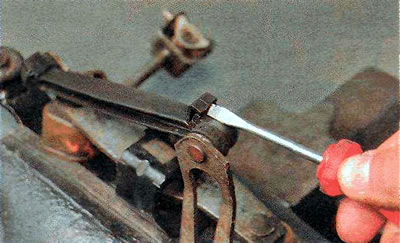
1. To replace the gearshift drive rod, use a screwdriver to pry open the lock...


...and disconnect the rod from the ball joint.
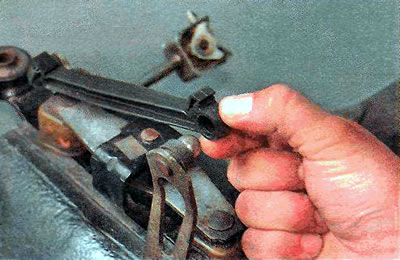
...and disconnect the rod from the ball joint.


2. Disconnect the second end of the rod in the same way.
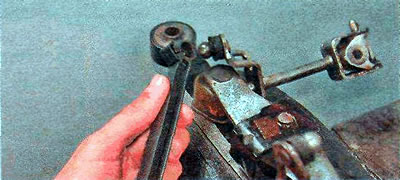
2. Disconnect the second end of the rod in the same way.


3. If necessary, remove the rod sealing rings.


4. To replace the bushings of the drive rod levers and gear shift mechanism, use a puller to loosen and remove the retaining ring.
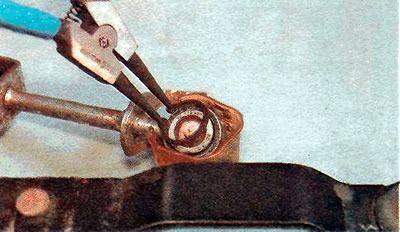
4. To replace the bushings of the drive rod levers and gear shift mechanism, use a puller to loosen…


5. Remove the drive rod lever (we remove the gear shift lever in the same way).
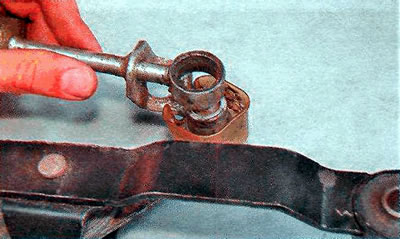
5. Remove the drive rod lever (we remove the gear shift lever in the same way).


6. Remove the plastic sleeve.
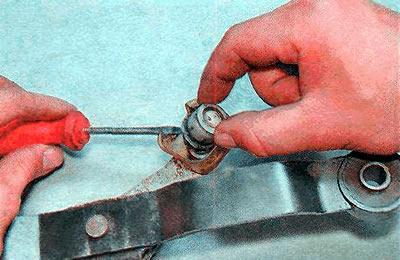
6. Remove the plastic sleeve.


7. If necessary, remove the sealing ring.
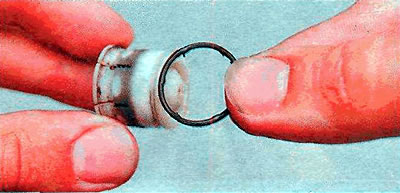
7. If necessary, remove the sealing ring.


8. If necessary, remove the protective element of the lever bushing.
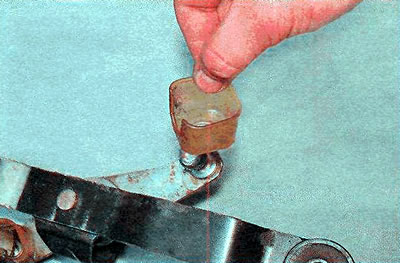


8. If necessary, remove the protective element of the lever bushing.


9. To replace the intermediate lever bushing, use a file to grind down the flared part...
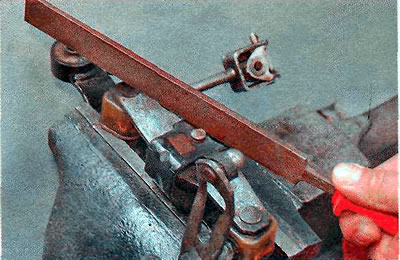
9. To replace the intermediate lever bushing, use a file to grind down the flared part...


...and knock the axle out of the bracket.
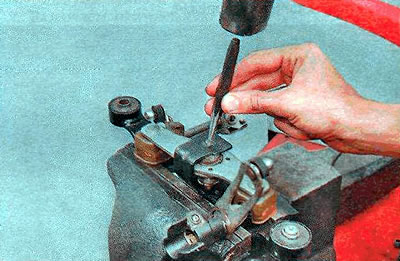
...and knock the axle out of the bracket.


10. Remove the gear shift mechanism drive from the bracket.
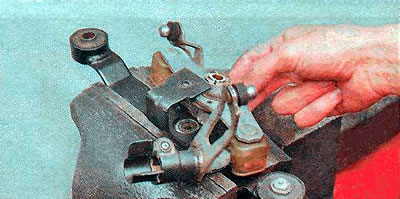
10. Remove the gear shift mechanism drive from the bracket.


11. Pulling up...
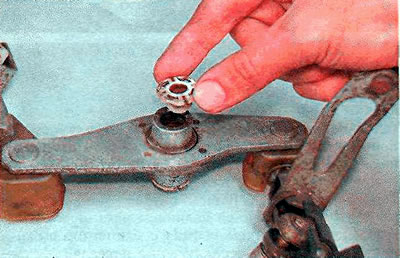


11. Pulling up...


...we remove the intermediate lever bushings.
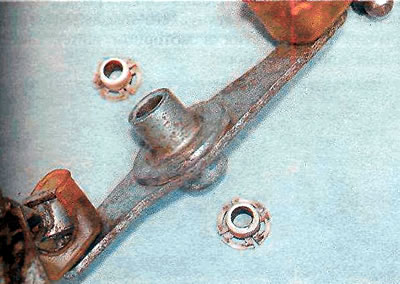
...we remove the intermediate lever bushings.


12. Assemble in reverse order. Apply white lithium grease to the hinge joints.
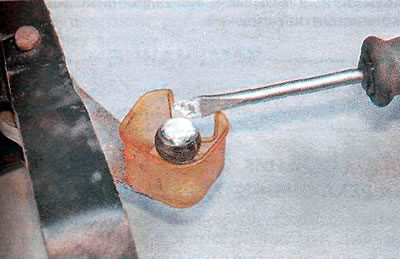
12. Assemble in reverse order. Apply white lithium grease to the hinge joints.


Installation


We install the parts in the reverse order. When connecting the rod and the gearshift mechanism drive, we align the marks made during removal and tighten the clamp. If parts were replaced, it is necessary to adjust the gearshift mechanism drive lever (see below, "Gearshift mechanism drive lever - replacement and adjustment").


This article is available at russian, bulgarian, belarusian, ukrainian, serbian, croatian, romanian, polish, slovak, hungarian
Checking the article: Chernov Alexander

Share information:

Previous articles
Opel Zafira A: Mechanical gearbox
Next articles

Gearbox — Checking the level and changing the oil
Manual gearbox — technical condition check
Manual transmission — reference data
Gearshift mechanism drive lever — replacement and adjustment
Gearshift Rod Seal — Replacement
Front Wheel Drive Seals — Replacement
Gearbox — removal and installation
Gearbox primary shaft seal — replacement


See similar ones from other Opel car manuals:
▶ Drive shaft repair — general information Opel Astra F (1991-1998, petrol)
▶ Introduction to the Operation and Repair Manual Opel Corsa B (1993-2000)
▶ Introduction to the operation and repair manual Insignia A Opel Insignia A (2008-2017)
▶ General requirements for car repair Opel Kadett E (1984-1995)
▶ Checking the condition of the auxiliary drive belt — every… Opel Omega A (1986-1993)
Link to this page in different formats

Visitor comments


No comments yet


How much will 50 + 36 =


Zafira A (1999-2005, petrol) 
  • General information
  • Governing bodies
  • User manual
  • Maintenance
  • Power unit
  • Engine repair
  • Control system
  • Cooling system
  • Exhaust system
  • Transmission
  • Clutch
  • Mechanical gearbox
  • Automatic gearbox
  • Front wheel drives
  • Chassis
  • Hubs, wheels and tires
  • Front suspension
  • Rear suspension
  • Steering
  • Brake system
  • Body
  • Maintenance and care
  • Exterior
  • Side doors
  • Climate control
  • Electrical equipment
  • Equipment and devices
  • Power devices
  • Lighting and signaling
  • Windshield wipers and washers
  • Electrical circuits
OpelBook.ru © 2017–2026 · Mobile version · · Sitemap: EN BG BY UA RS HR RO PL SK HU · Feedback · Site search
Astra F, petrol · Astra G, petrol · Astra G · Astra H · Astra J, petrol · Corsa B · Corsa C, petrol · Corsa C · Insignia A · Kadett D · Kadett E · Omega A · Omega B · Omega B2 · Vectra A, petrol · Vectra A · Vectra B, petrol · Vectra B · Vectra C · Zafira A, petrol · Frontera A, petrol · Frontera B · Ascona C · Vivaro A ·
We want your visit to be comfortable 🤝! We use cookies 🍪 to make that happen.