
Removing
Do the work as indicated in the first 17 points previous section.
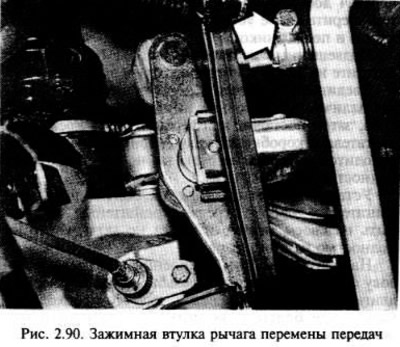
When working in the engine compartment, make marks to center the shift bar and clamping sleeve. Loosen the bolt, disconnect the shift fork shaft from the clamping sleeve.
Remove the clip, then pull the clutch cable away from the release lever, pushing the lever back if necessary to disengage the cable. Pull the cable holder out of the bracket, move the cable to the side.
Disconnect wiring from reversing light switch (front of gearbox housing).
Unscrew the clamping sleeve and disconnect the speedometer cable from the gearbox.
Unscrew the nut, disconnect the flat wire "masses" from the gearbox cover.
Make sure all proper pipes, hoses, wiring are disconnected
Raise the front of the car with a jack, supporting it securely; Remove the crankshaft pulley and then the front section of the exhaust line as instructed in the previous section.
Disconnect the ends of the drive shafts from the differential (chapter 8) This may leak oil, so plug the holes in the differential. Hang the shafts on a wire or rope - do not let them sag under their own weight.
After connecting the rigging to the brackets on the cylinder head, hang the engine.
Remove the engine/gearbox mounting by unscrewing the two rubber gasket bolts on the vehicle body and the three bracket bolts at the gearbox.
Working under the vehicle, remove the two rear engine/gearbox mounting nuts to the front subframe and the three bracket bolts at the transaxle, then remove the bracket itself.
Carefully rotate the engine/gearbox assembly in the engine compartment so that it can be lifted with a hoist.
After removing the engine/gearbox assembly from the vehicle, support it with wooden blocks on a workbench or, if not, on a clean workshop floor.
Remove dirt from the surface of the assembly using kerosene or a water-based solvent and a stiff brush.
Turn away bolts and remove the cone-shaped case of a transmission.
After making sure that the engine and gearbox are securely fastened, unscrew the bolts connecting the engine and gearbox, noting the position of the brackets.
Carefully separate the gearbox from the engine, making sure that the mass of the gearbox does not hang on the drive shaft in engagement with the clutch friction plate. Do not forget that the gearbox is fixed on the pins in the cylinder block.
Installation
Before starting the installation of the assembly, make sure that the two bolts of the rubber mounts of the engine with the gearbox to the car body rotate freely in the threaded holes of the body. If necessary, cut the thread with a M10x1.25 mm tap.
On engines where the clutch can be removed and installed without removing the engine and transmission from the vehicle, it will be easier to install the removed clutch after the engine/transmission assembly is installed on the vehicle.
Carefully drive the gearbox towards the engine until the tapered housing rests on the cylinder block pins, then install the engine-to-gearbox bolts and tighten them to the specified torque.
If the clutch is in place, install the transmission cone housing cover.
With the front of the vehicle raised and secured to the stands under the axle, hang the engine/gearbox assembly with a hoist, then lower it gently into place in the engine compartment.
Working under the vehicle, fit the engine/gearbox support to the gearbox. Install new lock washers under the bolt heads and tighten the bolts to the correct torque.
Install the two engine/gearbox rear mounting bolts to the front subframe, but do not fully tighten them at this stage.
Install the gearbox bracket and tighten the bolts to the specified torque.
Install new gearbox support bolts and tighten to specified torque.
If required, the clutch can be installed and/or the transmission drive shaft can be engaged with the splined bushing of the clutch friction disc as indicated in chapter 6.
Connect the inner ends of the drive shafts to the differential (see points in chapter 8). Use new snap rings.
Install the front section of the exhaust system as directed in chapter 4.
Install the crankshaft pulley.
Connect the connection flat wire to "mass" gearbox and tighten the nut.
Lower the car.
Connect the speedometer cable to the transmission and tighten the clamping sleeve.
Connect the wiring harness to the reversing lamp switch.
Connect the clutch cable to the bracket on the transaxle housing, then the clutch cable to the clutch release lever and adjust as indicated in chapter 6.
Connect the shift fork shaft to the clamping sleeve so that the marks made before disassembly match, and tighten the bolt.
Proceed as described in the previous section "Engine - removal and installation" from point "Install all pipes, wiring and hoses" to the end of the section.
Top up the oil level in the gearbox as indicated in chapter 1.
Visitor comments