
OpelBook.ru
Cars AvtoVAZ Cars Mitsubishi Cars BMW Cars Mercedes Cars Nissan Cars Toyota Cars Chevrolet
English Русский
Български
Беларускі
Український
Српски
Hrvatski
Română
Polski
Slovenský
Magyar
 |  Sitemap  |  Contacts  |    


Main Astra Corsa Insignia Kadett Omega Vectra Zafira Others Articles
Vectra A (1988-1995, petrol) Vectra A (1988-1995) Vectra B (1995-2002, petrol) Vectra B (1995-2002) Vectra C (2002-2008)
  • Main
  • Vectra
  • Vectra A
  • Transmission
  • Clutch
  • Release bearing and lever — removal and installation

Release bearing and lever — removal and installation (Opel Vectra A)

            0

Contents: Removal ⬇ Installation ⬇
Note: If the release bearing guide sleeve is removed, a new O-ring must be used during installation.


Removal


1. Access to the release bearing can be gained either by removing the clutch assembly as described in Chapter 5 (engine and transmission in the engine compartment), or by separating the engine from the transmission (the clutch assembly remains in place).

2. Loosen the clamp bolt securing the clutch release fork to the release lever pivot shaft.

3. If not already done, disconnect the clutch cable from the release lever by removing the clip from the threaded end rod and pulling the rod out of the lever.

4. Remove the release bearing from the guide sleeve, then remove the release lever pivot shaft from the clutch housing and remove the clutch release fork (see illustrations). If applicable, remove the bearing from the plastic ring.
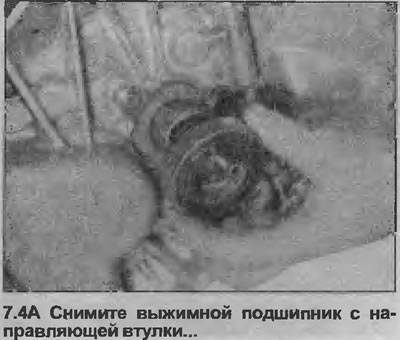
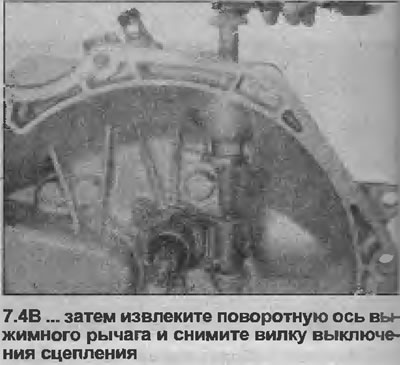
4. Remove the release bearing from the guide sleeve, then remove the release lever pivot shaft from…


4. Remove the release bearing from the guide sleeve, then remove the release lever pivot shaft from…


5. Make sure the release bearing rotates smoothly.


While holding the outer ring of the bearing, try to move its inner ring in a horizontal plane.

If the bearing rotates unevenly or its rings are significantly displaced relative to each other, replace it.

The release bearing also needs to be replaced if a new clutch is installed.

6. If necessary, remove the release bearing guide sleeve by unscrewing the three mounting bolts. The input shaft oil seal can now be replaced. Remove the O-ring installed between the guide sleeve and the clutch housing. Remove the old oil seal from the guide sleeve using a screwdriver as a lever and install a new oil seal using a tubular drift or socket. Fill the space between the sealing lips of the oil seal with lithium grease, then install the guide sleeve using a new O-ring. The O-ring must be installed without grease (see illustrations).
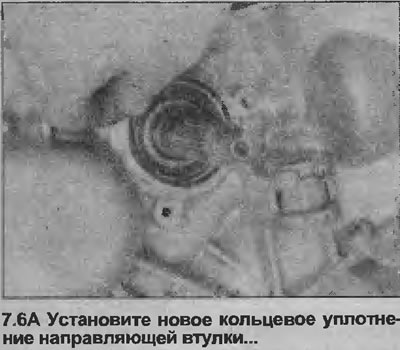
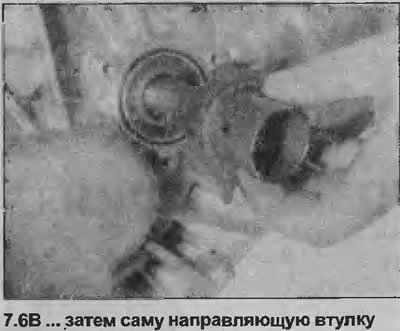
6. If necessary, remove the release bearing guide sleeve by unscrewing the three mounting bolts.…


6. If necessary, remove the release bearing guide sleeve by unscrewing the three mounting bolts.…


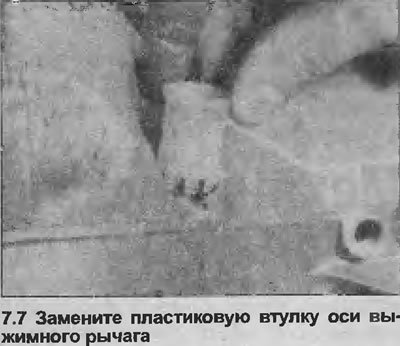
7. If necessary, replace the plastic bushings that support the release lever pivot pin by knocking them out of the clutch housing with a drift. Insert the new bushings into place, making sure that their locking tabs fit into the corresponding grooves in the clutch housing (see illustration).


Installation


Installation


8. Installation of the release bearing and lever is carried out in the reverse order, paying attention to the following.

9. Lightly coat the inner surface of the release lever pivot bushings and the outer surface of the release bearing guide bushing with molybdenum grease.

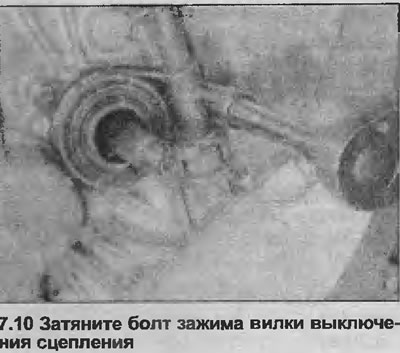
10. Where applicable, install the release bearing into the plastic ring, then install the release bearing together with the release fork and tighten the release fork clamp bolt to the torque specified in Specifications (see illustration).
10. Where applicable, install the release bearing into the plastic ring, then install the release…


11. Install the clutch assembly as described in Chapter 5 or reconnect the engine and transmission as described in Sections 2A, 2B or 7A (depending on the model).

12. Finally, check the clutch cable adjustment as described in Chapter 3.


This article is available at russian, bulgarian, belarusian, ukrainian, serbian, croatian, romanian, polish, slovak, hungarian
Checking the article: Chernov Alexander

Share information:

Previous articles
Opel Vectra A: Clutch
Next articles

Clutch (transmission removed) — removal and installation
Clutch (engine and transmission are located in the engine compartment) — removal, inspection and installation
Clutch pedal — removal and installation
Clutch cable — adjustment
Clutch cable — removal and installation
General description of the clutch
Troubleshooting Clutch Problems


See similar ones from other Opel car manuals:
▶ Replacing the release bearing and clutch release lever Opel Kadett D (1979-1984)
▶ Release bearing and lever — removal and installation Opel Omega A (1986-1993)
▶ Release bearing, clutch release lever, bushings and seal —… Opel Ascona C (1981-1988)
▶ Clutch release bearing — removal, inspection and… Opel Astra F (1991-1998, petrol)
▶ Removal, checking and installation the clutch release… Opel Corsa B (1993-2000)
Link to this page in different formats

Visitor comments


No comments yet


How much will 28 + 24 =


Vectra C (2002-2008) 
  • General information
  • User manual
  • Vehicle device
  • Maintenance
  • Troubleshooting
  • Power unit
  • Engine repair
  • Cooling system
  • Power and control system
  • Engine electrics
  • Transmission
  • Clutch
  • Car gearbox
  • Drive shafts
  • Chassis
  • Car suspension
  • Steering
  • Brake system
  • Body
  • Exterior
  • Interior
  • Doors, locks and windows
  • Heating and ventilation
  • Electrical equipment
  • Equipment and devices
  • Headlights and lighting
  • Electrical circuits
Vectra B (1995-2002) 
  • General information
  • User manual
  • Weekly checks
  • Maintenance (gasoline)
  • Maintenance (diesel)
  • Troubleshooting
  • Power unit
  • SOHC gasoline engine
  • DOHC petrol engine
  • Diesel engine 1.7 liter
  • Diesel engine 2.0 liters
  • Engine repair
  • Cooling system
  • Fuel system (gasoline)
  • Fuel system (diesel)
  • Charging system
  • Launch system
  • Ignition and preheat
  • Transmission
  • Clutch
  • Mechanical gearbox
  • Automatic gearbox
  • Drive shafts
  • Chassis
  • Brake system
  • Wheel suspension
  • Steering
  • Body
  • Exterior
  • Interior
  • Doors and windows
  • Heating and ventilation
  • Electrical equipment
  • Equipment and devices
  • Electrical circuits
Vectra B (1995-2002, petrol) 
  • General information
  • Maintenance
  • Help with malfunctions
  • Power unit
  • Engine repair
  • Exhaust system
  • Cooling system
  • Fuel system
  • Multec injection system
  • Four point injection
  • Transmission
  • Clutch
  • Gearbox and drive
  • Chassis
  • Wheel suspension
  • Steering
  • Brake system
  • Wheels and tires
  • Body
  • Exterior
  • Interior
  • Electrical equipment
  • Fuses and electronics
  • Power devices
  • Ignition system
  • Lighting and signaling
  • Equipment and devices
  • Heating and ventilation
  • Electrical circuits
Vectra A (1988-1995) 
  • Power unit
  • Engine repair
  • Ignition system
  • Lubrication system
  • Cooling system
  • Injection system
  • Fuel system (carburetor)
  • Fuel system (diesel)
  • Exhaust system
  • Transmission
  • Clutch
  • Car gearbox
  • Chassis
  • Front suspension
  • Rear suspension
  • Steering
  • Brake system
  • Wheels and tires
  • Body
  • Exterior
  • Interior
  • Electrical equipment
  • Electrical circuits
Vectra A (1988-1995, petrol) 
  • General information
  • User manual
  • Maintenance
  • Power unit
  • SOHC engine
  • DOHC engine
  • Cooling and ventilation
  • Fuel system (carburetor)
  • Fuel system (injector)
  • Exhaust converter
  • Transmission
  • Clutch
  • Mechanical gearbox
  • Automatic gearbox
  • Drive shafts
  • Chassis
  • Brake system
  • Car suspension
  • Steering
  • Body
  • Body elements
  • Electrical equipment
  • Power devices
  • Equipment and devices
  • Electrical circuits
OpelBook.ru © 2017–2026 · Mobile version · · Sitemap: EN BG BY UA RS HR RO PL SK HU · Feedback · Site search
Astra F, petrol · Astra G, petrol · Astra G · Astra H · Astra J, petrol · Corsa B · Corsa C, petrol · Corsa C · Insignia A · Kadett D · Kadett E · Omega A · Omega B · Omega B2 · Vectra A, petrol · Vectra A · Vectra B, petrol · Vectra B · Vectra C · Zafira A, petrol · Frontera A, petrol · Frontera B · Ascona C · Vivaro A ·
We want your visit to be comfortable 🤝! We use cookies 🍪 to make that happen.