
Removing
1. Working in the engine compartment, measure the length of the cable protruding from the plastic tip (at the release lever) cutting rod.
This will restore proper cable adjustment during installation.
2. Remove the clip from the threaded rod, then remove the rod from the release lever (see illustration).
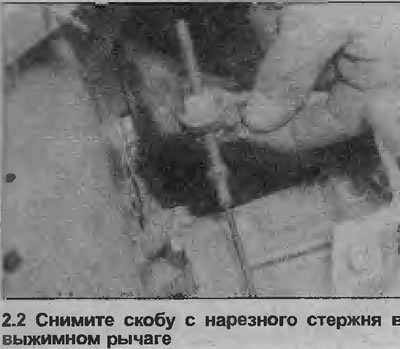
Slide the lever towards the engine and, if necessary, loosen the cable adjuster to facilitate removal.
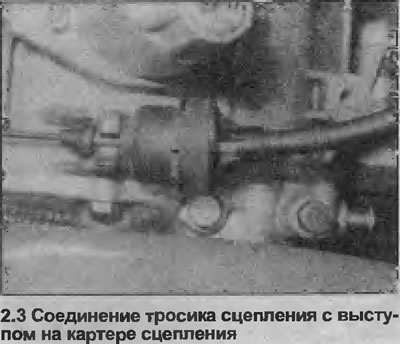
3. Remove the cable end assembly from the protrusion on the clutch housing (see illustration).
4. Working inside, remove the driver's footwell lower trim panel, then disconnect the return spring from the clutch pedal and unfasten the end of the cable from the pedal. Note that the end of the recoil spring secures the end of the cable to the pedal. To improve access, remove the clutch pedal as described in Chapter 4.
5. Remove the cable assembly into the engine compartment by pulling the cable through the baffle. Do not damage the baffle O-ring.
Installation
6. Install in reverse order. Install the threaded rod so that the length of its protruding end is equal to that marked before removal, then adjust the length of the cable as described in Chapter 3.
7. Make sure the baffle O-ring is installed correctly.
Visitor comments