


Remove the cylinder head cover.
Remove the oil filler cap, the cap from the engine cooling system expansion tank and take out the engine oil level indicator.
Using the pulley mounting bolt, turn the engine crankshaft in the direction of operating rotation until the camshaft cams (1) on the cylinder being checked are pointing upward.
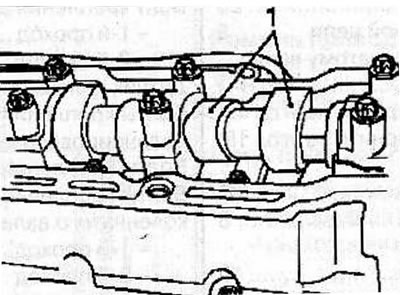
Warning: Do not turn the crankshaft when checking the pressure reduction in each cylinder. To avoid this, engage 1st gear and apply the parking brake.
Install the KM-533-1 adapter into the glow plug hole of the cylinder being tested.
Connect the KM-928 Pressure Reduction Tester to the compressed air source and calibrate it.
Connect the pressure drop tester to the adapter connecting hose.
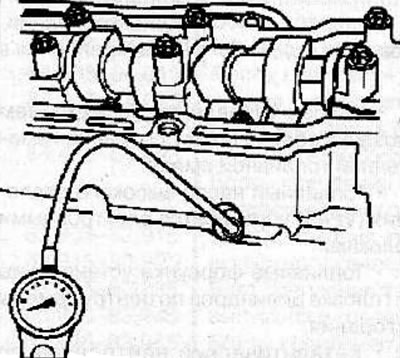
Apply compressed air to the cylinder being tested.
Read the percentage of air pressure loss in the engine cylinder on the tester scale, listening for any possible compressed air leaks from the intake manifold, exhaust manifold, crankcase and glow plug holes, and making sure there are no air bubbles in the coolant expansion tank.
The maximum permissible pressure difference between engine cylinders must not exceed 10%.
The reduction in maximum pressure of one cylinder should not exceed 25%.
The article was published on the website [Opelbook.ru]
Similarly, check the tightness of the remaining cylinders by setting the piston of the cylinder being checked to TDC in the compression stroke.
Remove the KM-928 device to check for pressure reduction.
Install the oil filler cap, the engine coolant expansion tank cap and the engine oil level indicator.
Screw in the glow plugs (see the relevant chapter).
Install the cylinder head cover.
Visitor comments