OpelBook.ru
Cars AvtoVAZ Cars Mitsubishi Cars BMW Cars Mercedes Cars Nissan Cars Toyota Cars Chevrolet
English Русский
Български
Беларускі
Український
Српски
Hrvatski
Română
Polski
Slovenský
Magyar
 |  Sitemap  |  Contacts  |    


Main Astra Corsa Insignia Kadett Omega Vectra Zafira Others Articles
Frontera A (1991-1998, petrol) Frontera B (1998-2004) Ascona C (1981-1988) Vivaro A (2001-2014)
  • Main
  • Opel
  • Frontera B
  • Electrical equipment
  • Power devices
  • Repair of engine starter 6VD1-W

Repair of engine starter 6VD1-W (Opel Frontera B)

            0

Contents: Disassembly ⬇ Assembly ⬇

Disassembly


Disconnect the cable from the negative battery terminal.

Remove the starter from the engine (see the relevant chapter).

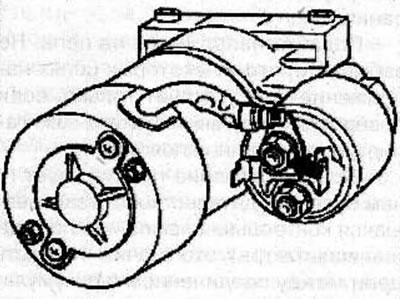
Unscrew the nut (arrow) and disconnect the wire going to the starter motor from contact M of the traction relay.
Unscrew the nut (arrow) and disconnect the wire going to the starter motor from contact M of the…


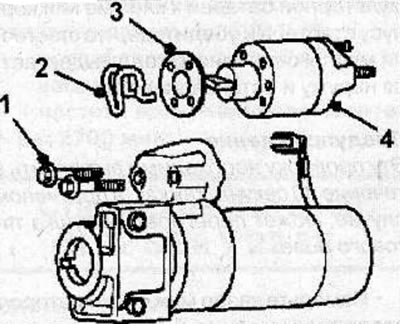
Remove 2 bolts (1) and remove the starter solenoid relay (4).

(Text copied from an internet website: OpelBook.ru)
Remove 2 bolts (1) and remove the starter solenoid relay (4).


Remove the protective plate (3) and return spring (2).

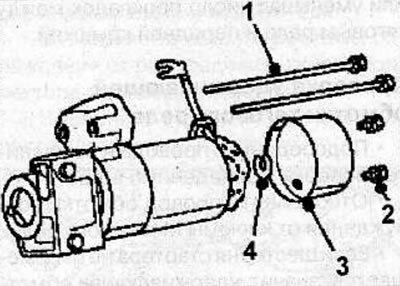
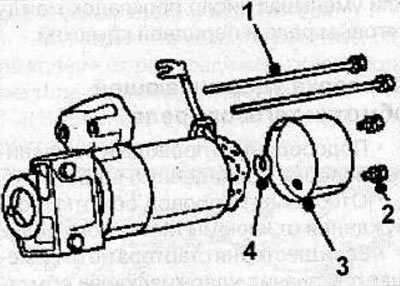
Remove 2 screws (2), remove the rear cover (3), then remove 2 clamp bolts (1) and remove the thrust washer (4).
Remove 2 screws (2), remove the rear cover (3), then remove 2 clamp bolts (1) and remove the thrust…


Move the brushes (1) away from the commutator and remove the brush holder (2).
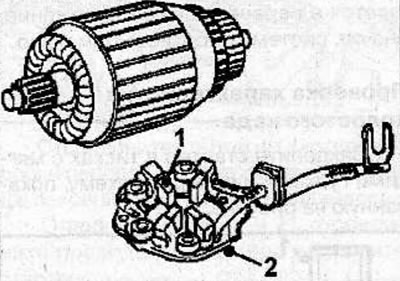


Move the brushes (1) away from the commutator and remove the brush holder (2).


Remove the stator (2) and rotor (3). Be careful when removing the stator, as its core has a strong magnetic field.
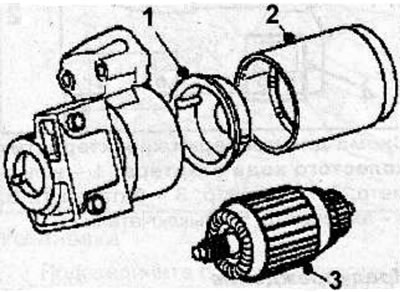
Remove the stator (2) and rotor (3). Be careful when removing the stator, as its core has a strong…


Remove the central lock (1).

Warning: Do not place any metal objects near the rotor and stator.


Remove the rubber cushion (2), return lever (1), center plate (3) and freewheel clutch (4) with drive gear.
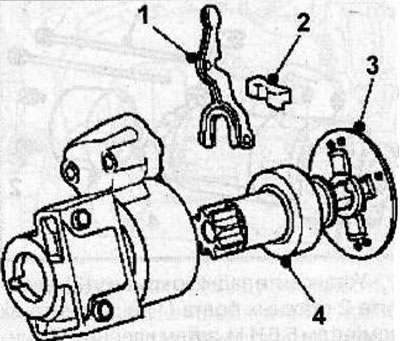
Remove the rubber cushion (2), return lever (1), center plate (3) and freewheel clutch (4) with…


Remove the ball bearing (2) and bearing cap (3) from the starter front cover (1).
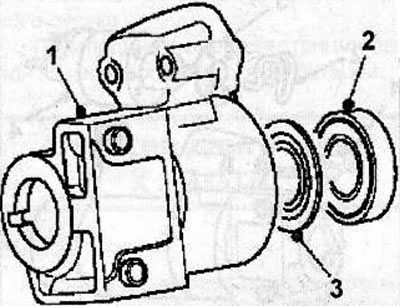


Remove the ball bearing (2) and bearing cap (3) from the starter front cover (1).


Remove the gear wheel (1) and satellites (2) of the planetary gear.
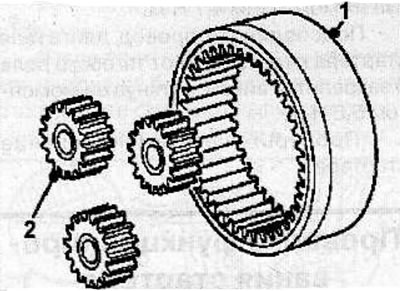
Remove the gear wheel (1) and satellites (2) of the planetary gear.


Remove the E-ring (arrow) from the pinion shaft.
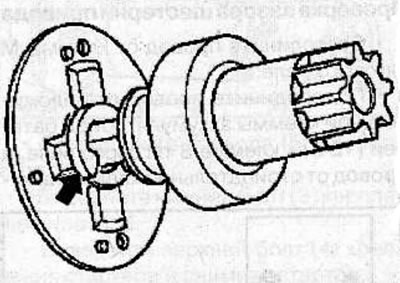
Remove the E-ring (arrow) from the pinion shaft.


While holding the pinion shaft, press the pinion toward the center plate, then turn the pinion clockwise or counterclockwise one tooth and remove the pinion.

Remove the thrust washer (1), center plate and pinion shaft.
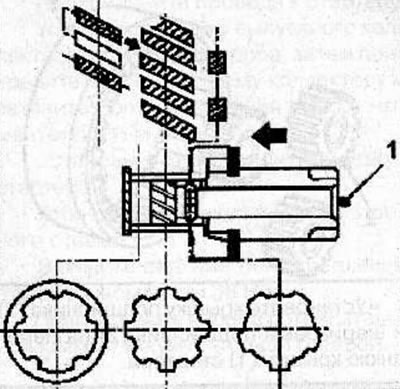


Remove the thrust washer (1), center plate and pinion shaft.


Assembly


Before assembling the starter, lubricate the following parts:
  • The bushing in the rear cover of the starter and the central plate;
  • Planetary gears:
  • Working ends of the return lever fork;
  • All sliding surfaces of the gear;
  • Traction relay plunger.

Install the pinion shaft, center plate and thrust washer (1).
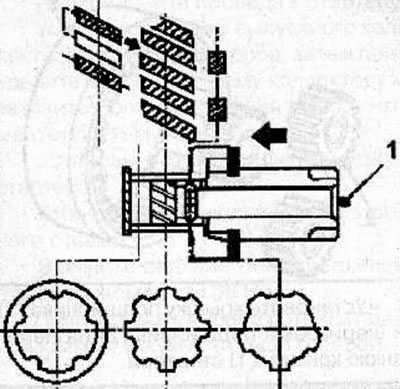
Install the pinion shaft, center plate and thrust washer (1).


Install the gear on the pinion shaft, press the gear to align the teeth, turn the gear clockwise or counterclockwise one tooth and then release the gear.

Install the E-ring (arrow) onto the pinion shaft.
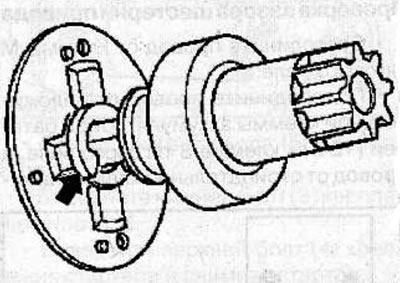
Install the E-ring (arrow) onto the pinion shaft.


Install the satellites (2) and the toothed wheel (1) of the planetary gear.
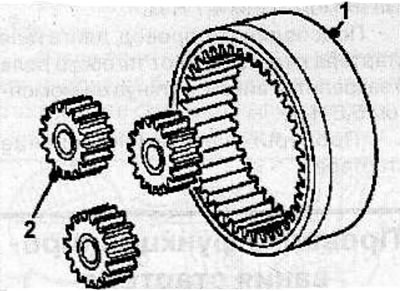


Install the satellites (2) and the toothed wheel (1) of the planetary gear.


Install the bearing cover (3) and ball bearing (2) onto the starter front cover (1).
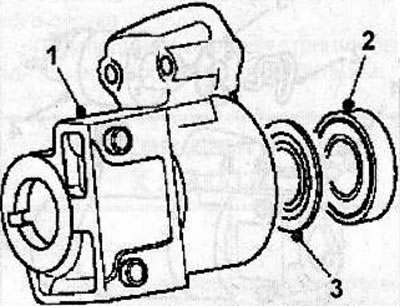
Install the bearing cover (3) and ball bearing (2) onto the starter front cover (1).


Install the freewheel clutch (4) with the drive gear, the center plate (3), the return lever (1) and the rubber cushion (2).
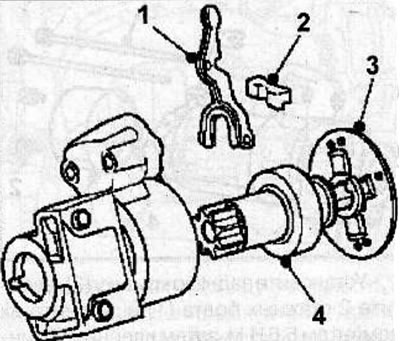
Install the freewheel clutch (4) with the drive gear, the center plate (3), the return lever (1)…


Install the center retainer (1), stator (2) and rotor (3).

Before installing the rotor, make sure that no metal objects are attracted to the rotor by its magnetic field.


Remove the brushes (1) and install the brush holder (2). Lower the brushes and make sure they are pressed against the commutator.
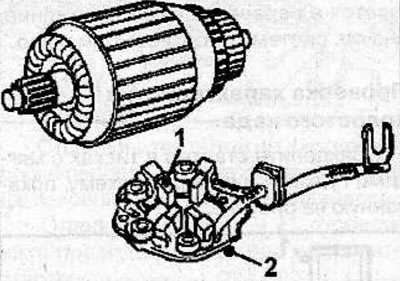
Remove the brushes (1) and install the brush holder (2). Lower the brushes and make sure they are…


Install the thrust washer (4).

Install the thrust washer (4).


Install the rear cover (Z), screw in the 2 clamp bolts (1) and tighten them to a torque of 5.6 N·m, then screw in the 2 screws (2) and tighten them to a torque of 1.9 N·m.

Install the return spring (2) and the protective plate (3).
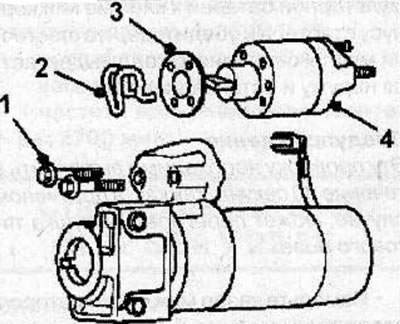
Install the return spring (2) and the protective plate (3).


Install the starter solenoid (4) and secure with 2 bolts (1), tightening them to a torque of 4.7 Nm.


Connect the starter motor wire to contact M from the traction relay and secure with a nut, tightening it to a torque of 5.6 N·m.

Check the operation of the starter.


This article is available at russian, bulgarian, belarusian, ukrainian, serbian, croatian, romanian, polish, slovak, hungarian
Checking the article: Chernov Alexander

Share information:

Previous articles
Opel Frontera B: Power devices
Next articles

Engine starter 6VD1-W
Launch system
Detecting a fault in an electrical system
General information
Technical data
Checking the operation of the 6VD1-W engine starter
Starter for engines X 22 SE and Y 22 SE
Engine starter X 22 DTH
Rechargeable battery
Checking the battery
Charging the battery


See similar ones from other Opel car manuals:
▶ Engine Repair — Assembly Sequence Opel Astra F (1991-1998, petrol)
▶ Alternative options for engine repair schemes Opel Corsa B (1993-2000)
▶ Removal, installation and repair of rear wheel hubs on… Opel Kadett E (1984-1995)
▶ Engine — preparation for first start after major repair Opel Omega A (1986-1993)
▶ Does the starter turn the engine? Opel Vectra B (1995-2002, petrol)
Link to this page in different formats

Visitor comments


No comments yet


How much will 12 + 32 =


Vivaro A (2001-2014) 
  • General information
  • User manual
  • Power unit
  • Petrol engine F4R
  • Diesel engine F9Q
  • Diesel engine G9U
  • Transmission
  • Clutch and drive shafts
  • Manual gearbox
  • Chassis
  • Front suspension
  • Rear suspension
  • Brake system
  • Body
  • Exterior
  • Interior
  • Electrical equipment
  • Heating and ventilation
  • Air conditioner
  • Equipment and devices
  • Electrical diagrams
Ascona C (1981-1988) 
  • General information
  • Maintenance
  • Power unit
  • Gasoline engines
  • Diesel engines
  • Cooling system
  • Fuel and exhaust system
  • Contact ignition system
  • Contactless ignition system
  • Transmission
  • Clutch
  • Mechanical gearbox
  • Automatic gearbox
  • Drive shafts
  • Chassis
  • Steering
  • Brake system
  • Car suspension
  • Body
  • Exterior
  • Interior
  • Doors and windows
  • Electrical equipment
  • Equipment and devices
  • Power devices
  • Electrical circuits
Frontera B (1998-2004) 
  • General information
  • User manual
  • Maintenance
  • Power unit
  • Petrol engines 2.2 l
  • Petrol engines 3.2 l
  • Diesel engines 2.2 l
  • Cooling system
  • Fuel system (petrol)
  • Fuel system (diesel)
  • Ignition system
  • Transmission
  • Clutch
  • Manual gearbox MUA5C
  • Automatic gearbox 4L30E
  • Chassis
  • Suspension and axles
  • Steering
  • Brake system
  • Body
  • Exterior
  • Interior
  • Doors, locks and windows
  • Heating and air conditioning
  • Electrical equipment
  • Power devices
  • Equipment and devices
  • Lighting and signaling
  • Electrical diagrams
Frontera A (1991-1998, petrol) 
  • General information
  • Introduction to guide
  • User manual
  • Maintenance
  • Power unit
  • Engine repair
  • Lubrication system
  • Cooling system
  • Power and exhaust system
  • Engine electrics
  • Transmission
  • Clutch
  • Mechanical gearbox
  • Cardan shafts
  • Chassis
  • Brake system
  • Front suspension
  • Rear suspension
  • Steering
  • Body
  • Repair and care
  • Electrical equipment
  • Equipment and devices
  • Electrical circuits
OpelBook.ru © 2017–2026 · Mobile version · · Sitemap: EN BG BY UA RS HR RO PL SK HU · Feedback · Site search
Astra F, petrol · Astra G, petrol · Astra G · Astra H · Astra J, petrol · Corsa B · Corsa C, petrol · Corsa C · Insignia A · Kadett D · Kadett E · Omega A · Omega B · Omega B2 · Vectra A, petrol · Vectra A · Vectra B, petrol · Vectra B · Vectra C · Zafira A, petrol · Frontera A, petrol · Frontera B · Ascona C · Vivaro A ·
We want your visit to be comfortable 🤝! We use cookies 🍪 to make that happen.