
Brake pads must be replaced as a set on both wheels. The pads on one side only must not be replaced if, for example, the pads on the other side are in good condition. The result of such a replacement may be uneven braking.
Brake pad material may contain asbestos which is harmful to human health. Currently, manufacturers are replacing asbestos-containing materials with other, less harmful ones. However, the owner may not know what material the pads of his car are made of. Therefore, do not blow off brake dust with compressed air. Do not inhale brake dust. Do not use gasoline-based fluids to clean parts of the brake system - they can lead to swelling of the rubber parts of the system. For this purpose, alcohol or special liquids must be used.
Brake pads are removed as follows:
1. Check the fluid level in the brake master cylinder reservoir. If the level is higher than the set level, the liquid must be sucked off to exclude the possibility of its transfusion.
2. Unscrew the bolt from the bottom of the cylinder as shown and remove it from the inside.
3. Tilt the cylinder body up.
4. Remove both brake pads on the sides of the brake disc. This releases the washers and latches from the bottom and top.
5. Wire the caliper in the raised position.
6. Blow out with compressed air or wipe the guide planes and mating surfaces in the housing with a rag. Do not use mineral solvents or tools with sharp edges.
7. Check up reliability of a protective cap and a lock ring in a support. Replace damaged caps.
When purchasing a repair kit for brake pads, you need to find out if they match the brake booster in terms of brake pad material. Therefore, when ordering pads, you must specify the chassis number and year of manufacture of the vehicle.
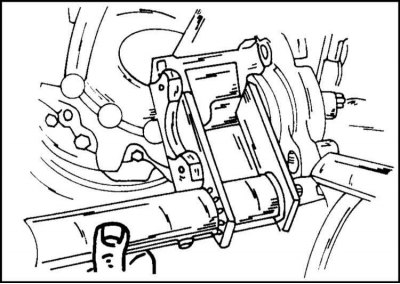
1. When installing the brake pads, push the wheel cylinder piston into the hole as shown. In this case, it is necessary to monitor the level of brake fluid in the reservoir.
2. Install the washers and latches on the bracket.
3. Put on the brake pads on the right and left.
4. The wear indicator on the underside of the pads must face inwards.
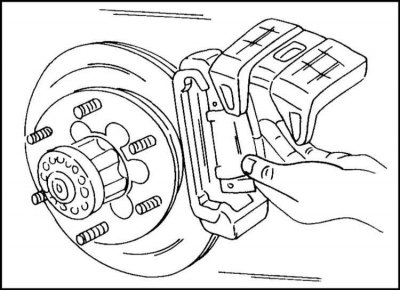
5. Lower the bracket as shown.
6. Insert guide pin from below and secure.
7. Depending on the year of manufacture, there are design differences:
On vehicles up to mid-1995, the tightening torque for the guide pins is 32 Nm.
On later vehicles, the tightening torque is 74 Nm.
8. Pour fluid into the brake master cylinder reservoir to the correct level.
9. Depress the brake pedal several times to bring the pads into contact with the brake disc.
It takes some time for the brake pads to break in. It is recommended during this time not to press the pedal sharply when braking.
Visitor comments