
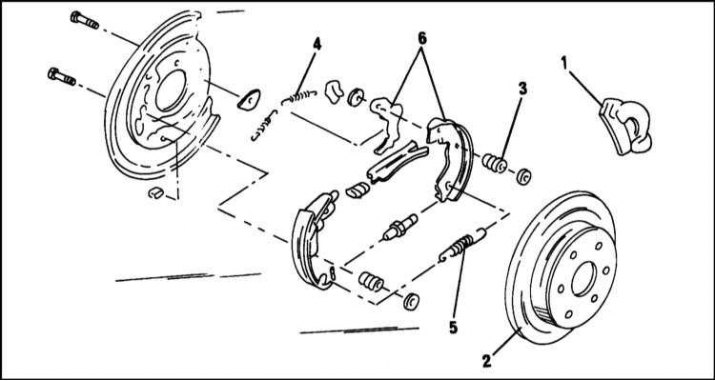
Parking brake pad assembly diagram for disc brakes
1. Remove the caliper (1).
2. Remove the rear brake disc (2).
3. Now the brake is clearly visible. Clean the mechanism with a cloth.
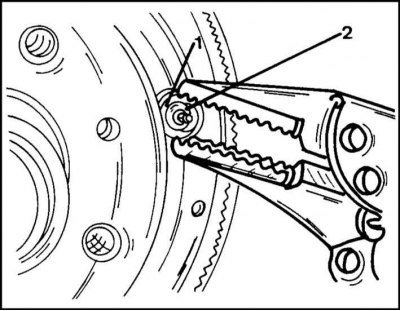
4. Press with your finger on the back of the brake shield on the anchor pin (3) and clamp the spring plate in front of the brake shoe with pliers, similarly as shown for a drum brake.
5. Press down on the cymbal and turn the pin so that the crown can be passed through the spring cymbal.
6. Remove the plate, spring and pin.
7. Work on both brake pads.
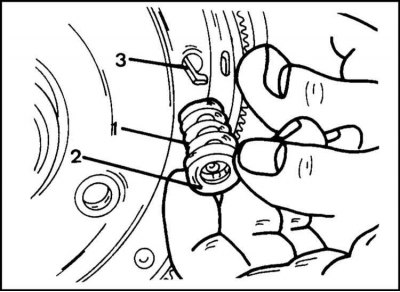
8. Removing the spring (2) shown in the illustration.
9. Take out the pin (3) on the back of the brake shield.
10. Remove the top spring with pliers (4) one side as shown.
11. Remove the lower return spring with a screwdriver (5).
12. Remove the brake pad (6).

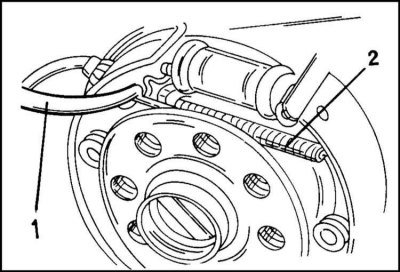
13. Pull down the brake shoe as shown and disconnect the cable from the parking brake lever. It is necessary to remember the location of the springs and the adjusting mechanism, since the adjusting handwheel must be on a certain side.
14. Measure the inside diameter of the brake disc. If it exceeds 211.4 mm, the brake disc must be replaced. The nominal value of the diameter is 210 mm.
15. Thoroughly clean all parts.
16. Unfold the adjusting rod, lubricate with oil and fold and unfold several times.
17. Finally, fold the bar to its minimum length.
18. Lightly lubricate the mating points with the brake pads on the brake shield.
19. Fix on the anchor pin one of the brake shoes on the brake shield.
20. Install the parking brake lever and install the second brake shoe in the same way as the first.
21. Install springs and adjusting rod.
22. Hook the upper return spring between the shoes.
23. Install the brake drum/disk and adjust the parking brake as described below.
24. Carry out other work in the reverse order of removal.
Visitor comments