
2. Disconnect the hoses and wiring from the carburetor, marking them so as not to be confused during subsequent connections.
3. In order to gain access to the jets and float chamber, remove the upper half of the carburetor, which is secured with 5 screws. Blow out the jets and their channels with compressed air (Never try to clean them with wire). If necessary, remove the jets by carefully unscrewing them.
4. Remove the strainer from the inlet pipe by picking it up with a small screwdriver. Replace filter (see photo).
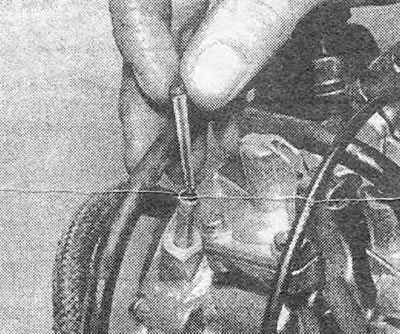
Photo 18.4. Removing the strainer from the inlet pipe.
5. Clean the float chamber from dirt and sediment. Replace the intake needle valve and its seat if they are worn or if the engine has high mileage. Replace the float if it is damaged.
b. This carburetor does not have a high float adjustment procedure. In any case, the upper level can vary within such a wide range that its precise adjustment is not necessary. Just check that the inlet needle valve is completely closed before the float reaches its highest point of rise.
7. Replace the membranes in the part load enrichment valve and in the accelerator pump. If the repair kit contains valve or accelerator pump parts, they should be installed instead of the old parts.
8. Further disassembly of the carburetor is not recommended. Pay special attention to the throttle valve opening mechanism if you decide to disassemble it: the locking system is of great importance.
9. Reassemble the carburetor in the reverse order. Replace all gaskets and seals with new ones and lubricate the linkages with molybdenum grease.
10. Before installing the carburetor on the engine, carry out the checks and adjustments described in the next section.
Visitor comments