
OpelBook.ru
Cars AvtoVAZ Cars Mitsubishi Cars BMW Cars Mercedes Cars Nissan Cars Toyota Cars Chevrolet
English Русский
Български
Беларускі
Український
Српски
Hrvatski
Română
Polski
Slovenský
Magyar
 |  Sitemap  |  Contacts  |    


Main Astra Corsa Insignia Kadett Omega Vectra Zafira Others Articles
Frontera A (1991-1998, petrol) Frontera B (1998-2004) Ascona C (1981-1988) Vivaro A (2001-2014)
  • Main
  • Opel
  • Ascona C
  • Power unit
  • Diesel engines
  • Checking the adjustment of the injection pump thrust torque

Checking the adjustment of the injection pump thrust torque (Opel Ascona C)

            0

Checking the adjustment of the injection pump thrust torque


Checking the adjustment of the injection pump thrust torque


Can be checked on an installed and removed engine. To check, you need a pointer-type micrometer with an adapter for screwing.

Remove the clutch cover.

Turn the crankshaft until the TDC mark is located at a distance of approximately 5 cm from the pointer.
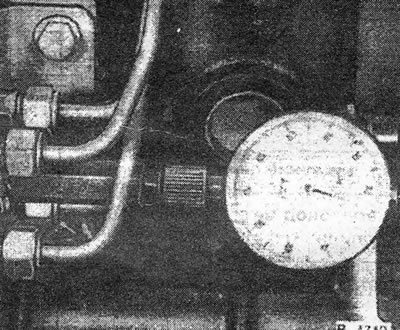
Turn the crankshaft until the TDC mark is located at a distance of approximately 5 cm from the…


Unscrew the central screw of the injection pump cover.


Do not remove the cold start accelerator rod.

The timing belt tension must be normal.

Screw in a micrometer with an adapter 0PEL-KM-226 and a sealing copper ring instead of the central screw. Don't press too hard. Set the micrometer to 0. Figure B4712.

Continue turning the crankshaft until the mark on the flywheel aligns with the pointer. The micrometer should show 1.0±0.05 mm piston stroke.

If the value is not reached, adjust. To do this, remove the timing belt guard.

Unscrew the three screws on the pump drive wheel.

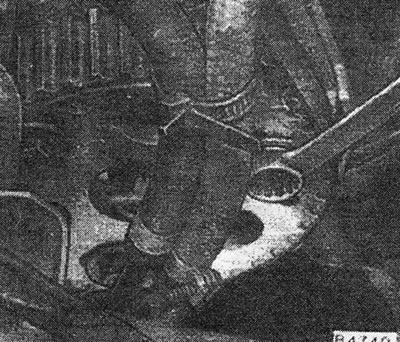
Adjust the pump stroke. To do this, slightly turn the wheel hub with the KM-541 tool or an open-end wrench on the central screw.

Tighten the screws slightly.

Check the adjustment again. To do this, turn the crankshaft back 90°.

(Original posted on the website: OPELBOOK.ru)

After adjustment, tighten the wheel screws.

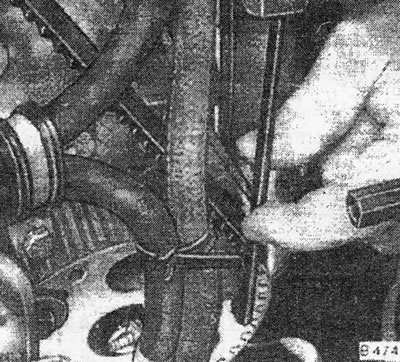
Tighten the central screw of the pump.
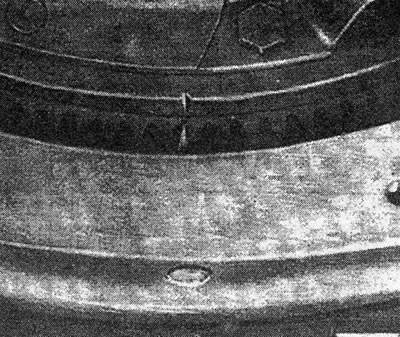
Tighten the central screw of the pump.

Tighten the central screw of the pump.

Tighten the central screw of the pump.


Attention! Always replace the sealing ring. Tightening force 15 Nm. In case of leaks, tighten no more than 25 Nm.


Install the timing belt guard.

Install the clutch cover.
Install the clutch cover.


This article is available at russian, bulgarian, belarusian, ukrainian, serbian, croatian, romanian, polish, slovak, hungarian
Checking the article: Kornev Georgy

Share information:

Previous articles
Opel Ascona C: Diesel engines
Next articles

Idle speed problems
Diesel injection equipment
Engine lubrication system
Compression check
Replacement of camshaft housing, removal and installation of camshaft
Removal and installation the cylinder head
Cleaning and replacing the air filter element
Checking and adjusting valve timing
Adjusting the valve timing
Diesel injection device malfunctions


See similar ones from other Opel car manuals:
▶ Start of injection pump supply — checking and adjustment Opel Omega B2 (1999-2003)
▶ Checking and adjusting the moment of start of injection of… Opel Kadett D (1979-1984)
▶ Fuel pump — checking, removal, installation Opel Astra F (1991-1998, petrol)
▶ Checking the clutch pedal adjustment Opel Corsa B (1993-2000)
▶ Checking the Power Steering Pump Drive Belt Opel Vectra A (1988-1995, petrol)
Link to this page in different formats

Visitor comments


No comments yet


How much will 14 + 49 =


Vivaro A (2001-2014) 
  • General information
  • User manual
  • Power unit
  • Petrol engine F4R
  • Diesel engine F9Q
  • Diesel engine G9U
  • Transmission
  • Clutch and drive shafts
  • Manual gearbox
  • Chassis
  • Front suspension
  • Rear suspension
  • Brake system
  • Body
  • Exterior
  • Interior
  • Electrical equipment
  • Heating and ventilation
  • Air conditioner
  • Equipment and devices
  • Electrical diagrams
Ascona C (1981-1988) 
  • General information
  • Maintenance
  • Power unit
  • Gasoline engines
  • Diesel engines
  • Cooling system
  • Fuel and exhaust system
  • Contact ignition system
  • Contactless ignition system
  • Transmission
  • Clutch
  • Mechanical gearbox
  • Automatic gearbox
  • Drive shafts
  • Chassis
  • Steering
  • Brake system
  • Car suspension
  • Body
  • Exterior
  • Interior
  • Doors and windows
  • Electrical equipment
  • Equipment and devices
  • Power devices
  • Electrical circuits
Frontera B (1998-2004) 
  • General information
  • User manual
  • Maintenance
  • Power unit
  • Petrol engines 2.2 l
  • Petrol engines 3.2 l
  • Diesel engines 2.2 l
  • Cooling system
  • Fuel system (petrol)
  • Fuel system (diesel)
  • Ignition system
  • Transmission
  • Clutch
  • Manual gearbox MUA5C
  • Automatic gearbox 4L30E
  • Chassis
  • Suspension and axles
  • Steering
  • Brake system
  • Body
  • Exterior
  • Interior
  • Doors, locks and windows
  • Heating and air conditioning
  • Electrical equipment
  • Power devices
  • Equipment and devices
  • Lighting and signaling
  • Electrical diagrams
Frontera A (1991-1998, petrol) 
  • General information
  • Introduction to guide
  • User manual
  • Maintenance
  • Power unit
  • Engine repair
  • Lubrication system
  • Cooling system
  • Power and exhaust system
  • Engine electrics
  • Transmission
  • Clutch
  • Mechanical gearbox
  • Cardan shafts
  • Chassis
  • Brake system
  • Front suspension
  • Rear suspension
  • Steering
  • Body
  • Repair and care
  • Electrical equipment
  • Equipment and devices
  • Electrical circuits
OpelBook.ru © 2017–2026 · Mobile version · · Sitemap: EN BG BY UA RS HR RO PL SK HU · Feedback · Site search
Astra F, petrol · Astra G, petrol · Astra G · Astra H · Astra J, petrol · Corsa B · Corsa C, petrol · Corsa C · Insignia A · Kadett D · Kadett E · Omega A · Omega B · Omega B2 · Vectra A, petrol · Vectra A · Vectra B, petrol · Vectra B · Vectra C · Zafira A, petrol · Frontera A, petrol · Frontera B · Ascona C · Vivaro A ·
We want your visit to be comfortable 🤝! We use cookies 🍪 to make that happen.