
2. Remove the cotter pin from the hub gear nut and loosen the nut.
3. Raise the car, support it securely and then remove the road wheel (see Chapter 9, Section 3).
4. Unscrew or release the brake caliper from the short axle holder, remove it from the brake rotor and secure it with wire. There is no need to disconnect the hydraulic system. See Chapter 9, Sections 4 or 5.
5. Unscrew the brace end ball joint nut and then, using a suitable ball joint removal tool, remove the ball joint from the steering bracket on the suspension strut.
6. Disconnect the control bracket hinge from the short axle in the same way. It may be difficult to use this ball joint removal tool because the clearance between the drive shaft joint and the ball joint nut is small. In this case, you can either slightly push the drive shaft out of the hub, which will compress the joint and make the gap larger, or you can use a fork wedge.
7. Pull the short axle holder towards you until the drive shaft is separated from the holder, and then support the shaft with a jack or block.
Please note: Do not drive the vehicle on wheels with one or both drive shafts removed from their hubs, as this may damage the front wheel hub bearings.
8. Remove the suspension strut mounting nuts from the upper turret (photo).
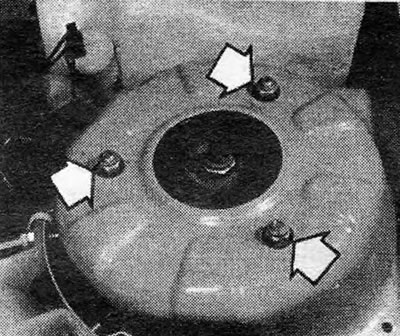
Photo 3.8 Front suspension strut mounting nuts (indicated by arrows).
9. Remove the suspension strut from under the front fender along with the coil spring.
10. Reassemble in reverse order, tighten all nuts and bolts to the specified torque values, paying attention to the fact that the gear nut is tightened according to the stages indicated in the Specifications.
Visitor comments