
2. Remove the protective trim from the wheel arch (from under the wing), after disconnecting its clamps and removing the screws that hold it in place.
3. Remove the front bumper as described in Section 9.
4. Open the hood and unscrew and remove the seven screws from the top of the fender (see Figure 11.9).
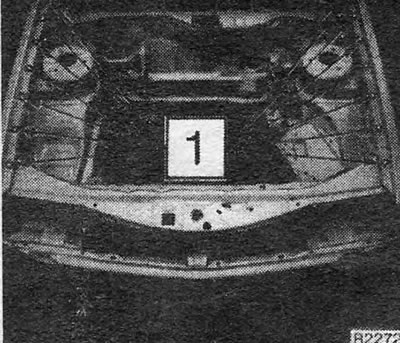
Figure 11.9. Front fender upper mounting bolts (1)
5. Working under the fender, remove the four bolts that secure the fender to the lower front body panel (see Figure 11.10).
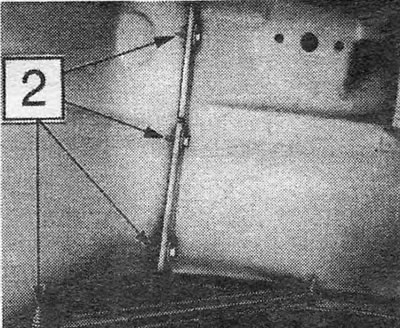
Figure 11.10. Bolts securing the fender to the lower body panel (2)
6. Working from inside the vehicle, remove the side trim panel at the bottom to gain access to the two bolts located at the bottom of the A-pillar (see Figure 11.11).
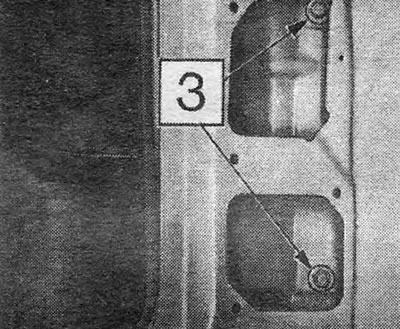
Figure 11.11. Bolts securing the front fender to the A-pillar (3)
7. Unscrew the screw located at the base of the front pillar on the edge of the threshold (see Figure 11.12).
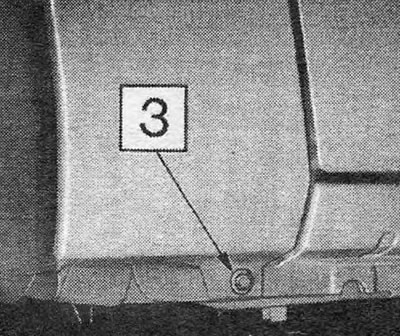
Figure 11.12. Screw securing the front fender to the sill (3)
8. Run a sharp knife around the fender outline to remove any old mastic, then remove the fender completely.
9. Clean all traces of old mastic from the body flange, and then apply a thick layer of new mastic.
10. Install the new fender in place, and tighten the mounting bolts only by hand for now.
11. Now align the fender with the adjacent body panels before fully tightening the mounting bolts and screws.
12. Apply a protective compound to the inner surface of the wing, and treat the outer surface so that it completely matches the color of the body.
13. After the protective coating has completely dried, reinstall the bumper, protective trim and interior decorative lower panel from inside the passenger compartment.
Visitor comments