


2. Mark the position of the hinges on the inside surface of the hood.
3. With the help of an assistant, support the weight of the hood, unscrew its bolts and remove it from the car.
4. It is unlikely that the hood hinges will ever need to be removed, but such a need has arisen, first you need to remove the windshield wiper arms and connecting elements (see Chapter 12), and also drill out the rivets in the hinge support brackets.
5. Installation in place is carried out by performing the above steps in reverse order, do not forget to check the adjustment of the hood position (even the gap between the hood and the wing) before finally tightening the hinge bolts.
6. The hood should close softly and firmly, with moderate hand pressure. If this is not the case, adjust the position of the latch and counter plate, and adjust the fork projection by loosening its locking nut and turning it, using a screwdriver, in its rear slot. The standard adjustment is shown in Figure 11.2.
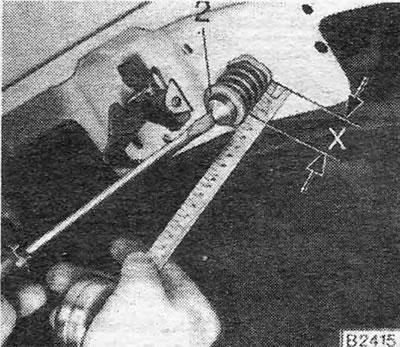
Figure 11.2. Standard installation of the hood latch pin: X = 38.0 to 40.0 mm (1.50 to 1.57 inches), the measurement is taken from the surface of the hood to the top edge of the washer (2)
Text copied from an online resource: OpelBook
Visitor comments