
Saloon and Hatchback
1. Remove the license plate light bulb from the rear bumper as described in Chapter 12, and then disconnect the electrical wire from it.
2. Disconnect the bumper from the support brackets located inside the lower rear panel of the body (see Figure 11.5).
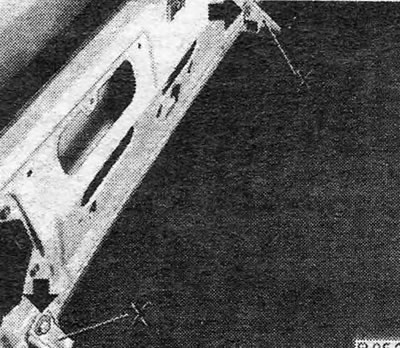
Figure 11.5. Rear bumper mounting brackets (X)
3. Remove the bumper by disconnecting the end latches from their brackets (see Figure 11.6).
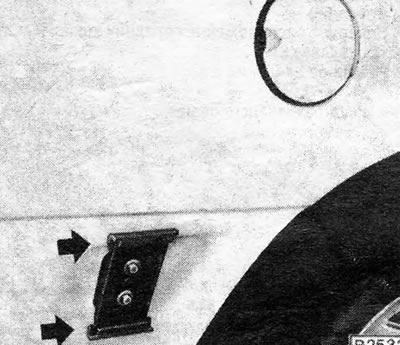
Figure 11.6. Rear bumper end mounting brackets - indicated by arrows
4. Reinstallation is carried out by performing the above steps in reverse order.
Estate
Central part
5. Remove the rear door interior trim panel.
6. Unscrew the bolts securing the bumper to the rear door and remove the bumper (see Figure 11.7).
Figure 11.7. Central part of the rear bumper (Estate)
7. Reinstall by performing the above steps in reverse order. Apply a small amount of bonding compound around the bolt holes before securing the bumper.
Side part
8. Open the rear door and remove the two bolts that secure the side of the bumper to its rear bracket (see photo 10.8).
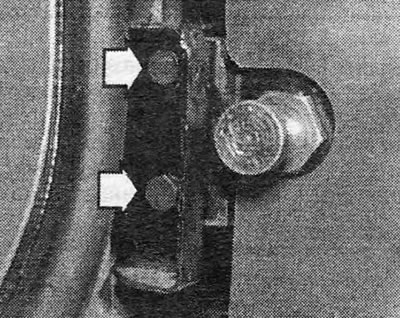
Photo 10.8 Estate rear bumper side mounting bolts (indicated by arrows)

Figure 11.8. Rear bumper side (Estate)
9. Move the rear part of the bumper back. If the mounting bracket is stuck, unscrew it from its place; its mounting bolt can be accessed after removing the washer reservoir (on the right side) or rear interior rear door trim panel (On the left side).
10. Reinstall by performing the above steps in reverse order. Make sure the center and side pieces fit together correctly.
Visitor comments