
Hatchback and Astra GTC models
1. Remove the rear combination lights (see chapter 12, Section 19).
2. Remove the license plate light (see Chapter 12, Section 21).
3. Turn out fixing bolts (see resist. illustration) and disconnect the protection of the rear wheel arches from the bumper (see also Section 6). Then remove the license plate and remove the 2 central fixing bolts.

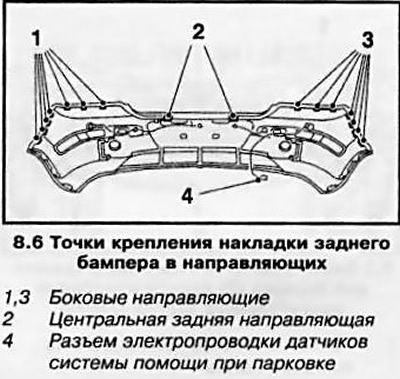
4. If equipped, disconnect the wiring connector of the sensors of the parking assistance system (see illustration 8.6).
5. Press the side faces of the bumper lining upwards and release the lining from the side guides (see illustration 7.6). Be careful not to damage the bumper pad mounting.
6. Release the bumper cover from the center rail (see resist. illustration) and remove the cover with an assistant.
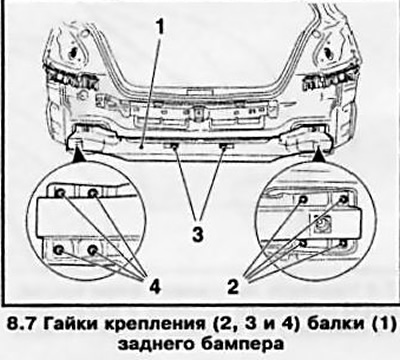
7. Give 8 fastening and 2 clamping nuts (see resist. illustration) and remove the rear bumper beam from the frame.
8. Installation is made in an order, the return to an order of removal. When installing the beam, it is necessary to use new fixing bolts and nuts. The flange of the bumper beam after tightening the bolts for protection should be sealed with wax. Pay attention to the wiring to the license plate lights.
Station wagon and Zafira models
9. Remove the rear combination lamps (see chapter 12).
10. Remove one mounting bolt from each side of the vehicle and release the top edge of the bumper pad, then remove 2 bolts each and separate the pad from the rear wheel arch protection (see resist. illustration).
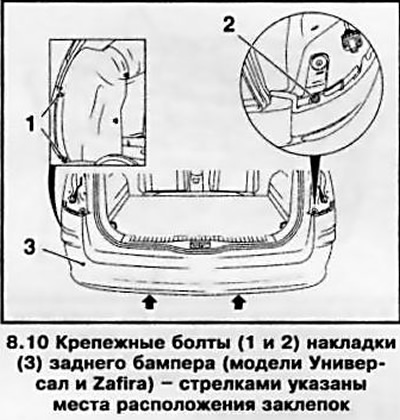
11. Remove 2 expansion rivets (see illustration 8.10) and a polystyrene foam insert from the bumper lining.
12. Further removal of the bumper cover is carried out in the same way as on Hatchback models. Turn out fixing bolts and remove a beam of a back bumper from a frame.
Note: On Zafira models, the bumper beam is secured with five fixing nuts.
13. Installation is carried out in the reverse order.
Visitor comments