
Hatchback and Astra GTC models
Removal and installation
1. Set the rotary switch for outdoor lighting to position «0» (see chapter «Controls and methods of operation», Section 17) and turn off the ignition. Disconnect the battery (see chapter 5).
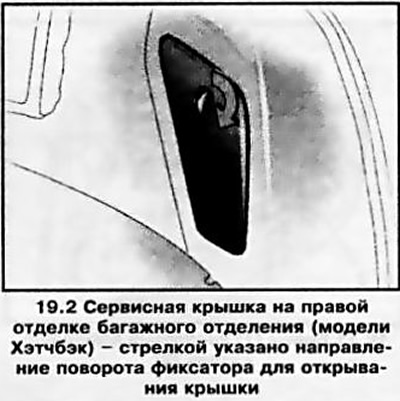
2. Open the tailgate, turn the latches with a coin (see illustrations 19.2 and 3.3) and fold down the service cover in the side trim of the luggage compartment.
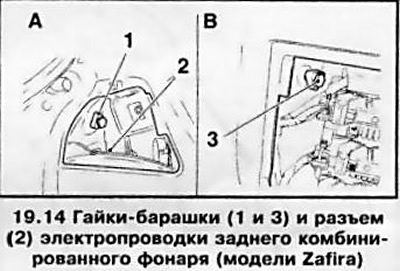
3. Disconnect the wiring connector (see resist. illustration). While holding the rear combination lamp assembly from the outside, loosen the 2 wing nuts and remove the assembly by pushing it to the rear.
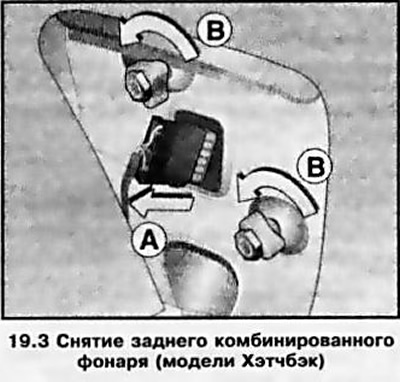
Note: On Astra GTC models, 2 mounting bolts must be removed. The wiring can be disconnected after removing the rear light assembly.
4. Installation is carried out in the reverse order. Check the lamps for proper operation.
Lamp replacement
5. Remove the rear combination lamp (see above).
6. Press 3 latches (see resist. illustration) and remove the bulb holder from the rear combination lamp assembly.
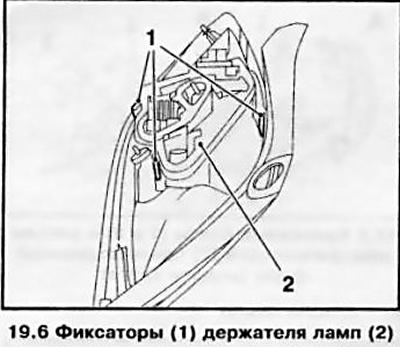
Note: Astra GTC models have 4 latches.
7. Lightly press the failed lamp (see resist. illustration) inside the chuck, turn it counterclockwise and remove it from the chuck.
Note: On models shipped in some countries, the fog light lamp only lights up on the left side, the lamp on the right side can be used as a spare.
8. Installation is carried out in the reverse order.
Models Wagon
Removal and installation
9. Removal / installation of the rear combination lamp is carried out in the same way as on Hatchback models. The difference lies in the execution of the service cover (see resist. illustration) rear combination lamps - to remove them, it is necessary to squeeze out 2 clamps. The canopy assembly is held in place by three wing nuts.
Lamp replacement
10. Remove the rear combination lamp (see above).
11. Turn out 3 fixing bolts (see resist. illustration) and remove the bulb holder from the rear combination lamp assembly.

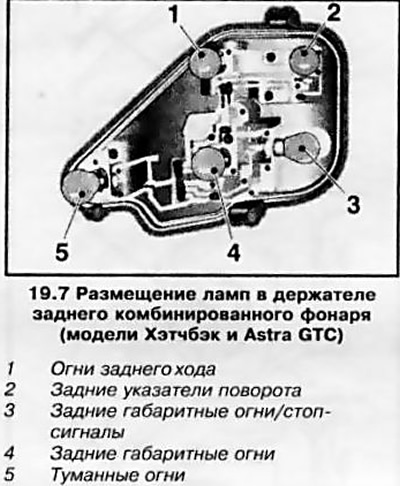
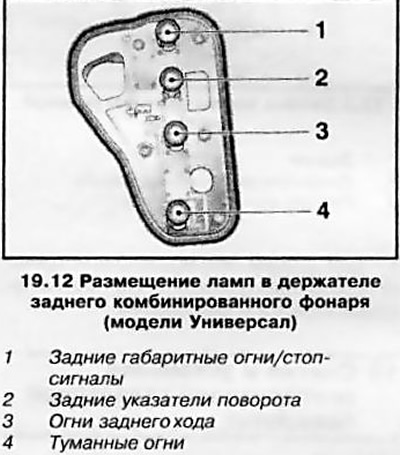
12. Otherwise, the procedure for replacing the lamps is the same as on Hatchback models (see above). The layout of the lamps in the holder is shown in Ref. illustrations.
Note: On models shipped in some countries, the fog light lamp only lights up on the left side, the lamp on the right side can be used as a spare.
Models Zafira
Removal and installation
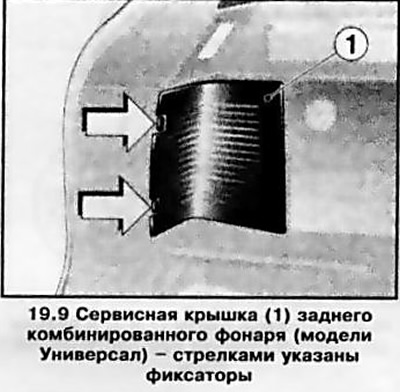
13. Removal / installation of the rear combined lamp is carried out in the same way as on Hatchback models. To remove the service covers, it is necessary to press 2 latches each (see illustration 19.9). If equipped, the tire repair kit must first be removed before removing the right rear combination lamp. For access to the left lantern in addition turn out a bolt and remove the top triangular cover.
14. Mounting of the rear combination lamp is shown in Ref. illustrations.
Note: Both recesses shown in the illustration are on the left side of the luggage compartment.
Lamp replacement
15. Remove the rear combination lamp (see above).
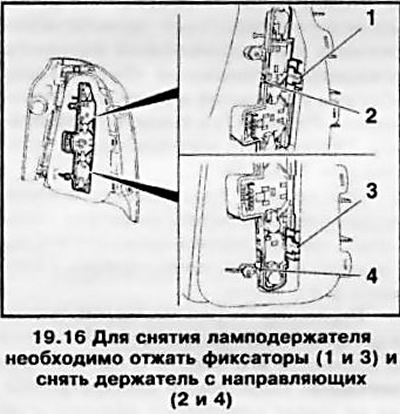
16. Press 2 latches (see resist. illustration) and remove the bulb holder from the rear combination lamp assembly.
17. Slightly press the failed lamp into the cartridge, turn it counterclockwise and remove it from the cartridge.
18. Installation is carried out in the reverse order. Check the lamps for proper operation.
Visitor comments