
Removing
1. Disconnect the wire from the negative terminal of the battery (see chapter 5).
2. Turn the rotary switch for outdoor lighting as far as it will go (position «0» or «AUTO» depending on configuration) (see chapter «Controls and methods of operation», Section 17).
3. Press the knob on the rotary switch and turn it to the center position (see resist. illustration). Remove the switch panel from the instrument panel.
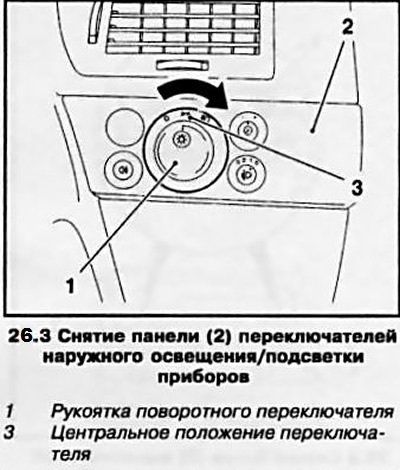
4. Disconnect the wiring connector from the back of the panel.
Installation
5. Connect the wiring connector to the switch panel.
6. Press the rotary switch handle and turn it to the right until the lock (see resist. illustration) the switch panel will not fully lower into the recess.
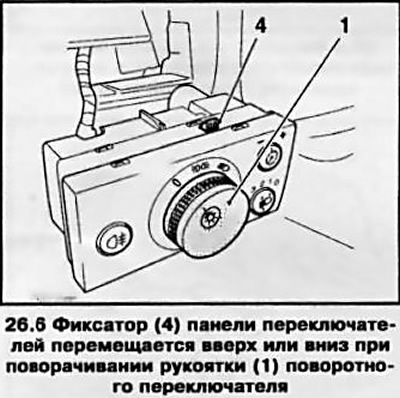
7. While holding the handle in this position, insert the panel into the slot, and turn the knob to the left until the panel locks into place.
8. Check up serviceability of functioning of the switch in all provisions and reliability of fastening of the panel.
Visitor comments