


Contents: Removal ⬇ Installation ⬇
Removal
1. Disconnect the cable from the negative terminal of the battery (see Chapter 5).
2. Turn the rotary switch for the outdoor lighting modes to position "0" (see Chapter "Controls and operating techniques", Section 17).
3. Press the rotary switch handle and turn it to the center position (see accompanying illustration). Remove the switch panel from the instrument panel.
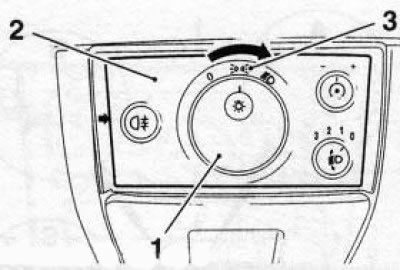
24.3 Central position (3) of the rotary switch (1) on the panel (2) of the exterior lighting/instrument lighting switches
4. Disconnect the electrical wiring connector from the back of the panel.
Installation
5. Connect the wiring connector to the switch panel.
6. Press the rotary switch handle and turn it to the right until the locks (above and below) (see accompanying illustration) the switch panels will not fully drop into the recess.
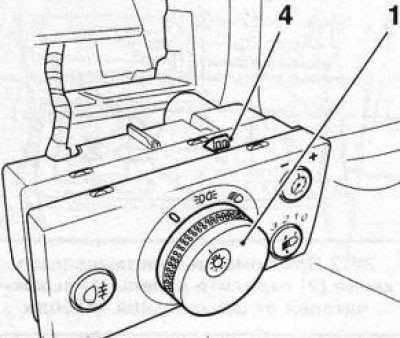
24.6 The upper lock (4) of the switch panel moves up or down when the handle (1) of the rotary switch is turned
7. While holding the handle in this position, insert the panel into the mounting socket and turn the regulator to the left until the panel is locked.
8. Connect the battery and check the proper functioning of the switch in all positions and the reliability of the panel fastening.
Visitor comments