
Broadband loudspeakers (front and rear)
Note: The loudspeakers are fixed in the door assemblies.
1. To access the loudspeaker, remove the upholstery of the corresponding door (see chapter 11).
2. Remove 3 fixing screws (see resist. illustration) and remove the loudspeaker, then disconnect the wiring connector.
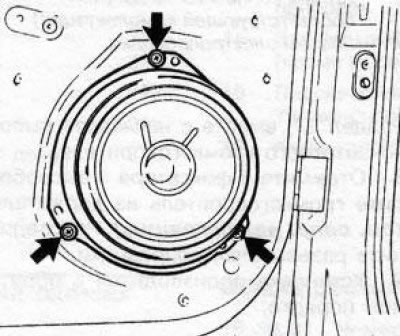
30.2 Mounting screws (indicated by arrows) full range speaker
3. Installation is carried out in the reverse order.
Front high-frequency loudspeaker
4. Remove the upholstery of the corresponding door (see chapter 11).
5. With a plastic wedge (Hazet 1965-20) separate the triangular lining of the front door, wring out the latches and remove the loudspeaker from the seat (see resist. illustration), disconnect the tweeter wiring connector.
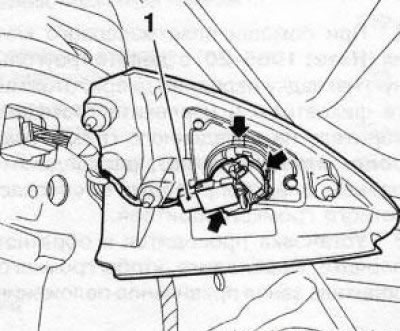
30.5 Connector (1) the wiring of the high-frequency loudspeaker, the arrows indicate the loudspeaker clamps
6. Installation is carried out in the reverse order. Make sure the speaker is in the correct position.
Rear high-frequency loudspeaker
7. Remove the individual rear door power window control switch (see Section 27) along with the tweeter overlay.
8. Press 3 latches and release the loudspeaker from the holder (see resist. illustration). Disconnect the electrical connector.
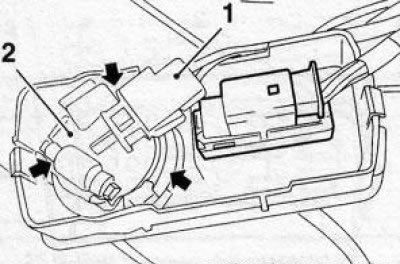
30.8 Connector (1) electrical wiring and clamps (indicated by arrows) rear high-frequency loudspeaker (2)
9. Installation is carried out in the reverse order.
Loudspeaker on the instrument panel
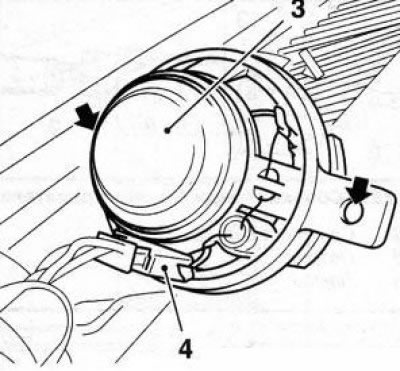
10. Using a plastic wedge, pry and separate the loudspeaker cover from the instrument panel (see resist. illustration). If equipped, disconnect the wiring connector and remove the sun sensor from the back of the cover.
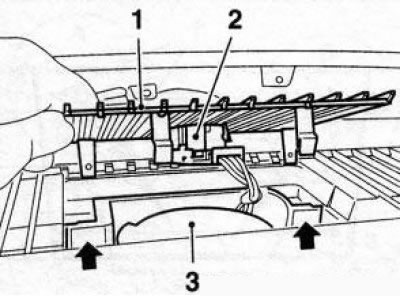
30.10 Removing the loudspeaker (3) from the instrument panel - the arrows indicate the mounting screws: 1. Speaker cover; 2. Sunlight sensor (with appropriate equipment); 4. Wiring connector
Attention: Be careful not to let the cable through the hole in the instrument panel.
11. Remove 2 fixing screws (see resist. illustration) remove the loudspeaker and disconnect the wiring connector.
30.11 Connector (4) loudspeaker wiring (3)
12. Installation is carried out in the reverse order. Press the loudspeaker cover until it locks into the instrument panel.
Visitor comments