
Note: This section provides a detailed description of the upholstery removal/installation procedure using the example of the front (driver's license) side door. For the rear door, only the features are given.
Front door trim
1. Lower the glass of the relevant door, insert the plastic wedge between the inside door handle and the trim, and separate the trim (see resist. illustration).
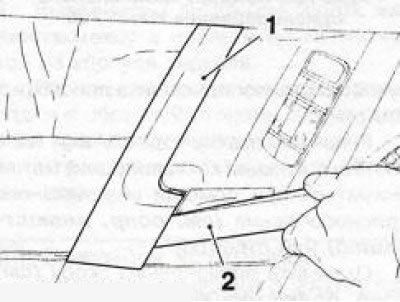
19.1 Removing the lining (1) from the inside door handle with a plastic wedge (2)
2. Remove the 2 screws on the inside door handle and then the 3 bottom screws securing the upholstery (see resist. illustration).
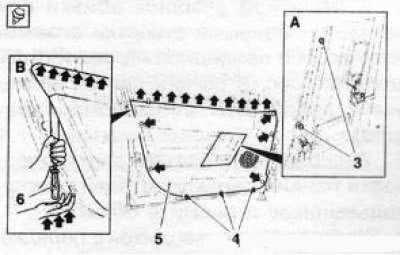
19.2 Upholstery attachments (5) side door (on the example of the front door): 3, 4. Mounting screws; 6. Special tool Hazet-2164-2
3. With a plastic wedge (e.g. Hazet 799-3) separate the 5 upholstery holders from the door frame (see illustration 19.2).
4. In a similar way, separate the lower inner lining of the window opening together with the lining from the door frame, gradually moving the wedge along the lining.
Note: The wedge should be inserted under the trim on the outside of the door (through the window).
5. Using a special tool (e.g. Hazet-2164-2) separate the door upholstery from the window opening lining, slightly knocking the tool with the palm of your hand (see illustration 19.2).
Note: The trim is secured to the door trim with spring clips. When separating the lining from the upholstery, the spring clips are damaged and must be replaced during subsequent installation.
6. On the back of the upholstery, use a small screwdriver to depress the lock of the drive cable and disconnect the cable from the door lock release lever (see resist. illustration)
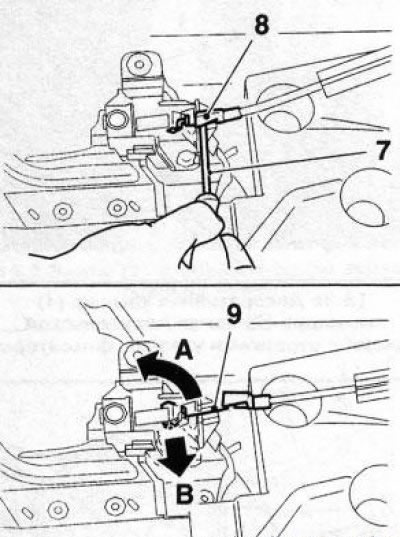
19.6 Pry out with a screwdriver (7) retainer (8) and separate the drive cable (9), moving in the directions indicated by the arrows
7. Disunite a socket of electroconducting of the panel of switches of window regulators and remove an upholstery.
8. Installation is made in an order, the return to an order of removal. Replace any broken fasteners.
Features Removing the trim for the rear door
9. If equipped, after lowering the glass, remove the power window handle (see Section 20).
10. On Hatchback models (GTS) using a plastic wedge, press out the 3 latches and separate the triangular lining of the rear door (see resist. illustration). The wedge should be inserted from above.
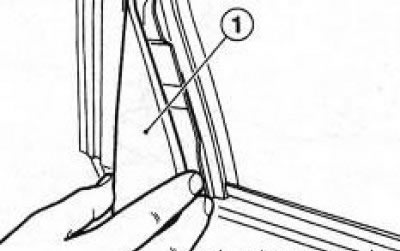
19.10 Removing the triangular lining of the rear door (Hatchback models (GTS))
11. Remove the 2 screws on the inside door handle and then the 2 lower upholstery fixing screws (see resist. illustration).
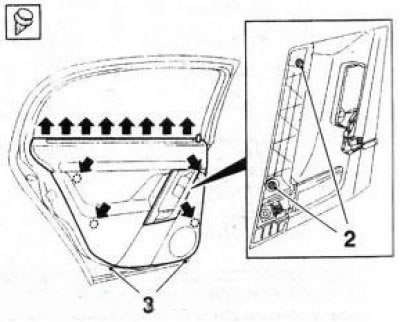
19.11 Rear side door upholstery fasteners 2.3 Fastening screws
12. Using a plastic wedge (e.g. Hazet 799-3) separate the 4 upholstery holders from the door frame.
Visitor comments