
2. Before removing the power window, disconnect the wire from the negative terminal of the battery (see chapter 5).
3. Remove the upholstery of the corresponding door (see Section 19).
4. Peel off the insulating film from the door frame as far as necessary to free access to the relevant parts.
5. Separate the cable from the swing arm of the door lock release button (see illustration 17.8)
6. Lower the glass so that the glass clip is visible through the hole in the door frame (see resist. illustration).
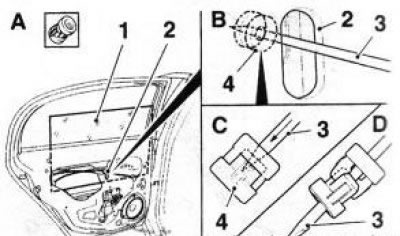
27.6 Removing the clamp (4) glass (1) back door: 2. Hole in the door frame; 3. Rod Ø 4 mm (scriber)
7. Insert a suitable rod or 4 mm scriber into the clamp hole (see illustration 27.6), release the clip and remove it from the door assembly.
8. Manually lift the glass up to the stop and fix it in this position with adhesive tape.
9. On models equipped with an electric window regulator, disconnect the power window motor wiring connector, remove the fixing screw and drill out the heads of the two rivets (see resist. illustration, a).
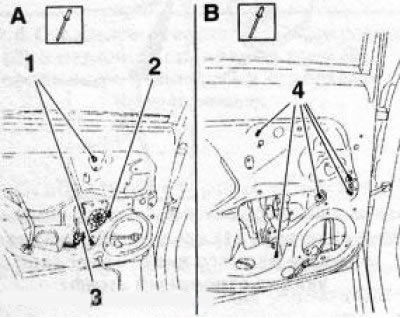
27.9 Rivets (1 and 4) electrical fasteners (A) and mechanical (IN) rear door window regulator: 2. Fixing screw; 3. Wiring connector
10. On models equipped with manual power windows (see illustration 27.9, B), drill out the 5 power window rivets.
11. Separate the power window from the door frame (see resist. illustration) remove from the door assembly.
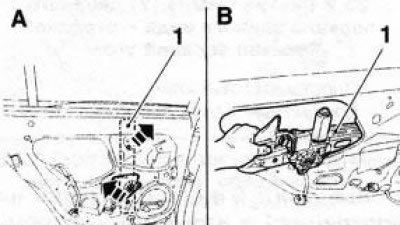
27.11 Removing the power window (1) rear door - the arrows indicate the directions for removing the power window
12. Installation is made in an order the return to an order of removal. Lubricate the control levers with multipurpose grease. Use rivets 4.8x11 mm to fasten the power window or replace them with suitable short bolts with nuts, the threads of the bolts must be lubricated with a fixing compound. If necessary, replace the damaged insulating film.
13. After connecting the battery, it is necessary to synchronize the automatic window lifting system. Check the operation of the power window.
Visitor comments