
Comment. The work is shown on the example of the left door. On the features of removing the upholstery of the right door, see the text.
Removal of an upholstery of a forward door
1. We prepare the car for work (see «Preparing the car for maintenance and repair»).
2. Remove the decorative overlay of the side rear-view mirror (see «Side rear-view mirror - check and replacement»).
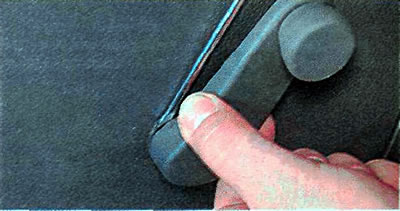
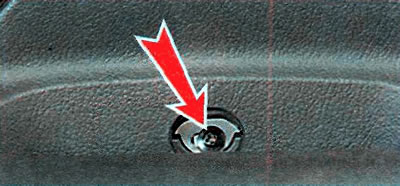
3. If manually operated windows are installed, use a wide slotted screwdriver to open the latch...
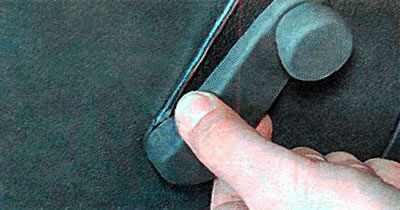
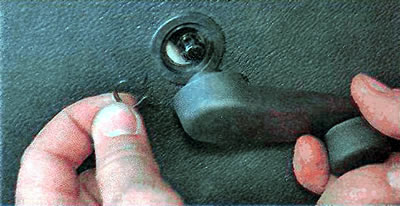
... and remove the handle together with the latch.
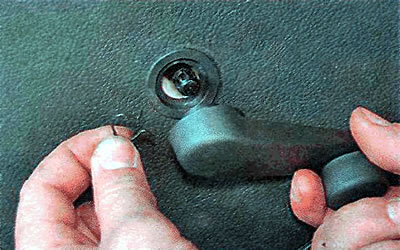
Using a thin slotted screwdriver, remove the plugs from the inner handles.
4. If power windows are installed, then for upholstery of the left door we remove the power window control unit (see «Power window control unit - check and replace»), and for the upholstery of the right door, remove the power window control key (see «Passenger door power window controls - check and replace») or (on vehicles with manual windows) remove the plugs in the same way.
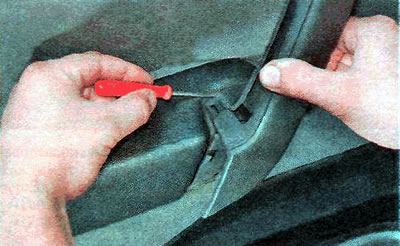
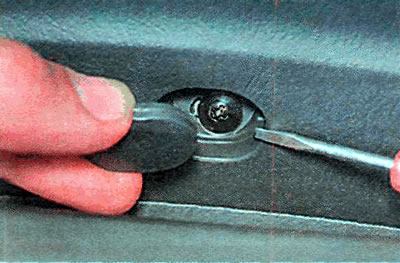
5. Using a thin slotted screwdriver, pry off the lining of the inner handle and remove it from the door upholstery.
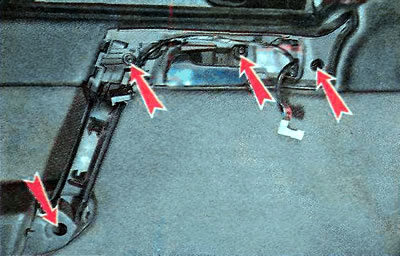
6. If power side mirrors are installed, disconnect the wiring harness block from the mirror control unit and remove the trim completely.

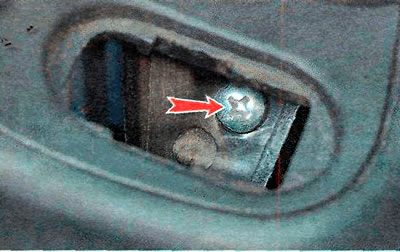
7. Using a Phillips screwdriver, unscrew the four screws securing the inner handle.
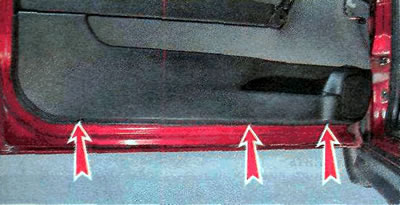
8. Using a Phillips screwdriver, unscrew the three lower screws securing the upholstery.
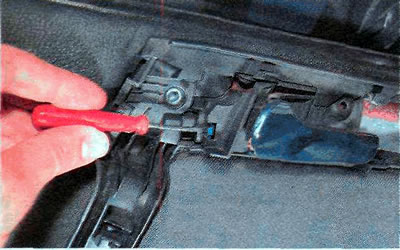
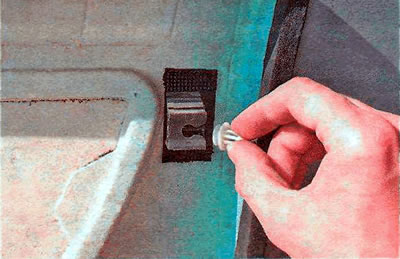
9. With a thin slotted screwdriver, we slightly drown the retainer of the opening cable sheath holder.
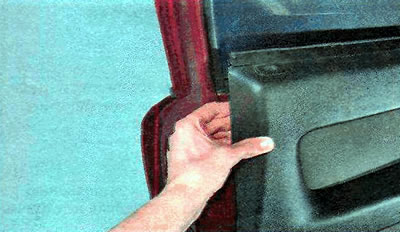
10. We pull the door upholstery by the lower edge towards ourselves until all of its holders come out of the door openings. Then we lift the upholstery up and take it away from the door.
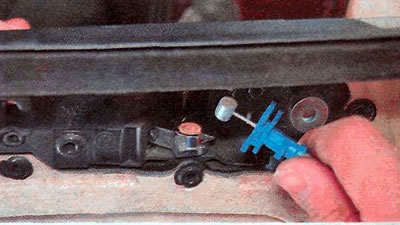
11. Disconnect the cable sheath holder from the door upholstery.

12. We remove the tip of the cable from engagement with the door unlock handle and finally remove the upholstery.
Removal of an upholstery of a back door
1. We prepare the car for work (see «Preparing the car for maintenance and repair»).
2. If manual windows are installed, use a wide slotted screwdriver to open the latch...
... and remove the handle together with the latch.
Using a thin slotted screwdriver, remove the plugs from the inner handles.
If power windows are installed, remove the power window control button (see «Passenger door power window controls - check and replace»).
3. Using a Phillips screwdriver, unscrew the front screw securing the inner handle.
4. Pry off with a thin slotted screwdriver and remove the decorative cap of the central screw securing the inner door handle.
5. Using a Phillips screwdriver, unscrew the central screw securing the inner door handle.
6. Remove the tweeter (see «Speaker System Speakers - Replacement») and with a Phillips screwdriver we unscrew the fastening screw located under the speaker as on the Zafira model (see «Upholstery of doors of the Zafira model - removal and installation»).
7. Using a Phillips screwdriver, unscrew the lower upholstery fastening screws (similar to removing the front door upholstery, see above).
8. We pull the door upholstery by the lower edge towards ourselves until all of its holders come out of the door openings. Then we lift the upholstery up and take it away from the door.
9. Disconnect the cable sheath holder from the door upholstery and disengage its tip from engagement with the door release handle (similar to removing the front door upholstery, see above) and finally remove the upholstery.
Upholstery installation
1. Before installing the upholstery, check the condition of its holders (the location and number of holders may differ depending on the installation location, vehicle model and body type).
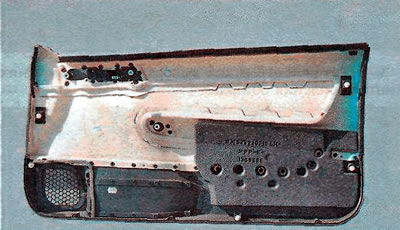
2. Broken and damaged holders must be replaced.
3. When installing the door upholstery, we first put its upper edge on the door, and then press it against the door until the holders are fixed in the door openings.
4. Further installation is carried out in the reverse order.
Visitor comments