
OpelBook.ru
Cars AvtoVAZ Cars Mitsubishi Cars BMW Cars Mercedes Cars Nissan Cars Toyota Cars Chevrolet
English Русский
Български
Беларускі
Український
Српски
Hrvatski
Română
Polski
Slovenský
Magyar
 |  Sitemap  |  Contacts  |    


Main Astra Corsa Insignia Kadett Omega Vectra Zafira Others Articles
Zafira A (1999-2005, petrol)
  • Main
  • Zafira
  • Zafira A
  • Body
  • Side doors
  • Door lock — replacement and adjustment

Door lock — replacement and adjustment (Opel Zafira A)

            0

Contents: Replacement ⬇ Adjustment ⬇
If there is a central control for door locks (central locking) the left front door lock is made as a single unit with its locking motor-reducer and the central lock switch. The locks of the other doors are made as a single unit with their locking motor-reducer.

Note: The operation is basically the same for adjusting all doors on all modifications (differences are indicated in the text).


Replacement


1. Prepare the car for work (see "Preparing the car for maintenance and repair").

2. Raise the door glass to the upper position.

3. Remove the door trim (see "Astra model door trims - removal and installation" or "Door trims for Zafira model - removal and installation") and peel off the polyethylene film from the back of the door.

4. Pry up the wiring harness connector retainer...
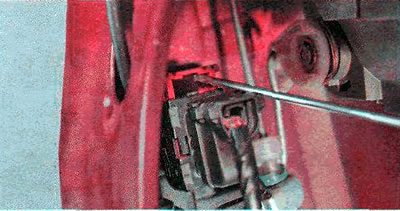
4. Pry up the wiring harness connector retainer...


...and disconnect the shoe from the lock.
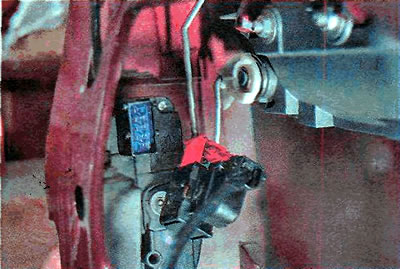
...and disconnect the shoe from the lock.


5. To remove the left front door lock, remove the inner part of the handle (see "Front door lock switch (cylinder) - replacement").


6. To remove the rear door lock, use a Phillips screwdriver to unscrew the screw securing the lock button rod casing...
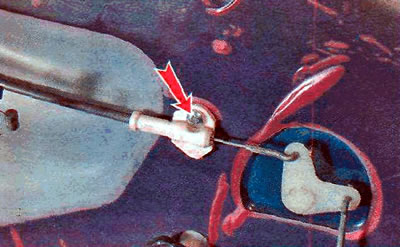
6. To remove the rear door lock, use a Phillips screwdriver to unscrew the screw securing the lock…


...and we remove the rod from the lock button lever.
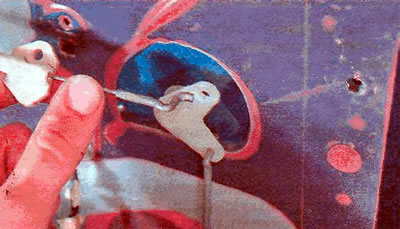
...and we remove the rod from the lock button lever.


7. Using a TORX T40 key, unscrew the three bolts securing the lock.
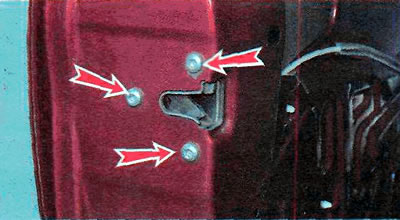
7. Using a TORX T40 key, unscrew the three bolts securing the lock.


8. Lower the lock slightly down, disengaging it from the outer handle rod, and remove it together with the rods through the technological opening in the door.
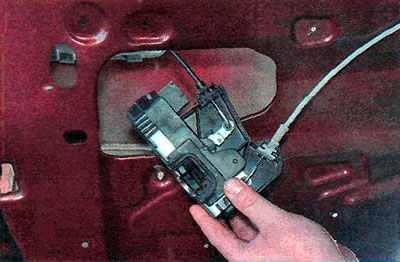


8. Lower the lock slightly down, disengaging it from the outer handle rod, and remove it together…


9. Press the retainer of the inner door opening handle cable housing.
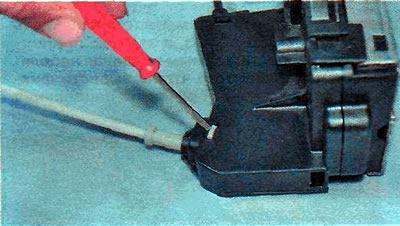
9. Press the retainer of the inner door opening handle cable housing.


Material was taken from a resource: www.opelbook.ru

10. Disconnect the cable sheath holder from the lock body.
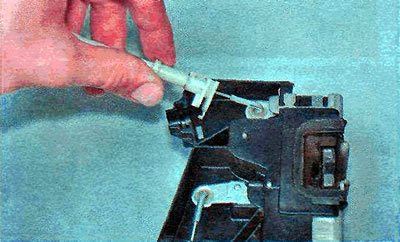
10. Disconnect the cable sheath holder from the lock body.


11. Remove the end of the inner handle cable from the lock lever.
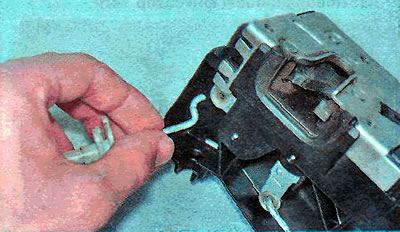
11. Remove the end of the inner handle cable from the lock lever.


12. Press the locking button cable casing holder retainer.
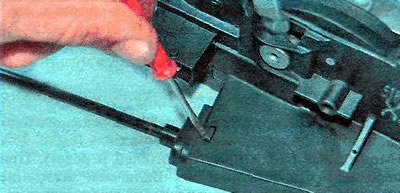


12. Press the locking button cable casing holder retainer.


13. Disconnect the cable sheath holder from the lock body.
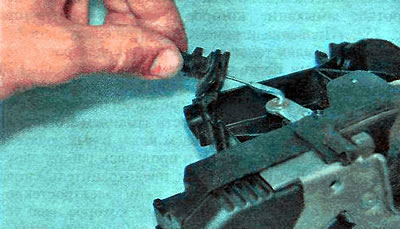
13. Disconnect the cable sheath holder from the lock body.


14. Remove the button cable tip from the lock lever.
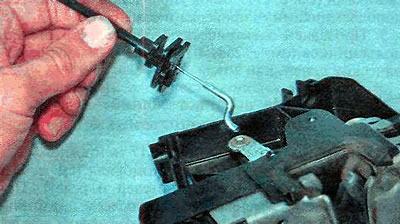
14. Remove the button cable tip from the lock lever.


15. Install the parts in reverse order.

Note: When installing the lock, make sure that the rod of the outer door opening handle fits precisely into the hole in the lock drive.

Note: When installing the lock, make sure that the rod of the outer door opening handle fits…


Lubricate the lock mechanism with lithium grease and apply thread lock to the lock mounting screws.
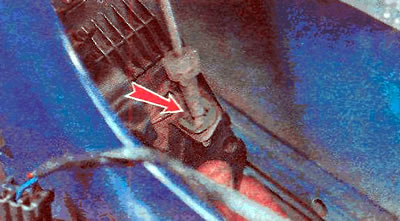
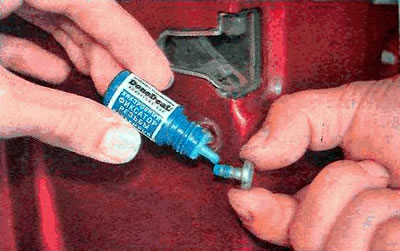
Lubricate the lock mechanism with lithium grease and apply thread lock to the lock mounting screws.


Adjustment


1. Mark the position of the door lock retainer to be able to return to the original installation.
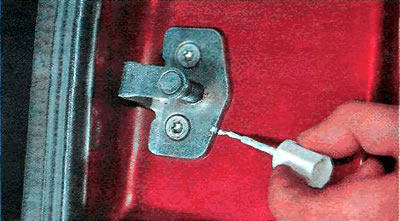
1. Mark the position of the door lock retainer to be able to return to the original installation.


2. Using a TORX T40 key, loosen the two bolts securing the door lock retainer; by slightly moving the latch to the right and left and up and down, we achieve an easy and tight closing of the door.
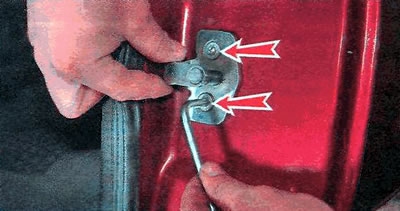
2. Using a TORX T40 key, loosen the two bolts securing the door lock retainer; by slightly moving…


This article is available at russian, bulgarian, belarusian, ukrainian, serbian, croatian, romanian, polish, slovak, hungarian
Checking the article: Chernov Alexander

Share information:

Previous articles
Opel Zafira A: Side doors
Next articles

External door handle — replacement
Front door lock switch (cylinder) — replacement
Door trims for Zafira model — removal and installation
Door trims for Astra model — removal and installation
Replacing the side mirror of the Zafira model
Replacing the side mirror of the Astra model
Door opening limiter — replacement
Diagnosis of faults in electric windows
Replacing the front door window lifter
Replacing the rear door window lifter


See similar ones from other Opel car manuals:
▶ Door lock retainer Opel Astra G (1998-2004, petrol)
▶ Controlling door locks using the key in the driver's door… Opel Corsa C (2000-2006, petrol)
▶ Front door adjustment Opel Insignia A (2008-2017)
▶ Removal and installation the front door lock cylinder Opel Kadett D (1979-1984)
▶ Front Door Lock Cylinder — Removal and Installation Opel Omega A (1986-1993)
Link to this page in different formats

Visitor comments


No comments yet


How much will 42 + 44 =


Zafira A (1999-2005, petrol) 
  • General information
  • Governing bodies
  • User manual
  • Maintenance
  • Power unit
  • Engine repair
  • Control system
  • Cooling system
  • Exhaust system
  • Transmission
  • Clutch
  • Mechanical gearbox
  • Automatic gearbox
  • Front wheel drives
  • Chassis
  • Hubs, wheels and tires
  • Front suspension
  • Rear suspension
  • Steering
  • Brake system
  • Body
  • Maintenance and care
  • Exterior
  • Side doors
  • Climate control
  • Electrical equipment
  • Equipment and devices
  • Power devices
  • Lighting and signaling
  • Windshield wipers and washers
  • Electrical circuits
OpelBook.ru © 2017–2026 · Mobile version · · Sitemap: EN BG BY UA RS HR RO PL SK HU · Feedback · Site search
Astra F, petrol · Astra G, petrol · Astra G · Astra H · Astra J, petrol · Corsa B · Corsa C, petrol · Corsa C · Insignia A · Kadett D · Kadett E · Omega A · Omega B · Omega B2 · Vectra A, petrol · Vectra A · Vectra B, petrol · Vectra B · Vectra C · Zafira A, petrol · Frontera A, petrol · Frontera B · Ascona C · Vivaro A ·
We want your visit to be comfortable 🤝! We use cookies 🍪 to make that happen.