
Note: This section describes the removal/installation/adjustment procedure using the example of the front (driver's license) side door. The corresponding operations for the remaining doors are carried out in a similar manner.
Removal and installation
1. Disconnect the wire from the negative terminal of the battery (see chapter 5).
2. Open the door, remove the mounting screw and disconnect the door travel stop from the body rack (see resist. illustration).
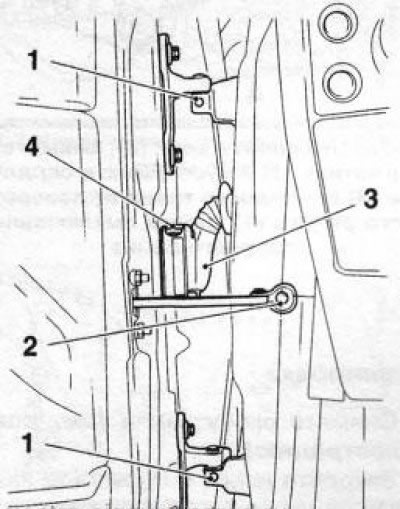
16.2 Fastening the side door: 1, 2. Fixing screws; 3. Wiring connector; 4. Connector lock
3. To disconnect the electrical wiring connector of the front door, press the latch (see illustration 16.2) upwards, overcoming the point of resistance, and press the blue locking bar on the rear door connector.
4. Turn out 2 fixing screws and by means of the assistant remove a door.
5. Installation is made in an order, the return to an order of removal. Lubricate the door fixing screws with fixing compound before installation (e.g. Loctite 243). After installing the door, make the appropriate adjustments (see below). Tighten the door hinge bolts to the required torque.
Adjustment
6. Remove the lock bracket (see resist. illustration).
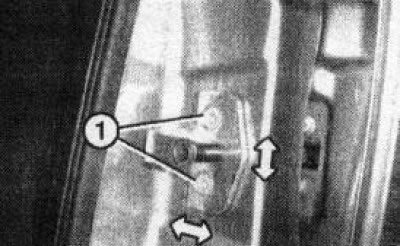
16.6 Screws (1) side door lock brackets
7. Close the door and check the gap between adjacent body elements (see specs). The tailgate is adjusted correctly if there is an even gap around the entire perimeter in the closed position, and the tailgate is flush with the surrounding body surfaces. The front edge of the rear door may be no more than 1 mm deeper than the rear edge of the front door.
8. Adjust the door if necessary. To do this, loosen the screws securing the door hinges to the body. Alignment of the door in the body opening is performed by moving the door hinges.
9. Reinstall the side door lock bracket and tighten its fixing bolts by hand. Carefully, observing the set gaps, close the side door, while the lock bracket will take the desired position. Open the door and tighten the bracket fixing screws and then the door hinge fixing screws to the required torque.
10. Close and open the door several times, check its position and ease of closing / opening, repeat the adjustment if necessary.
Visitor comments