
2. Using a plastic wedge, remove the hole plug on the rear end wall of the door, pull the outside handle away from the door and turn the locking bolt counterclockwise until it stops (see resist. illustration) - the handle should lock in the retracted position.
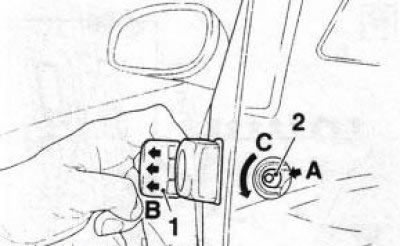
18.2 Lock the outside handle (1) in retracted position (arrows B): A. Hole on the rear end wall of the door; 2. The locking bolt must be turned counterclockwise (arrow C)
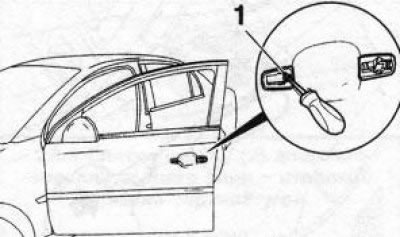
3. Remove the lock cylinder with body from the door (see illustration 18.3a). If necessary, press the latches and remove the decorative cover from the cylinder (see illustration 18.3b).

18.3a Removing the cylinder (3) driver's door lock
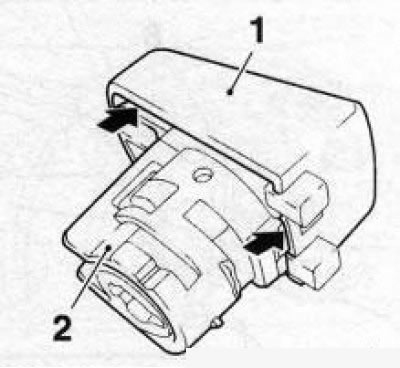
18.3b Decorative cover (1) cylinder (2) driver's door lock - arrows indicate latches
Note: There is no lock cylinder on the front passenger and rear side doors.
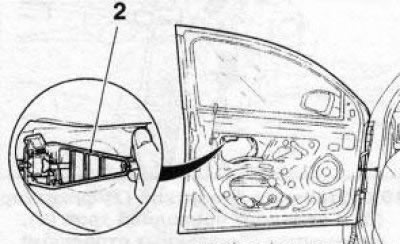
4. The order of removal of the handle from a door is shown on resist. illustrations.
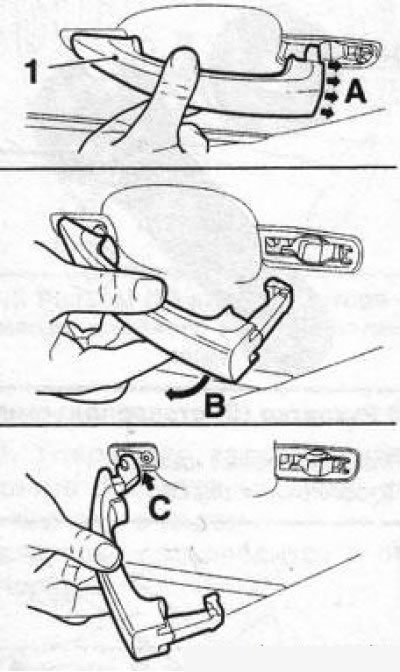
18.4 Removing the outer door handle (1)
5. Remove the door lock (see Section 17).
6. Loosen the screw on the front of the support bracket 5 turns (see resist. illustration).
18.6 Screw (1) door handle support bracket
7. Remove the support bracket through the top hole on the inside of the door frame (see resist. illustration).
18.7 Removing the support bracket (2) from the door frame
8. Installation is made in an order, the return to an order of removal. Turning the locking screw clockwise (for fixing the handle) it is necessary to hold the outer door handle and the lock cylinder housing in the retracted position from turning.
Visitor comments