
Corsa C models
1. Loosen 4 plastic nuts securing the protection of the arches of the right and left rear wheels (see resist. illustration).
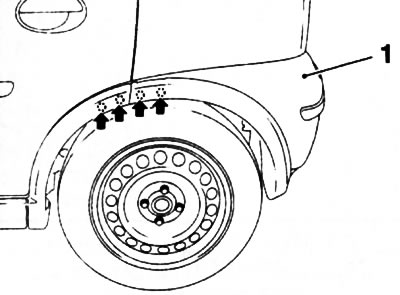
8.1. plastic nuts (indicated by arrows) rear wheel arch mounts (Corsa C models): 1. Rear bumper
2. Open the tailgate, remove the 4 upper plastic bolts from the rear bumper cover, then remove the 2 lower side bolts and remove the 2 expansion rivets (see resist. illustration).
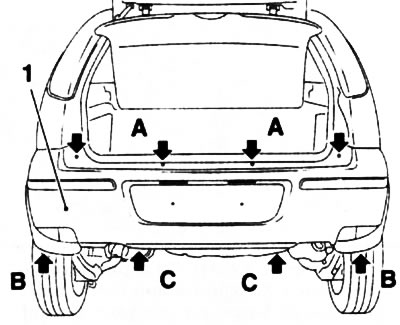
8.2. Pad fasteners (1) rear bumper: A. Upper mounting bolts; B. Bottom side mounting bolts; C. Pop rivets
3. Separate an overlay from a bumper and disunite sockets of electroconducting of a lantern of illumination of license plate and fog lamps. Remove the overlay.
4. Turn out 6 bolts and remove a beam of a back bumper (see resist. illustration).
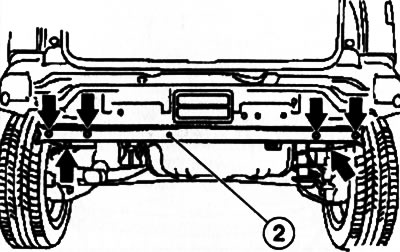
8.4. bolts (indicated by arrows) rear bumper mounts (2) (Corsa C models)
5. Installation is carried out in the reverse order. At installation it is necessary to use new fixing bolts and nuts.
Corsa Combo models
6. Remove the rear combination lights (see chapter 12).
7. Disconnect protection of back wheel arches from a lining of a bumper.
8. Remove the 2 upper spacer rivets, remove the 6 spacer rivets on the bottom of the car and unscrew the 2 lower fixing bolts (see resist. illustration). Remove the rear bumper cover with the help of an assistant.
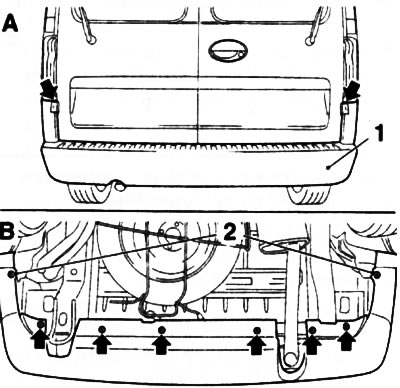
8.8. Pad attachment (1) rear bumper (Corsa Combo models)
9. Turn out 2 bolts and remove a beam of a back bumper.
10. Installation is carried out in the reverse order of removal. At installation it is necessary to use new fixing bolts and rivets.
Meriva Models
11. Loosen one nut each and remove one expansion rivet each (A) (see resist. illustration) and disconnect the protection of the rear wheel arches from the bumper cover.
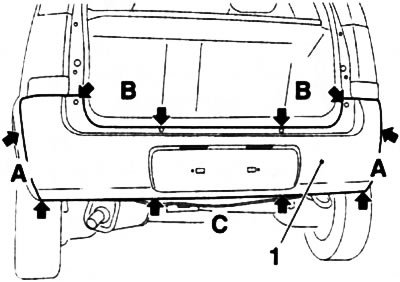
8.11. Pad attachment (1) rear bumper (Meriva models)
12. Open the tailgate, unscrew the 4 upper plastic bolts (IN) from the bumper cover, remove the 2 lower spacer rivets (WITH) (see illustration 8.11) and separate the trim from the rear bumper, if necessary, use the help of an assistant.
13. Disconnect the license plate light wiring connector and completely remove the trim.
14. Release 6 nuts and remove a beam of a back bumper.
15. Installation is performed in the reverse order of removal. At installation it is necessary to use new fixing nuts and rivets.
Visitor comments