


Contents: Corsa Models ⬇ Meriva Models ⬇
Corsa Models
1. Disconnect the fog light connector and open the hood.
2. First turn out the top 3 (see illustration 7.2a), and then the 4 lower ones (see illustration 7.2b) screws securing the front bumper trim, remove the 3 expansion rivets and separate the trim from the subframe.
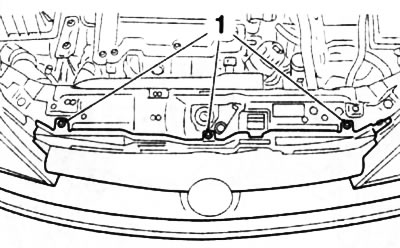
7.2a. Upper screws (1) for fastening the front bumper trim (corsa models) |
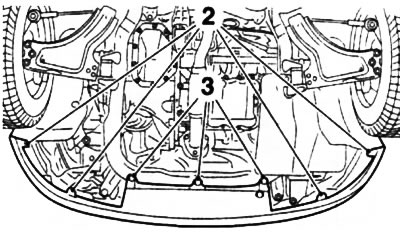
7.2b. Lower screws (2) and expansion rivets (3) for fastening the front bumper trim (corsa models) |
3. Loosen one nut at a time (see accompanying illustration) on the right and left wings.
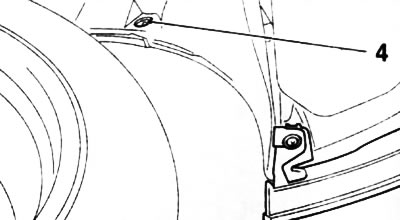
7.3. Wing mounting nut (4) (corsa models)
4. Press the fasteners and release the bumper cover from the front guides (see accompanying illustration), and with the help of an assistant, remove the overlay.
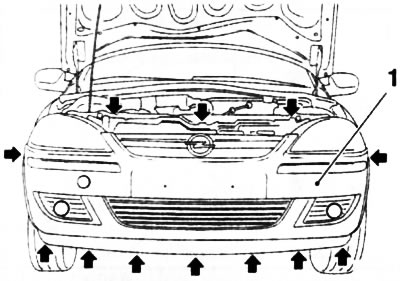
7.4. Attachment points (indicated by arrows) bumper pads (1) in front guides (corsa models)
5. Remove 10 mounting bolts (see accompanying illustration) and remove the front bumper beam from the side members.
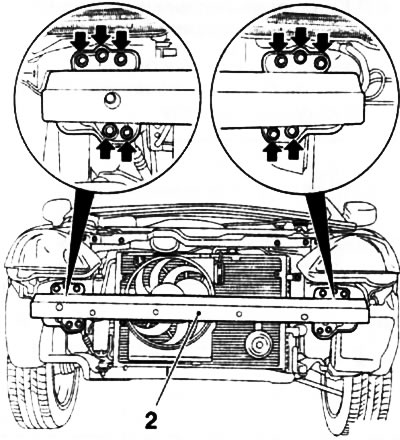
7.5. Bolts (indicated by arrows) front bumper mounts (2) (corsa models)
6. Installation is carried out in the reverse order. When installing the beam, it is necessary to use new fastening bolts.
Meriva Models
7. Disconnect the fog light connector and open the hood.
8. Remove 6 mounting bolts and 3 expansion rivets from the front suspension subframe (see accompanying illustration).
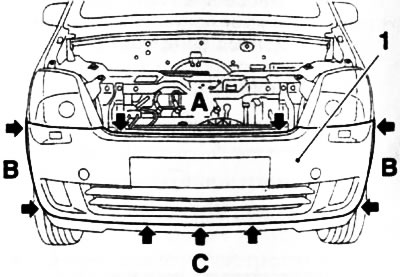
7.8. Fastening the front bumper cover (meriva models): A. Upper bolts; B. Side bolts; C. Expansion rivets
9. Press on the side edges of the bumper cover and release the cover from the side guides.
10. With the help of an assistant, release the bumper cover from the front guide and remove the cover.
11. Loosen the 10 mounting nuts (see accompanying illustration) and remove the front bumper beam from the side members.
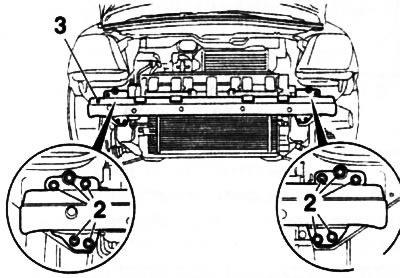
7.11. Nuts (2) for fastening the front bumper beam (3) (meriva models)
12. Installation is carried out in the reverse order. When installing the beam, it is necessary to use new fastening nuts.
Visitor comments