
Comment. The operation is shown on the example of replacing the bumper of the Astra model. On the Zafira model, the operation is similar.
Replacing the lower part of the decorative trim
Comment. The lower part of the bumper cover consists of two parts. The operation is shown on the left side. Replacing the right half is done in the same way.
1. We prepare the car for work (see «Preparing the car for maintenance and repair»).
2. Using a Phillips screwdriver, unscrew the screw of the side fastening of the lower part of the front bumper lining on the left side.
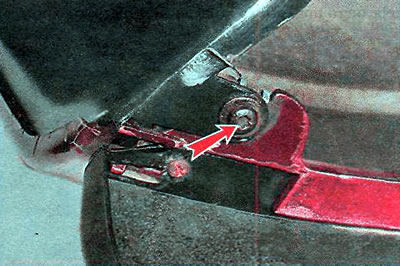
3. Using a Phillips screwdriver, unscrew the left bolt of the central mount.

4. Alternately, using a thin slotted screwdriver, we remove the four holders of the bumper lining from engagement with its lower part.
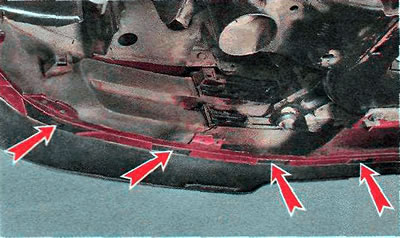
5. Remove the lower left side of the bumper cover.

6. Install the parts in reverse order.
Replacing the decorative trim and amplifier
1. We prepare the car for work (see «Preparing the car for maintenance and repair»).
2. Open the hood.
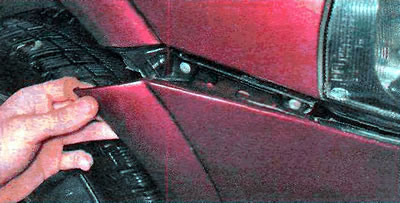
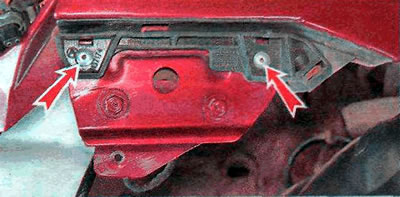
3. Using a Phillips screwdriver, unscrew the latch and remove the right upper front bumper trim holder.
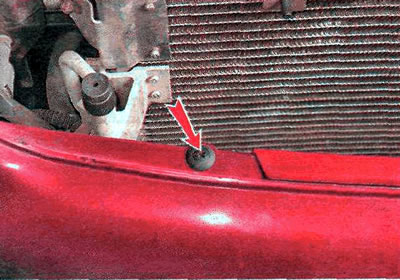
Remove the upper left holder in the same way.
4. Turn off the fastening of the left and right fender liner to the bumper (see «Front fender liner - removal and installation»).
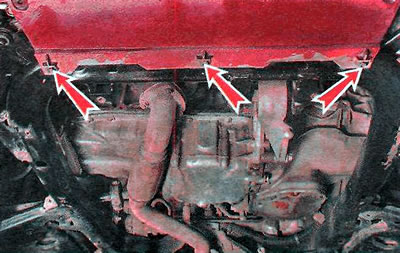
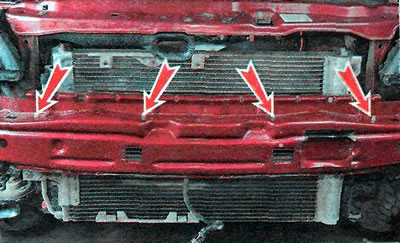
5. Using a Phillips screwdriver, unscrew the latches and remove the three lower holders of the front bumper lining.
6. If fog lights are installed, disconnect the wiring harness pads from them (see «Fog lamp - lamp replacement»).
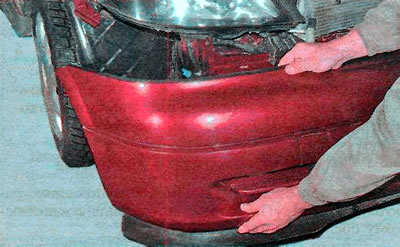
7. Overcoming the resistance of the clamps, we slightly move the side parts of the bumper lining to the side.
8. Pulling forward, remove the front bumper cover.
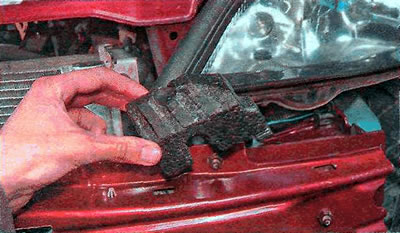
9. If it is necessary to replace the amplifier, remove the foam inserts from the right...
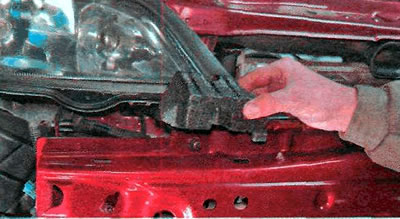
...and the left side.
10. Disconnect four wire harness holders from the amplifier.
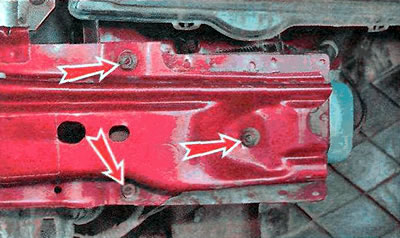
11. Using a 13 mm wrench, unscrew the three nuts securing the front bumper amplifier on the left and similarly on the right side.
12. If necessary, drill two rivets with a 10 mm drill and remove the side brackets.
13. Install the parts in reverse order. Before installation, check the condition of the latches and holders.
Visitor comments