
Rear door lock parts (Estate) - removal and installation
1. On later models, the rear door lock components have been modified and the removal and installation processes are as follows:
Lock cylinder
2. Open the rear door and remove the screws securing the outer trim molding to the lock cylinder (see photo 8.2).
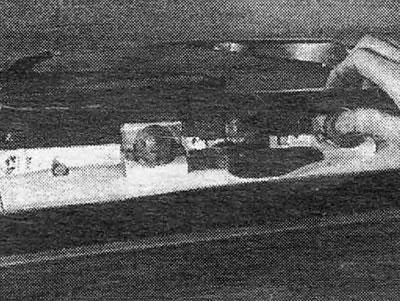
Photo 8.2 Remove the decorative molding located on top of the lock cylinder
3. Remove the rear door interior trim panel (see photo 8.3).
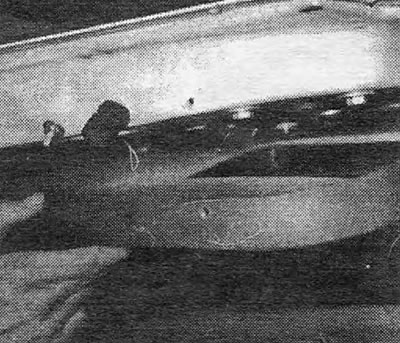
Photo 8.3 Remove the interior decorative panel of the rear door
4. Using pliers, release the return spring from the lock cylinder lever (see photo 8.4).
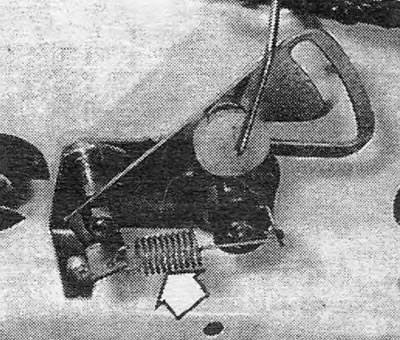
Photo 8.4 Release the return spring (indicated by an arrow) from the lock cylinder lever
5. Remove the spring clip and washer, then remove the lock cylinder lever from the end of the cylinder.
6. Unscrew the mounting nut and pull the lock cylinder out of the rear door.
7. Reinstallation is carried out by performing the above steps in reverse order.
Lock handle
8. Perform the actions described in steps 2 to 4.
9. Unscrew the mounting nut, remove the washer and disconnect the handle from the control lever and the rear door (see photo 8.9).
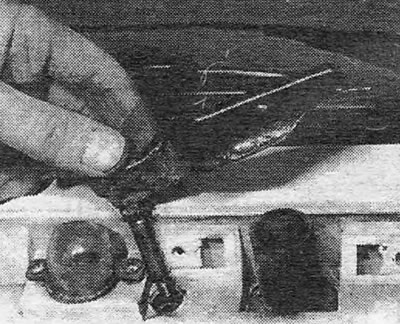
Photo 8.9 Removing the lock handle
10.Reinstallation is carried out by performing the above steps in reverse order.
Front seats (later models) - removal and installation
11. The mounting method of the front seats on later models has been modified, and the removal and installation processes are as follows.
12. Remove the front trim cap and rear plastic trim cap that cover the four bolts securing the seat rails to the floor.
13. Remove the two front bolts and two rear bolts, then remove the seat along with the runners. In cases where a heated seat system is installed, disconnect its electrical wiring plugs.
14. Reinstallation is carried out by performing the above steps in reverse order.
Visitor comments