
Cars with 4-cylinder engine
Attention! When installing, you will need new bolts securing the main bearing caps.
1. Remove the oil pump and flywheel/drive plate (see Part B).
2. Remove piston/rod assemblies as described in Chapter 9. If the pistons/connecting rods do not need repair, loosen the cap bolts and push the pistons out just enough so that the connecting rods do not touch the crankshaft journals.
3. On older DOHC engines with a split sump, gradually loosen the remaining bolts and remove the main bearing cap hold-down frame from the base of the block. Discard the mounting bolts; they are to be replaced.
4. Check the end play of the crankshaft as described in Chapter 13, then proceed as follows.
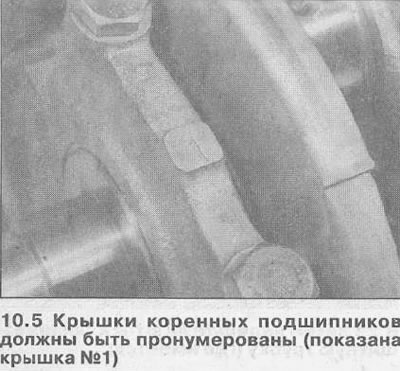
5. Main bearing caps should be numbered 1 to 5. #1 cap closest to toothed drive belt (see illustration).
Attention! On some engines, the bearing cover near the flywheel/drive plate (№5) You don't have to label it as it's easy to identify. If necessary, make marks on the covers yourself, so as to indicate the correct orientation and not mix up during installation.
6. In diagonal sequence, evenly loosen the ten main bearing cap bolts half a turn at a time, then remove all bolts.
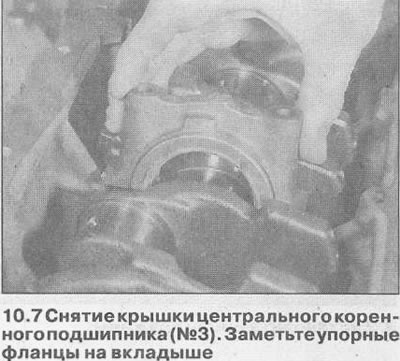
7. Carefully remove each cover from the cylinder block, making sure that the lower main bearing remains in place in the cover (see illustration).
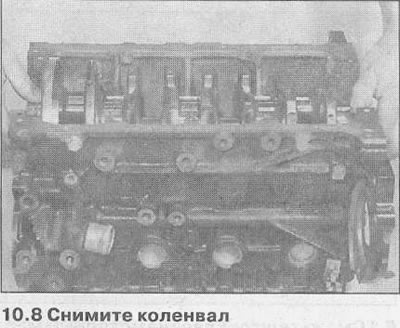
8. Carefully raise the crankshaft, making sure that the upper main bearings do not move (see illustration). Remove the oil seal from the flywheel/drive plate side.
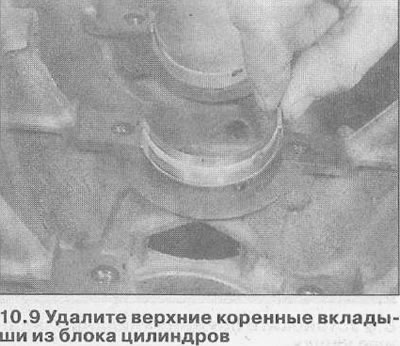
9. Remove the upper bearing shells from the cylinder block, and tape them to the appropriate covers (see illustration).
Vehicles with a 6-cylinder engine
Attention! At installation use new bolts of fastening of covers of radical bearings.
10. Remove the oil pump and flywheel/drive plate as described in Parts In This Section.
11. Remove piston/rod assemblies as described in Chapter 9. If the pistons/connecting rods do not need repair, unscrew the covers and push the pistons into the cylinders just enough so that the connecting rods do not touch the crankshaft journals.
12. Check the end play of the crankshaft as described in Chapter 13, then proceed as follows.
13. Before removing, check that the mark on the clamping frame of the main bearing caps is clearly visible (the arrow should point towards the front end of the engine).
14. Turn the cylinder block over with the crankcase up, loosen and remove the four bolts securing the pressure frame of the main bearing caps to the cylinder block.
15. Working in a diagonal sequence, gradually loosen the eight main bearing cap bolts half a turn at a time, then remove the bolts and remove the cap hold-down frame from the cylinder block.
16. Main bearing caps should be numbered 1 through 3. Cap #1 is closest to the toothed drive belt; the bearing cap near the flywheel/drive plate need not be marked as it is easy to identify. If necessary, make marks on the covers yourself, so as to indicate the correct orientation and not mix up during installation.
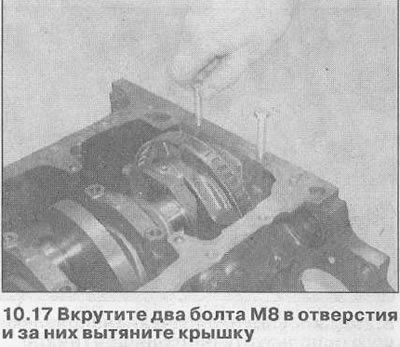
17. Carefully remove each cover from the cylinder block, making sure that the lower main bearing remains in the cover. If the back cover is tight and cannot be removed, insert two M8 bolts into the holes and pull the cover out (see illustration).
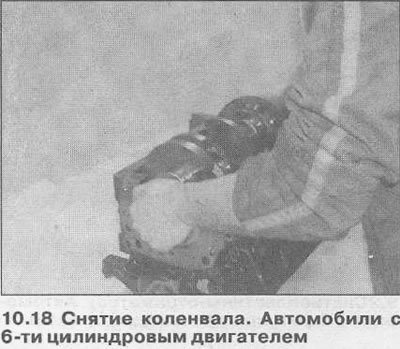
18. Gently raise the crankshaft, making sure that the upper main bearings do not move (see illustration). Remove the crankshaft oil seal from the flywheel/drive plate side, it must be replaced.
19. Remove the upper liners from the cylinder block, and tape them to the appropriate covers.
Visitor comments