
Attention! It is recommended to install new main bearings, regardless of the condition of the previous ones.
Earbud selection
1. Although different grades of liners may be installed at the factory, they are all commercially available. Opel supplies bearings in nominal and oversize sizes. The bearing size can be determined by measuring the crankshaft journal (see Chapter 13).
Checking the operating clearance of the main bearing
2. Clean the reverse side of the liners and the bearing surfaces of the liners in the cylinder block and in the covers.
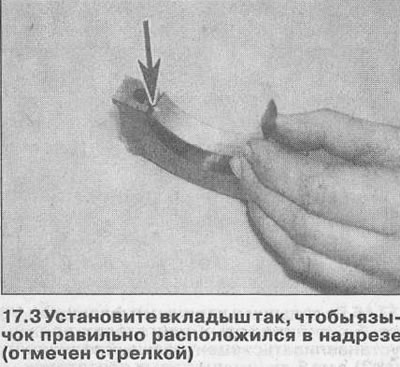
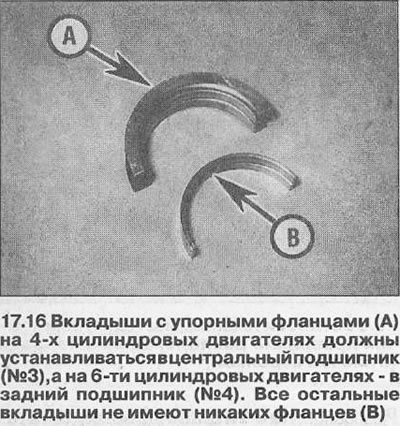
3. Insert the liners into the covers and into the cylinder block, making sure that the tab on the liner fits into the corresponding recess (see illustration). If old liners are used for testing, make sure that they are installed strictly in their original place. When installing new bearings on 6-cylinder engines, note that bearing #1 is wider than bearings #2 and #3 and that grooved bearings #2 and #3 must be installed on top (into the cylinder block). The gap can be determined in one of two ways.
4. First method (internal micrometers or calipers required) - Install the main bearing caps on the cylinder block with liners in the working position. Tighten the cap bolts to the specified torque and measure the diameter of the hole formed by each pair of bushings (bearing inner diameter). Measure the diameter of each crankshaft journal and subtract it from the inside diameter of the bearing. The result obtained is equal to the working clearance of the main bearing.
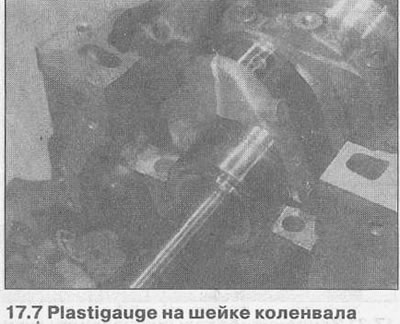
5. Second (and more accurate) the method consists in using a special Plastigauge tool. The tool consists of a scale and plastic threads of round cross section. The procedure using Plastigauge is as follows.
6. Place the upper main bearing shells in operating position and carefully lower the crankshaft into the crankcase. Do not use any lubricant, the crankshaft journals and bearings must be absolutely clean and dry.
7. Cut a few pieces of Plastigauge thread to the right size (they should be slightly shorter than the width of the main bearings) and place a piece on each neck (see illustration).
8. Replace the covers with inserts. Be careful not to dislodge the Plastigauge. On 6-cylinder engines, also install the main bearing cap clamping frame (the arrow on the frame must point towards the front end of the engine).
9. Install the mounting bolts and tighten them with a tightening torque (see the specifications in the relevant section), and then tighten to the desired angle (see paragraphs 22 and 23). Do not rotate the crankshaft during this operation. Remove the bolts and carefully remove the main bearing caps.
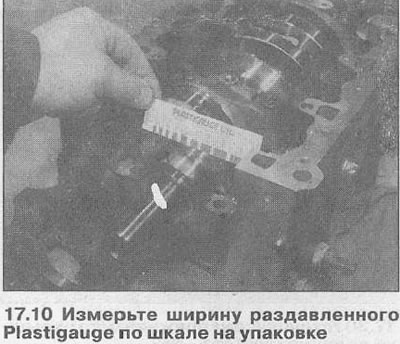
10. Compare the width of the deformed thread with the scale. The working clearance is indicated on the scale (see illustration). Compare the result with the data given in the Specifications (see Sections 2A and 2B).
11. If the gap is too large, the bearings may not be the correct size, or they may be excessively worn (if old liners are reused). Before deciding that the crankshaft is worn, make sure that no dirt or oil has entered between the bearing shells and the caps or block when measuring the clearance. If one end of the Plastigauge is wider than the other, the crankshaft journal may be tapered.
12. Before deciding to replace components, seek advice from an Opel dealer or engine rebuilder.
13. If necessary, purchase bearings of the correct size, and recheck the operating clearance as described above.
14. Finally, carefully clean all traces of Plastigauge from the crankshaft and liners.
Installing the crankshaft
Cars with 4-cylinder engine
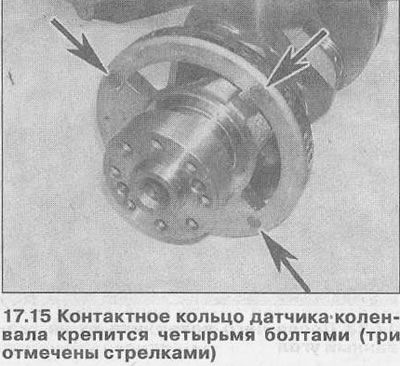
15. Carefully lift the crankshaft out of the cylinder block. If a new crankshaft is installed, do not forget to rearrange the sensor slip ring from the old one to it. Fasten the sensor with new fastening bolts, clamping them with the tightening force regulated by the Specifications (see illustration).
16. Place the earbuds in their places as described above in points 2 and 3 (see illustration). If new bearings are installed, remove protective grease from them. Wipe the earbuds and covers tightly (lint-free) cloth.
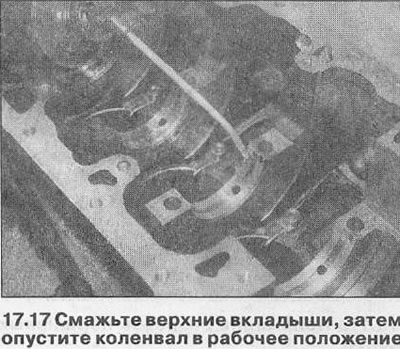
17. Lubricate the upper bearings, then lower the crankshaft into place in the crankcase (see illustration).
18. Then check the end play as described in Chapter 13.
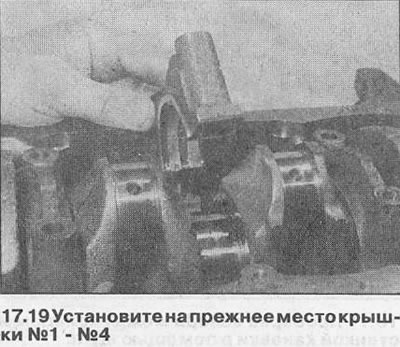
19. Insert the liners into the covers, then install the covers into the cylinder block (see illustration). Make sure that they are installed strictly in the same place.
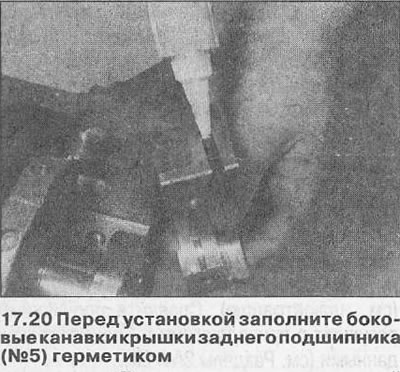
20. Clean the surface of the rear bearing cap (№5), then fill the groove on each side of the cover with sealant (Opel recommends using sealant 15 03 295) (see illustration). Install the cover into the crankcase, orienting it correctly.
21. Apply a small amount of oil to the threads of the main bearing cap bolts. Tighten all bolts by hand (see illustration).

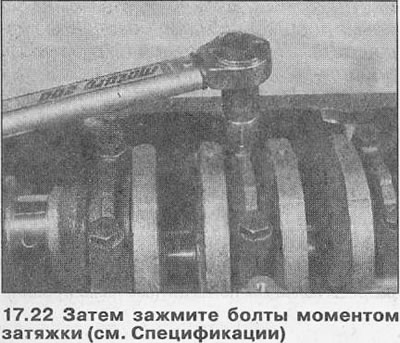
22. Working in diagonal sequence from center out, tighten the main bearing cap bolts to Stage 1 torque (see specs) (see illustration).
23. Then again, in the same sequence, tighten all the bolts to the specified angle (see Specifications in the relevant section).

24. After all the bolts are tightened, inject more sealant into the grooves in the rear main bearing cap.
25. Make sure the crankshaft rotates freely; if necessary, determine the cause before proceeding.
26. On early engines with double overhead camshafts (DOHC) and two-piece pan, clean the contact surfaces, then install the main bearing cap hold-down frame on the block. Insert new mounting bolts into the central holes and tighten them first with a torque (see specs), and then - tighten to the angle specified in the Specifications.
27. On all engines, install the connecting rod/piston assemblies as described in Chapter 18.
28. Guided by Part B (DOHC engine), install a new crankshaft oil seal, then install the flywheel/drive plate, oil pump, cylinder head, sprocket (ki) drive belt and a new toothed drive belt.
Vehicles with a 6-cylinder engine
29. Install the crankshaft as described in paragraphs 15-18.
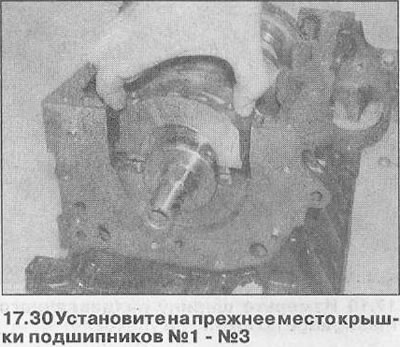
30. Install the liners in the covers, then install the covers 1-3 in the cylinder block (see illustration).
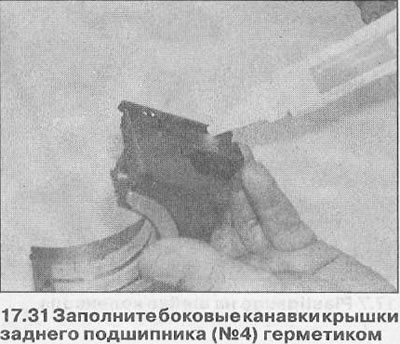
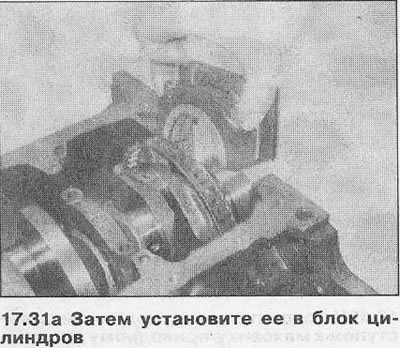
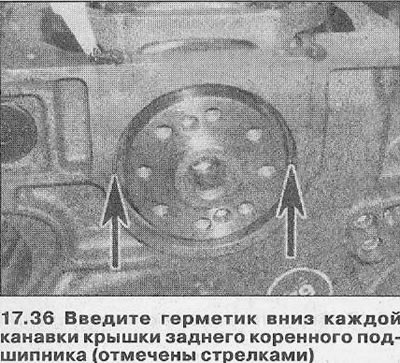
31. Clean the rear bearing cap, then fill the groove on each side of the cap with sealant (Opel recommends using sealant 15 03 295). Install the bearing cap into the crankcase, orienting it correctly (see illustrations).
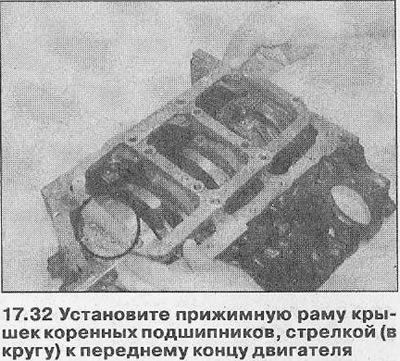
32. Unscrew the threaded couplings so that they do not protrude out of the clamping frame of the main bearing caps, then install the frame, arrow to the front end of the engine (see illustration).
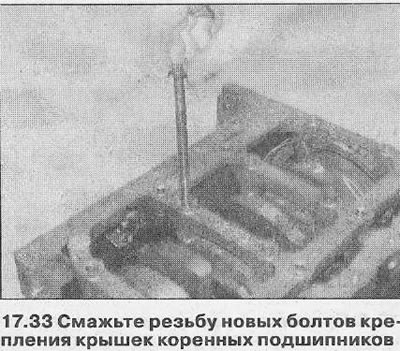
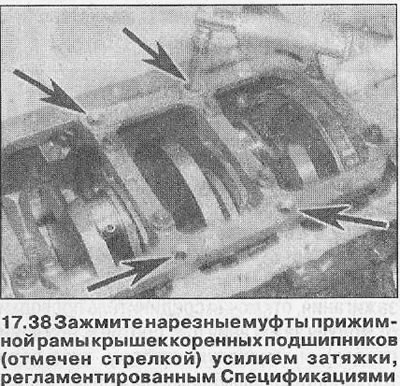
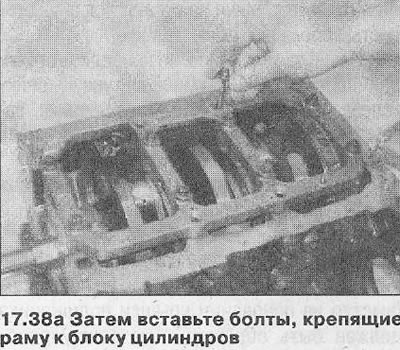
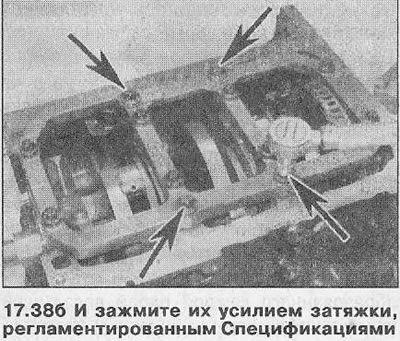
33. Lubricate the threads of the new main bearing cap bolts (see illustration). Insert the bolts and tighten them by hand.
34. Working in a diagonal sequence from the center outwards, evenly and gradually tighten the main bearing cap bolts to the torque (see specs) (see illustration).

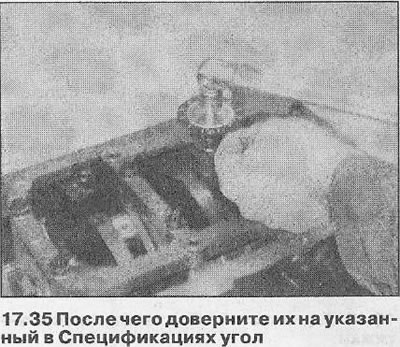
35. Then again, in the same sequence, tighten all the bolts to the specified in Specifications corner (see illustration).
36. After all the bolts are tightened, inject more sealant into the grooves in the rear main bearing cap. Then wipe off excess sealant with a clean cloth.
37. Make sure the crankshaft rotates freely; if necessary, determine the cause before proceeding.
38. Screw the threaded couplings into the clamping frame of the main bearing caps, and tighten them with a tightening torque regulated specifications. Then insert the bolts securing the frame to the cylinder block, and tighten them with a tightening force regulated specifications (see illustrations).
39. Install the connecting rod/piston assemblies as described in Chapter 18.
40. Guided Part B, install a new crankshaft oil seal, then install the flywheel/drive plate, oil pump, cylinder heads, timing belt sprockets, and drive belt itself.
Visitor comments