OpelBook.ru
Cars AvtoVAZ Cars Mitsubishi Cars BMW Cars Mercedes Cars Nissan Cars Toyota Cars Chevrolet
English Русский
Български
Беларускі
Український
Српски
Hrvatski
Română
Polski
Slovenský
Magyar
 |  Sitemap  |  Contacts  |    


Main Astra Corsa Insignia Kadett Omega Vectra Zafira Others Articles
Astra F (1991-1998, petrol) Astra G (1998-2004, petrol) Astra G (1998-2004) Astra H (2004-2009) Astra J (2009-2015, petrol)
  • Main
  • Astra
  • Astra F
  • Power unit
  • Engine removed
  • Crankshaft — Installation and Checking the Main Bearing Clearance

Crankshaft — Installation and Checking the Main Bearing Clearance (Opel Astra F)

            0

Contents: Checking the main bearing clearance ⬇ Final installation of the crankshaft ⬇
Installing the crankshaft is the first step in the engine assembly process. At this stage, the cylinder block and crankshaft are cleaned, inspected, and machined as required.

Install the cylinder block so that its mating surface with the oil pan is facing up.

Checking the main bearing clearance


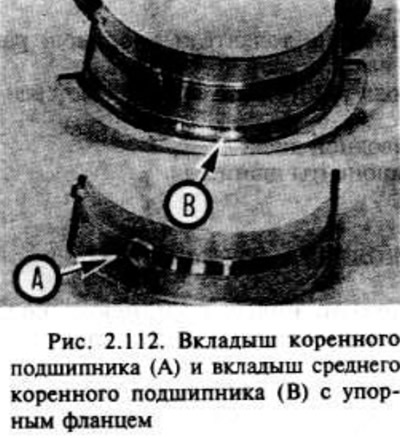
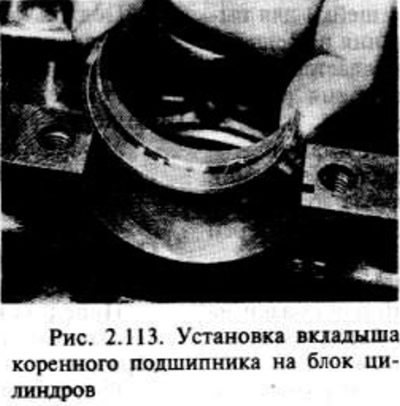
Clean the bearing shells and the recesses of the working surfaces in both the cylinder blocks and the main bearing caps. If new shells are installed, make sure that all traces of protective grease are removed. Wipe the bearing shells dry with a lint-free cloth.
Clean the bearing shells and the recesses of the working surfaces in both the cylinder blocks and…


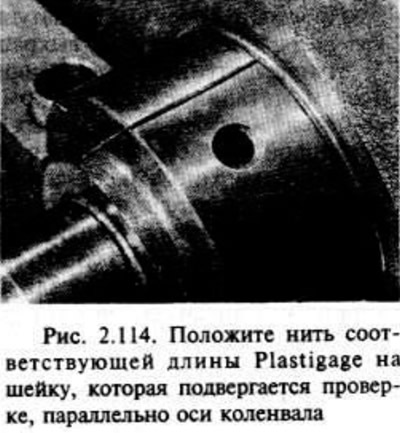
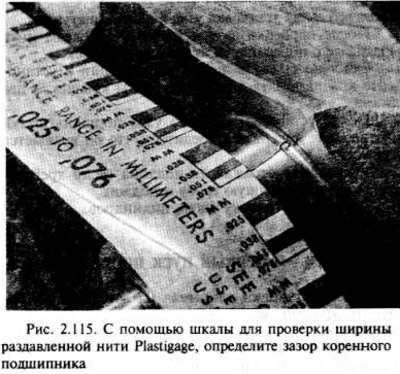
Before installing the crankshaft, it is necessary to check the main bearing clearances, which can be done in two ways. First, you can install the main bearing caps in the cylinder block together with the bearing shells. After tightening the cap with the old bolts to the required tightening torque, measure the inside diameter of each assembled pair of bearing shells using a dial indicator or micrometer. If you measure the diameter of each crankshaft journal and then subtract it from the shell diameter, you will get the value of the main bearing operating clearance. Second (and more accurate) the method involves using an American product called Plastigage. It consists of a thin thread of perfectly round plastic material that is compressed between the bearing shell and the crankshaft journal. The deformed plastic material can be measured using a special scale supplied with the Plastigage kit.


Before installing the crankshaft, it is necessary to check the main bearing clearances, which can…


Before installing the crankshaft, it is necessary to check the main bearing clearances, which can…


Text was copied from the portal [OpelBook.ru]

Compare the width of the deformed Plastigage thread on each journal to the scale to determine the main bearing clearance.

Compare the width of the deformed Plastigage thread on each journal to the scale to determine the…


Carefully remove all traces of Plastigage from the crankshaft and bearing shells.
Carefully remove all traces of Plastigage from the crankshaft and bearing shells.

Carefully remove all traces of Plastigage from the crankshaft and bearing shells.

Carefully remove all traces of Plastigage from the crankshaft and bearing shells.


Final installation of the crankshaft


Carefully remove the crankshaft from the cylinder block.

Lubricate the lips of the new rear crankshaft oil seal and rotate it on the rear of the crankshaft. Do this carefully, the sealing lips are easily damaged. Make sure the open side of the seal faces the inside of the engine.

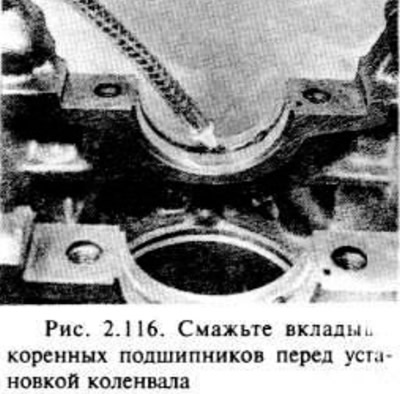
Generously lubricate each bearing shell in the cylinder block and lower the VAZ crankshaft into place. Check the correct installation of the rear oil seal.

When seating the crankshaft, you can carefully tap it with a soft-shell hammer on the counterweight cheeks.

Lubricate the bearing shells, crankshaft journals, then install bearing caps NN 2, 3 and 4 and tighten the new bolts by hand as much as possible.

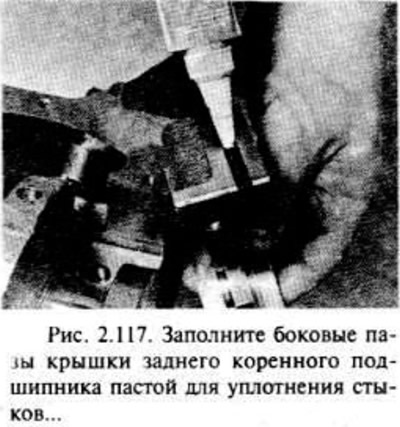
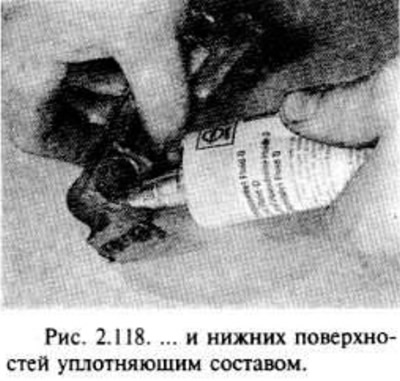
Fill the side grooves of the front covers (if required) and rear main bearings with joint sealing paste (vauxhall/Opel paste pan N 15 03 294 or equivalent) and apply sealing compound Vauxhall/Opel part N 15 04 201 or equivalent to the undersides of the bearing caps). Fit the bearing caps and tighten the new bolts finger tight as far as possible. Ensure that the front main bearing cap is flush with the end face of the cylinder block.

Working from the center main bearing cap outward, tighten the bearing cap bolts to specification in two stages.

After all bolts have been tightened completely, squeeze more sealing paste into the side grooves of the front wheel covers (if required) and rear main bearings and check that they are filled with paste.

Now you can turn the crankshaft and make sure that it rotates freely without jamming.


Check the crankshaft offset along the axis.

Install the pistons and connecting rods.

Install the oil pump.

Install the sump deflector (if required), oil supply pipe and sump.

Install the cylinder head.


This article is available at russian, bulgarian, belarusian, ukrainian, serbian, croatian, romanian, polish, slovak, hungarian
Checking the article: Trifonova Emilia

Share information:

Previous articles
Opel Astra F: Engine removed
Next articles

Piston rings — installation
Engine Repair — Assembly Sequence
Main and connecting rod bearings — inspection
Crankshaft — inspection
Piston/Connecting Rod Assembly — Inspection
Cylinder Block/Crankshaft — Cleaning and Inspection
Piston/Connecting Rod Assembly — Installation and Clearance Check
Engine — first start after repair
Exhaust gas toxicity control


See similar ones from other Opel car manuals:
▶ Crankshaft — installation and checking of main bearing… Opel Omega B2 (1999-2003)
▶ Installing the crankshaft and checking the main bearing… Opel Corsa B (1993-2000)
▶ Checking the clearance in the crankshaft main bearings Opel Insignia A (2008-2017)
▶ Checking the diametrical clearance between the bearings and… Opel Kadett E (1984-1995)
▶ Checking the wheel bearing clearance Opel Vectra B (1995-2002, petrol)
Link to this page in different formats

Visitor comments


No comments yet


How much will 49 + 36 =


Astra J (2009-2015, petrol) 
  • General information
  • Vehicle device
  • User manual
  • Faults en route
  • Maintenance
  • Power unit
  • Engine repair
  • Cooling and lubrication system
  • Engine power system
  • Exhaust system
  • Transmission
  • Clutch
  • Car gearbox
  • Drive shafts
  • Chassis
  • Front suspension
  • Rear suspension
  • Steering
  • Brake system
  • Wheels and tires
  • Body
  • Exterior
  • Interior
  • Doors and windows
  • Body Care
  • Heating and air conditioning
  • Security systems
  • Electrical equipment
  • Equipment and devices
  • Lighting and signaling
  • Power devices
  • Electrical circuits
Astra H (2004-2009) 
  • General information
  • Introduction to the guide
  • Troubleshooting
  • User manual
  • Maintenance
  • Power unit
  • Engine repair
  • Cooling and heating
  • Power and exhaust system
  • Ignition system
  • Launch and charge system
  • Transmission
  • Mechanical gearbox
  • Automatic gearbox
  • Drive shafts
  • Chassis
  • Brake system
  • Car suspension
  • Steering
  • Body
  • Interior
  • Exterior
  • Electrical equipment
  • Equipment and devices
  • Electrical circuits
Astra G (1998-2004) 
  • General information
  • Introduction to manual
  • User manual
  • Maintenance
  • Power unit
  • SOHC gasoline engines
  • DOHC gasoline engines
  • Diesel engines 1.7 and 2.0
  • Engine repair
  • Cooling system
  • Supply system
  • Injection system (gasoline)
  • Injection system (diesel)
  • Exhaust system
  • Charge and launch system
  • Ignition system (gasoline)
  • Preheat system (diesel)
  • Transmission
  • Manual gearbox
  • Automatic gearbox
  • Clutch
  • Drive shafts
  • Chassis
  • Brake system
  • Wheel suspension
  • Steering
  • Body
  • Exterior
  • Interior
  • Doors and windows
  • Ventilation and heating
  • Electrical equipment
  • Equipment and devices
  • Electrical circuits
Astra G (1998-2004, petrol) 
  • General information
  • User manual
  • Car care
  • Maintenance
  • Power unit
  • Single shaft engines
  • Twin shaft engines
  • Engine repair
  • Cooling and heating
  • Fuel and exhaust systems
  • Starting and charging system
  • Ignition system
  • Transmission
  • Clutch
  • Mechanical gearbox
  • Automatic gearbox
  • Drive shafts
  • Chassis
  • Brake system
  • Car suspension
  • Steering
  • Body
  • Interior
  • Exterior
  • Electrical equipment
  • Equipment and devices
  • Wiring diagrams Opel Astra
  • Wiring diagrams Opel Zafira
Astra F (1991-1998, petrol) 
  • General information
  • Maintenance
  • Power unit
  • Engine in car
  • Engine removed
  • Cooling system
  • Heating and ventilation
  • Fuel supply (carburetor)
  • Fuel supply (injector)
  • Emission control
  • Ignition system
  • Transmission
  • Clutch
  • Mechanical gearbox
  • Automatic gearbox
  • Drive shafts
  • Chassis
  • Brake system
  • Car suspension
  • Steering
  • Body
  • Exterior
  • Interior
  • Electrical equipment
  • Equipment and devices
  • Electrical circuits
OpelBook.ru © 2017–2026 · Mobile version · · Sitemap: EN BG BY UA RS HR RO PL SK HU · Feedback · Site search
Astra F, petrol · Astra G, petrol · Astra G · Astra H · Astra J, petrol · Corsa B · Corsa C, petrol · Corsa C · Insignia A · Kadett D · Kadett E · Omega A · Omega B · Omega B2 · Vectra A, petrol · Vectra A · Vectra B, petrol · Vectra B · Vectra C · Zafira A, petrol · Frontera A, petrol · Frontera B · Ascona C · Vivaro A ·
We want your visit to be comfortable 🤝! We use cookies 🍪 to make that happen.