


Contents: Removal the air filter housing ⬇ Removal the front timing belt cover ⬇ Removal the right engine cowling ⬇ Setting the crankshaft to the top…⬇ Installing components ⬇
Removal the air filter housing
Open the hood.
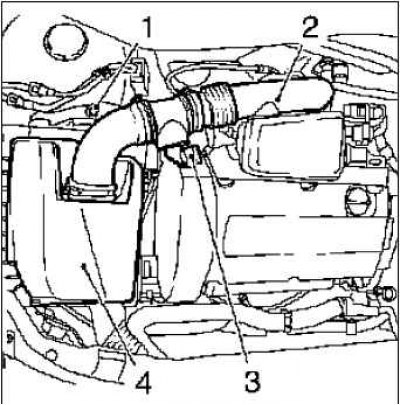
Components removed when dismantling the air filter: 1 – mounting bolt; 2 – intake manifold; 3 – Mass air flow sensor wiring harness connector; 4 – air filter housing
Note: Before the inspection procedure, warm up the engine to operating temperature (oil temperature – 80°C).
Loosen the mounting nut and disconnect the ground wire from the battery.
Remove the air filter housing and intake manifold.
Disconnect the MAF sensor wiring harness connector.
Loosen the mounting bolt, remove the clamp and the air filter inlet pipe.
Removal the front timing belt cover
Remove the two mounting bolts, detach the upper latch and remove the front timing belt cover (top).
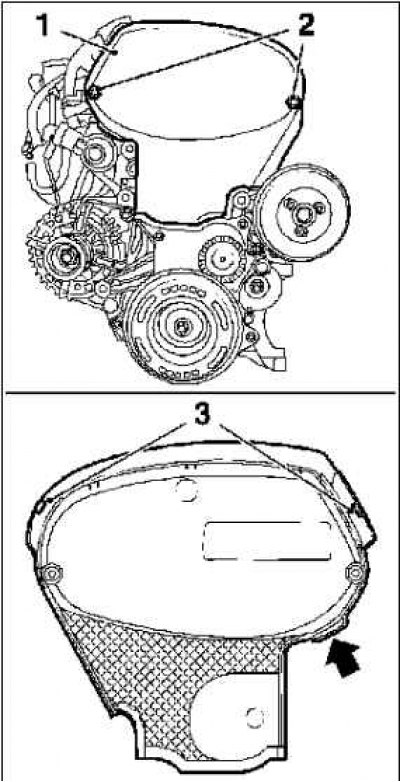
Fastening the front timing belt cover: 1 – front timing belt cover; 2 – mounting bolts; 3 – latches
Note: Pull the front timing belt cover upwards by the lug (arrow in the picture).
Remove the ignition module cover in the direction of the arrow shown on it.
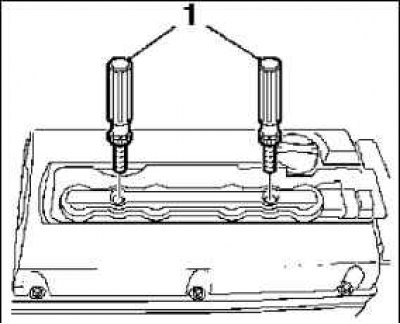
Removing the ignition module cover: 1 – mounting bolts
Note: Mark the position of the arrow on the cover.
After unscrewing 2 bolts, remove the spark plugs using the special tool KM 6009.
Remove the coolant expansion tank cap.
Remove the oil dipstick.
Raise the car.
Removal the right engine cowling
Unscrew the 4 mounting bolts and remove the right engine mudguard.
Remove the two rivets installed on the body.
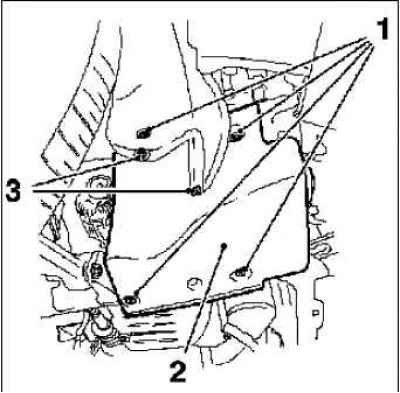
Components removed when dismantling the cylinder head cover: 1 - right engine mudguard; 2 – mounting bolts; 3 – rivets
Setting the crankshaft to the top dead center (TDC) position of the piston of cylinder No.1
Turning the engine crankshaft in the direction of rotation, set the piston of cylinder No.1 to the top dead center (TDC) position (mark 1).
Lower the car.
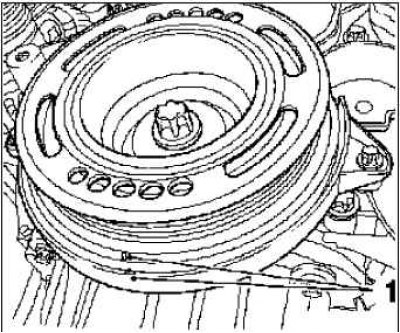
Setting the crankshaft to the top dead center (TDC) position of the piston of cylinder No.1: 1 – marks
Place 3 marks on one of the camshaft gears and align the marks on both gears.
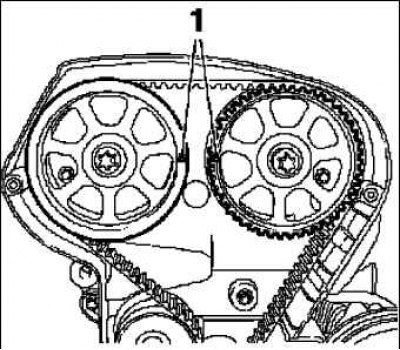
Alignment of marks on camshaft gears: 1 – marks
Each mark must be offset by 90° relative to the adjacent mark.
Connect the pressure drop tester to the compressed air supply system.
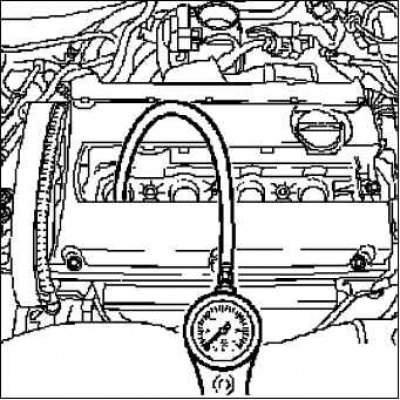
Calibrate the pressure drop tester.
Engage first gear and apply the parking brake.
Note: The wheels must be in contact with the ground.
Screw the connecting piece into the threaded hole of the spark plug of cylinder No.1.
Apply compressed air to the cylinder.
Checking the pressure drop
Determine the value of the pressure drop.
The maximum permissible pressure difference between cylinders is approximately 10%.
Maximum pressure loss in the cylinder is 25%.
Note: Watch for any visible compressed air leaks in the intake and exhaust manifolds and crankcase.
Note: Watch out for bubbles in the coolant expansion tank.
Turn the crankshaft 180° in the direction of engine rotation (corresponds to 90° of rotation of the camshaft gear) and set the piston of cylinder No.3 to the top dead center (TDC) position (pre-marked).
Connect the pressure drop tester.
Screw the connecting piece into the threaded hole of the spark plug of cylinder No.3 and supply compressed air to the cylinder.
Determine the value of the pressure drop.
The maximum permissible pressure difference between cylinders is approximately 10%.
Maximum pressure loss in the cylinder is 25%.
Turn the crankshaft 180° in the direction of engine rotation (corresponds to 90° of rotation of the camshaft gear) and set the piston of cylinder No.4 to the top dead center (TDC) position (pre-marked)
Connect the pressure drop tester.
Screw the connecting piece into the threaded hole of the spark plug of cylinder No.4 and supply compressed air to the cylinder.
Determine the value of the pressure drop.
The maximum permissible pressure difference between cylinders is approximately 10%.
Maximum pressure loss in the cylinder is 25%.
Turn the crankshaft 180° in the direction of engine rotation (corresponds to 90° of rotation of the camshaft gear) and set the piston of cylinder No.2 to the top dead center (TDC) position (pre-marked)
Connect the pressure drop tester.
Screw the connecting piece into the threaded hole of the spark plug of cylinder No.2 and supply compressed air to the cylinder.
Determine the value of the pressure drop.
The maximum permissible pressure difference between cylinders is approximately 10%.
Maximum pressure loss in the cylinder is 25%.
Installing components
Raise the car.
Install the engine splash guard.
Lower the car.
Insert the oil dipstick into the hole.
Install the coolant expansion tank cap.
Install the spark plugs using the special tool KM 6363 and tighten to a torque of 25 Nm.
Install the ignition module, replacing the 4 gaskets.
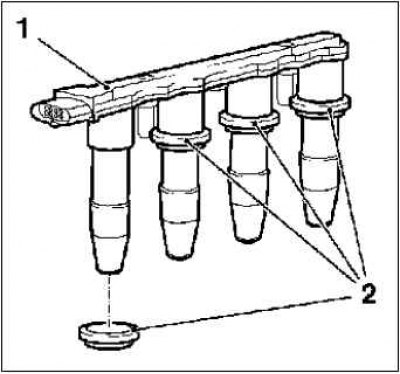
Tighten the two mounting bolts to 8 Nm.
Install the ignition module cover.
Install the front timing belt cover.
Attention! Check that the cover is installed correctly.
Tighten the two cover mounting bolts to 6 Nm.
Install the air filter housing, tighten the mounting bolt and secure the clamp with a torque of 3.5 N·m.
Install the inlet pipe.
Connect the air flow sensor wiring harness connector.
Connect the battery.
Tighten the terminal mounting nut.
Program the transient memory.
Close the hood.
Visitor comments