
OpelBook.ru
Cars AvtoVAZ Cars Mitsubishi Cars BMW Cars Mercedes Cars Nissan Cars Toyota Cars Chevrolet
English Русский
Български
Беларускі
Український
Српски
Hrvatski
Română
Polski
Slovenský
Magyar
 |  Sitemap  |  Contacts  |    


Main Astra Corsa Insignia Kadett Omega Vectra Zafira Others Articles
Vectra A (1988-1995, petrol) Vectra A (1988-1995) Vectra B (1995-2002, petrol) Vectra B (1995-2002) Vectra C (2002-2008)
  • Main
  • Vectra
  • Vectra A
  • Power unit
  • Engine repair
  • Removal and installation valves

Removal and installation valves (Opel Vectra A)

            0

Petrol engines and diesel engines with a capacity of 1.7 liters


Attention! If the removed valve mechanism parts are supposed to be reused, they must be installed in their places. To avoid mixing up the parts, they should be stored in marked cells of a special box (you can make it yourself from, for example, a cardboard box).


Removal
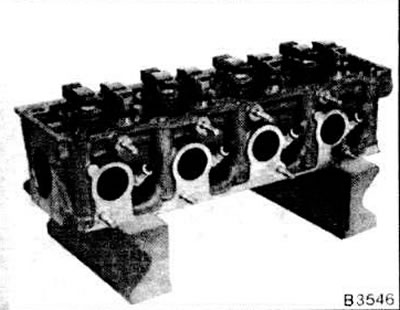


Removal


Remove the cylinder head and place it on wooden blocks.

Remove the rocker arms, tappets and hydraulic valve clearance compensators.

Remove the intake and exhaust manifolds.

Mark valves before disassembling.
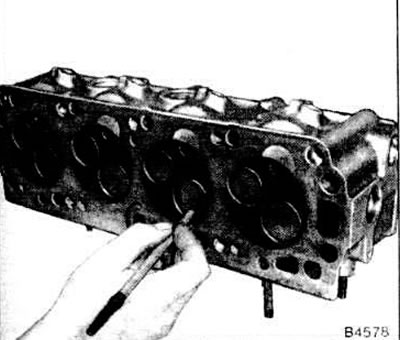
Mark valves before disassembling.


Remove the valves using a spring compressor. Compress the spring and remove the crackers. Then release the spring and remove the valve.
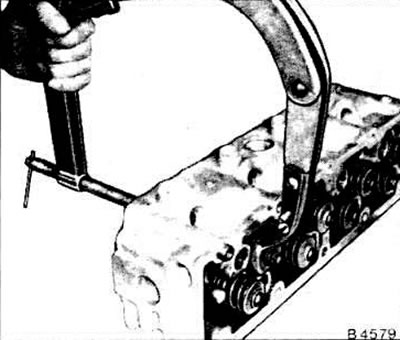
Remove the valves using a spring compressor. Compress the spring and remove the crackers. Then…


Remove the oil seal with a screwdriver.
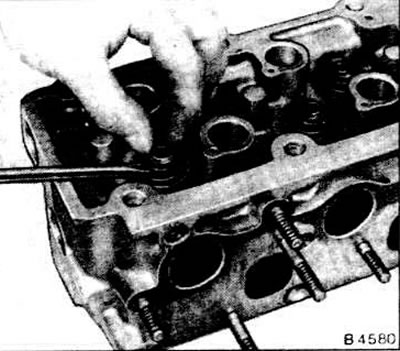


Remove the oil seal with a screwdriver.


Remove the exhaust valve rotator and the inlet valve steel washer.

Installation


Before installation, the valves and their seats are ground if necessary.

Grind the valves.

Before installing the valves, be sure to check the clearance in the guide bushings.
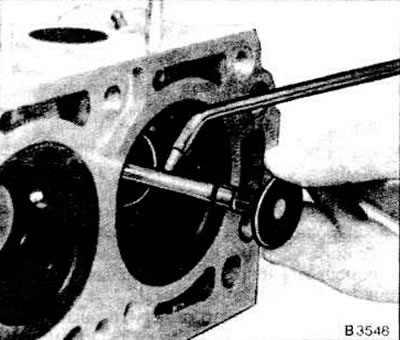
Before installing the valves, be sure to check the clearance in the guide bushings.


Before installing the valves, lubricate their stems with engine oil.

Insert the valves into the guide bushings. Install all parts in their original places.

Attention! Do not confuse the inlet and outlet valves!
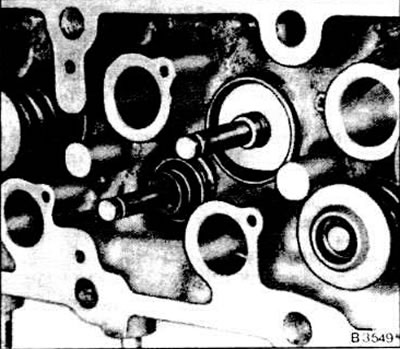

Attention! Do not confuse the inlet and outlet valves!


Install a rotary device on the outlet valve.


Install new valve stem seals.
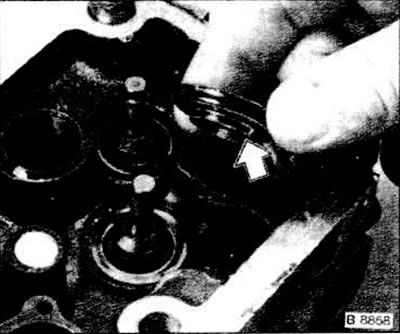
Install new valve stem seals.


Install the intake valve adjusting washer and oil seal into the recess as shown in the figure.
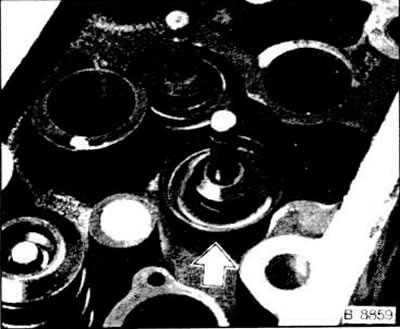
Install the intake valve adjusting washer and oil seal into the recess as shown in the figure.


Check the correct position of the adjusting washer (see arrow in fig.B8858).
Check the correct position of the adjusting washer (see arrow in fig.B8858).


Attention! If the inlet valve adjusting washer is installed incorrectly, the height of its spring is reduced by 2.6 mm.


The consequence of this is that the spring is displaced towards the cylinder block, which leads to damage to the camshaft.

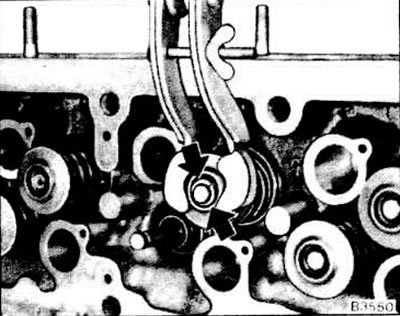
Install the springs and valves in place.

Compress the springs using the device and insert the crackers (see fig.B3550).

Move the springs apart.
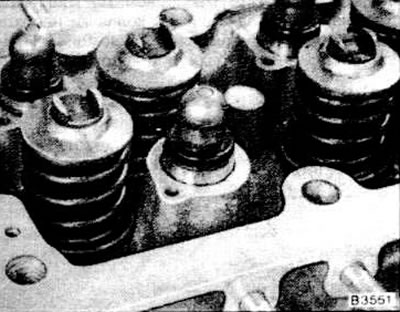
Move the springs apart.


Insert hydraulic clearance compensators.
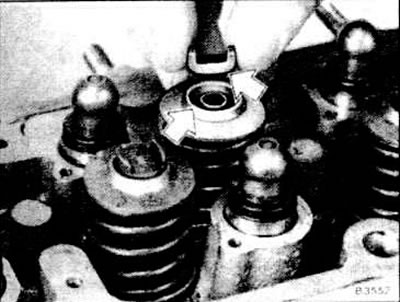
Insert hydraulic clearance compensators.


When installing the rocker arms, make sure that one fillet fits onto the other (see arrows in fig.).

Install the rocker arms. Cover their contact surfaces with a MoS₂ - based paste.

Install the intake and exhaust manifolds with new gaskets on the cylinder head and tighten the bolts to 22 Nm.

Install the cylinder head.


This article is available at russian, bulgarian, belarusian, ukrainian, serbian, croatian, romanian, polish, slovak, hungarian
Checking the article: Zinoviev Kirill

Share information:

Previous articles
Opel Vectra A: Engine repair
Next articles

Checking and adjusting valve clearances
Cleaning the oil separator of the camshaft housing cover
Checking and adjusting valve timing
Replacing the camshaft housing. Removing and installing the camshaft
Checking the cylinder head and cylinder block for straightness
Removal and installation the cylinder head
Replacing valve stem seals
Valve grinding
Lapping valves
Checking the valve guide clearance
Checking the valve guides
Compression check


See similar ones from other Opel car manuals:
▶ Cylinder head and valves — cleaning and checking Opel Astra G (1998-2004, petrol)
▶ Removal, inspection and installation of valves Opel Corsa B (1993-2000)
▶ Grinding of valve seats and valves Opel Kadett E (1984-1995)
▶ Cylinder head and valves — cleaning and inspection Opel Omega B2 (1999-2003)
▶ Valves — lapping Opel Zafira A (1999-2005, petrol)
Link to this page in different formats

Visitor comments


No comments yet


How much will 18 + 38 =


Vectra C (2002-2008) 
  • General information
  • User manual
  • Vehicle device
  • Maintenance
  • Troubleshooting
  • Power unit
  • Engine repair
  • Cooling system
  • Power and control system
  • Engine electrics
  • Transmission
  • Clutch
  • Car gearbox
  • Drive shafts
  • Chassis
  • Car suspension
  • Steering
  • Brake system
  • Body
  • Exterior
  • Interior
  • Doors, locks and windows
  • Heating and ventilation
  • Electrical equipment
  • Equipment and devices
  • Headlights and lighting
  • Electrical circuits
Vectra B (1995-2002) 
  • General information
  • User manual
  • Weekly checks
  • Maintenance (gasoline)
  • Maintenance (diesel)
  • Troubleshooting
  • Power unit
  • SOHC gasoline engine
  • DOHC petrol engine
  • Diesel engine 1.7 liter
  • Diesel engine 2.0 liters
  • Engine repair
  • Cooling system
  • Fuel system (gasoline)
  • Fuel system (diesel)
  • Charging system
  • Launch system
  • Ignition and preheat
  • Transmission
  • Clutch
  • Mechanical gearbox
  • Automatic gearbox
  • Drive shafts
  • Chassis
  • Brake system
  • Wheel suspension
  • Steering
  • Body
  • Exterior
  • Interior
  • Doors and windows
  • Heating and ventilation
  • Electrical equipment
  • Equipment and devices
  • Electrical circuits
Vectra B (1995-2002, petrol) 
  • General information
  • Maintenance
  • Help with malfunctions
  • Power unit
  • Engine repair
  • Exhaust system
  • Cooling system
  • Fuel system
  • Multec injection system
  • Four point injection
  • Transmission
  • Clutch
  • Gearbox and drive
  • Chassis
  • Wheel suspension
  • Steering
  • Brake system
  • Wheels and tires
  • Body
  • Exterior
  • Interior
  • Electrical equipment
  • Fuses and electronics
  • Power devices
  • Ignition system
  • Lighting and signaling
  • Equipment and devices
  • Heating and ventilation
  • Electrical circuits
Vectra A (1988-1995) 
  • Power unit
  • Engine repair
  • Ignition system
  • Lubrication system
  • Cooling system
  • Injection system
  • Fuel system (carburetor)
  • Fuel system (diesel)
  • Exhaust system
  • Transmission
  • Clutch
  • Car gearbox
  • Chassis
  • Front suspension
  • Rear suspension
  • Steering
  • Brake system
  • Wheels and tires
  • Body
  • Exterior
  • Interior
  • Electrical equipment
  • Electrical circuits
Vectra A (1988-1995, petrol) 
  • General information
  • User manual
  • Maintenance
  • Power unit
  • SOHC engine
  • DOHC engine
  • Cooling and ventilation
  • Fuel system (carburetor)
  • Fuel system (injector)
  • Exhaust converter
  • Transmission
  • Clutch
  • Mechanical gearbox
  • Automatic gearbox
  • Drive shafts
  • Chassis
  • Brake system
  • Car suspension
  • Steering
  • Body
  • Body elements
  • Electrical equipment
  • Power devices
  • Equipment and devices
  • Electrical circuits
OpelBook.ru © 2017–2026 · Mobile version · · Sitemap: EN BG BY UA RS HR RO PL SK HU · Feedback · Site search
Astra F, petrol · Astra G, petrol · Astra G · Astra H · Astra J, petrol · Corsa B · Corsa C, petrol · Corsa C · Insignia A · Kadett D · Kadett E · Omega A · Omega B · Omega B2 · Vectra A, petrol · Vectra A · Vectra B, petrol · Vectra B · Vectra C · Zafira A, petrol · Frontera A, petrol · Frontera B · Ascona C · Vivaro A ·
We want your visit to be comfortable 🤝! We use cookies 🍪 to make that happen.