


17YD 1.7L engine
Loosen the clutch housing cover mounting bolts.
Remove the upper timing belt cover.
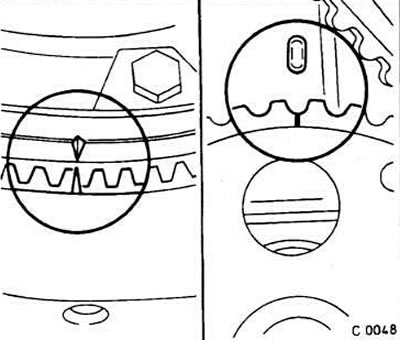
Set the piston of the 1st cylinder to TDC. To do this, turn the crankshaft until the TDC mark on the flywheel coincides with the lug on the clutch housing cover (see fig. on the left). In this case, the valves of the 4th cylinder should overlap (the mark on the toothed pulley of the fuel injection pump should be opposite the mark on its bracket (see pic on the right). To make it easier to turn the crankshaft, engage 4th gear, lift any of the front wheels with a jack and turn it by hand.
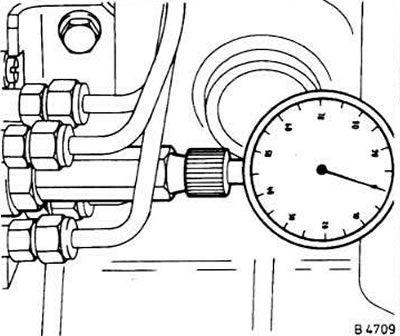
Unscrew the central threaded plug on the high-pressure fuel pump.
Install an adapter in place of the threaded plug (for example, Opel KM-226) and a small indicator (with a measuring range of up to 3 mm) with copper sealing washer.
Slowly turn the crankshaft against the operating direction of rotation (counterclockwise) approximately 5 cm.
Set the indicator to "O".
Turn the crankshaft in the direction of rotation (clockwise) so that the TDC mark on the flywheel coincides with the corresponding mark on the engine block. The indicator leg should move by 0.9±0.05 mm.
Caution! If the TDC mark is accidentally missed, turn the crankshaft back and set the TDC again.
If the above value is not obtained, it is necessary to adjust the position of the fuel injection pump.
Set the piston of the 1st cylinder to TDC by turning the crankshaft in the working direction of rotation.
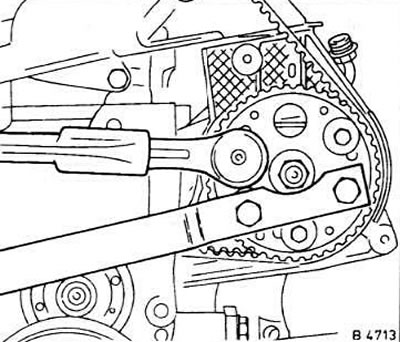
Loosen the bolts securing the fuel injection pump toothed pulley. Opel repair shops use a special device KM-468 to hold the pulley from turning. You can also use a suitable chain wrench.
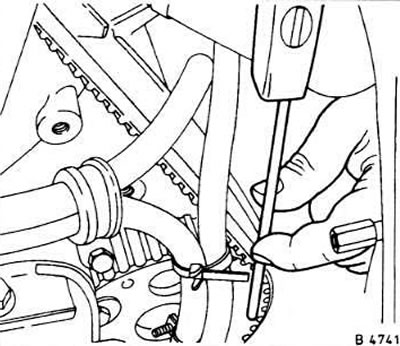
Set the specified advance value. To do this, slightly turn the fuel injection pump by the housing. In repair shops, the Opel KM-541 device is used for this purpose. You can also use a regular screwdriver.
Lightly tighten the fuel injection pump pulley mounting bolts.
Check the adjustment again.
After the appropriate adjustment, finally tighten the pulley mounting bolts to a torque of 22 Nm, holding the pulley from turning with the Opel KM-468 device. Remove the indicator.
Screw the central threaded plug back into place, inserting a new copper washer, and tighten the plug to a torque of 15 Nm.
Install and secure the clutch housing cover.
Install and secure the timing belt top cover.
Start the engine and wait for some time to allow air to escape from the fuel system.
After the test drive, check the tightness of the central threaded plug and tighten it if necessary.
1.7L turbocharged TC4EE1 engine
Disconnect the ground wire from the battery.
Attention! This will erase all information in the computer's memory.
Mark all hoses and other connections on the intake manifold with tape and disconnect.
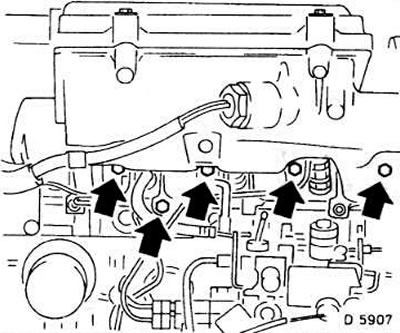
Loosen the bolts (see arrows in fig.) intake manifold mounts.
Loosen the two outer nuts on the intake manifold and remove it together with the air filter.
Unscrew the threaded plug from the fuel injection pump housing (see fig.C6352).
Disconnect the high-pressure fuel lines by unscrewing their union nuts using a Hazet 612-17x19 open-end wrench.
Caution! Do not bend the pipes!
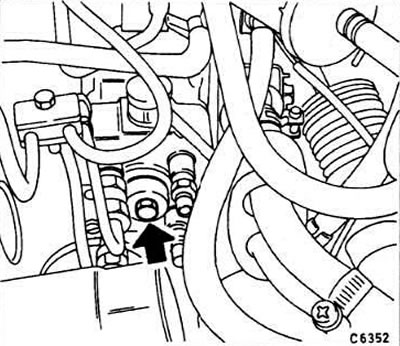
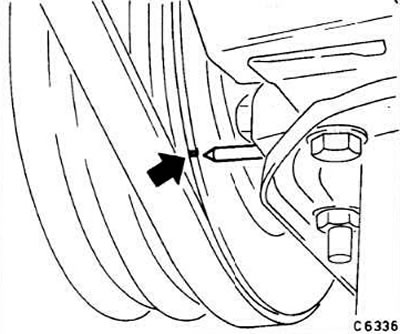
Set the piston of the 1st cylinder to TDC by turning the crankshaft so that the TDC mark on the pulley coincides with the pointer on the engine block (see Fig.).
To make it easier to turn the crankshaft, engage 4th or 5th gear, lift any of the front wheels and turn it by hand.
Using a screwdriver, disconnect the cold start device.
Screw the Opel KM-226-A adapter and a small indicator into place of the threaded plug (with a measuring range of up to 3 mm).
Set the indicator so as to ensure a minimum stroke of the measuring leg of 1 mm.
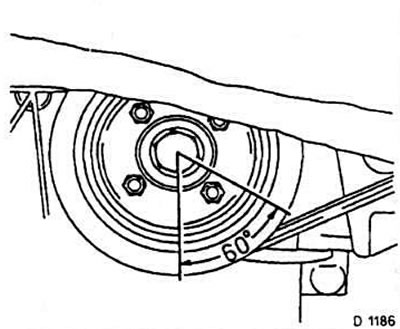
Turn the crankshaft in the direction opposite to the operating direction of rotation (counterclockwise) by 60° so that the injection pump pistons are set to the appropriate position. In this case, the indicator needle should deviate minimally. In this position, set the indicator to zero. By rotating the crankshaft back and forth, check the correctness of the adjustment. In this case, the indicator should not show a value less than 0 (see Fig.).
Restore the previous position of the crankshaft by turning it back 60° (clockwise) at TDC, and take readings from the indicator (injection pump plunger stroke)It should be within 0.5-0.6 mm.
If the obtained value is not within the specified range, adjust the position of the fuel injection pump.
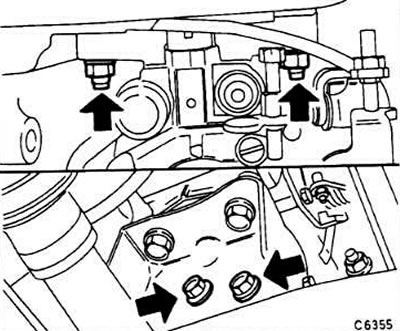
Loosen the fuel injection pump mounting bolts (see arrows in fig.).
Rotate the pump until the specified value of its plunger stroke is reached. If the stroke exceeds the upper limit of the above range, then it is necessary to turn the pump towards the engine, and if it is less than the lower limit of the range, then in the opposite direction. Recommended stroke value (to strive for) — 0.55 mm.
After adjusting the position of the high-pressure fuel pump, tighten its mounting bolts. The tightening torque of the pump mounting bolts to the cylinder head is 25 Nm, and the pump bracket mounting bolts are 40 Nm.
Remove the indicator.
Screw the central threaded plug back into place and tighten it to 20 Nm, installing a new washer.
Remove the screwdriver from the trigger.
Connect the pipes in place and tighten their union nuts to a torque of 25 Nm.
Clean the mating surfaces of the intake manifold and cylinder head from gasket residue using a triangular file. Install a new gasket.
Install the intake manifold and tighten the bolts and nuts to a torque of 30 Nm.
Connect all hoses and other connections to the intake manifold as marked.
Visitor comments