
Removing
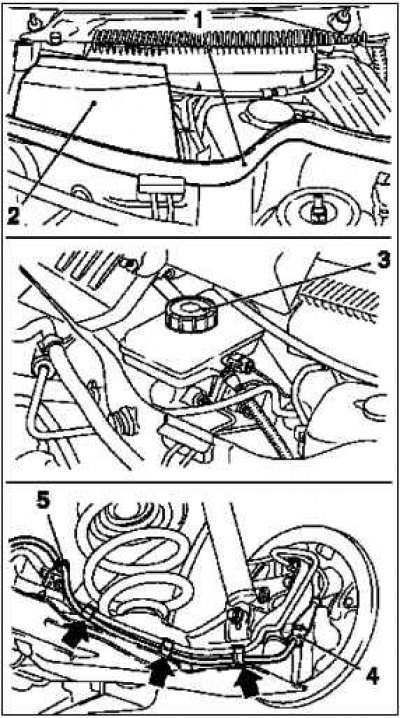
Pull up the safety flap 2 of the brake master cylinder.
Remove seal 1 from the water tank as far as necessary.
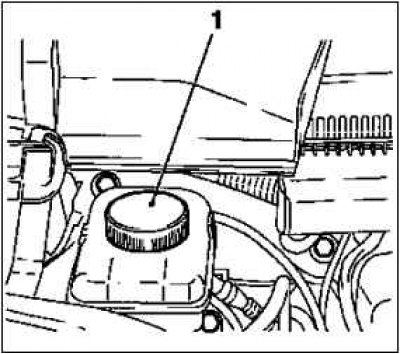
Remove cover 3 from the brake fluid reservoir.
Plug the brake fluid reservoir with tool MKM-558-10.
Remove rear wheels.
Note. Mark the position relative to the drum hub.
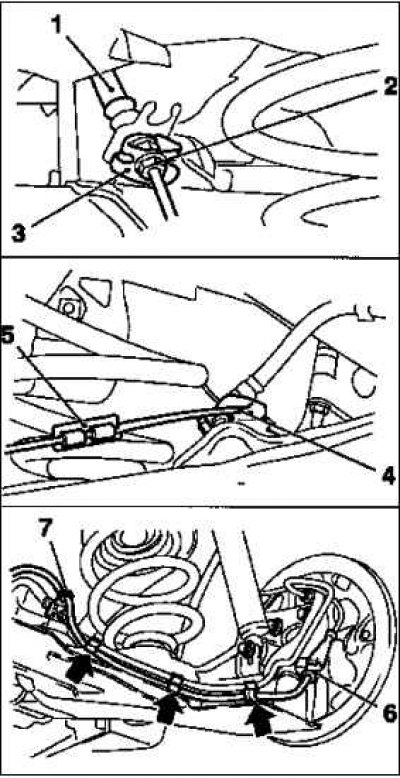
Remove the 2 ABS harness connectors 4 from the rear axle.
Disconnect from the brake pipe (arrows).
Disconnect from the holder on the rear axle 5.
Remove the headlight range control circuit sensor arm assembly from the holder on the rear axle.
Note. On vehicles with xenon headlights.
Disconnect the 2 parking brake cables at the rear, on both sides, from connector 1.
Disconnect the parking brake cable in the middle and the parking brake cable at the rear from guide 2 on the rear axle and set aside.
Note. On both models «ECO» remove the air deflector on the bottom.
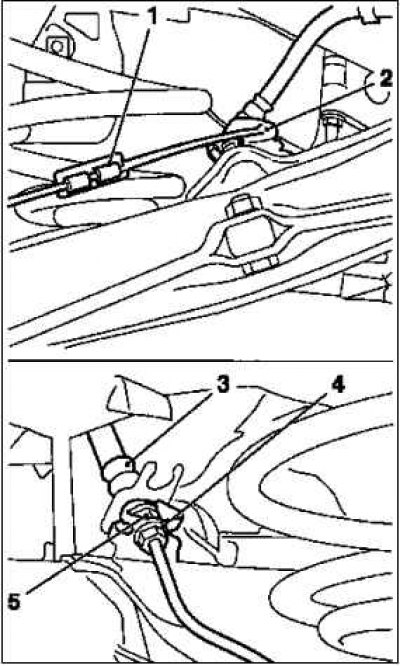
Remove the rear brake pipe 4 from the rear brake hose 3 on both sides.
Remove the brake hose from the holder, while the safety washer 5 remains on the brake pipe.
Note. The rear springs are removed and installed only one after the other on each side of the car.
Remove the rear springs.
Note. The following describes how to remove and install one side. Accordingly, work is being done on the other side.
Support the rear axle with a hydraulic jack on the assembly side under the trailing arm.
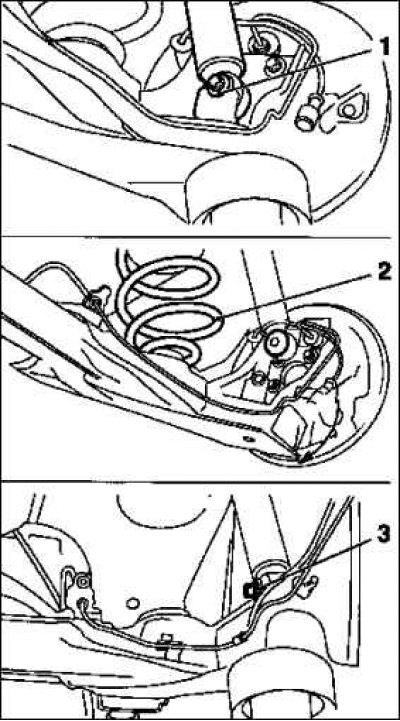
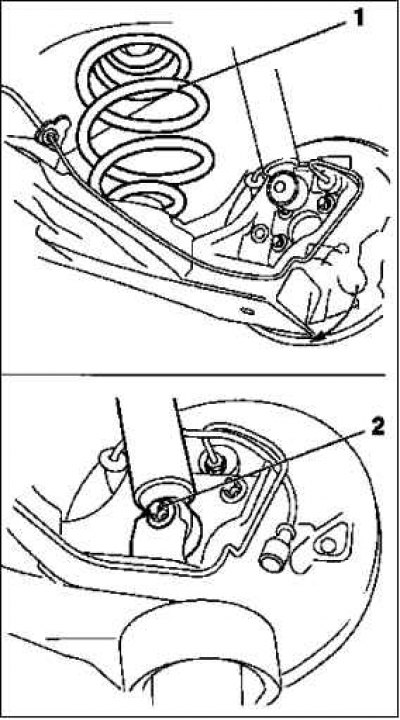
Remove the fixing screw 1 of the shock absorber on the rear axle.
Slowly lower and remove the hydraulic jack.
On the assembly side, pull the rear axle down as far as (arrow), so that the rear spring 2 can be removed.
Note. Check the setting of the spring.
Place the hydraulic jack under the rear axle trailing arm again.
Raise the rear axle with a hydraulic jack until the shock absorber can be installed.
Install the shock absorber with fixing screw 3 on the rear axle.
Remove the rear spring from the other side.
Removal from the opposite side is done in the same way.
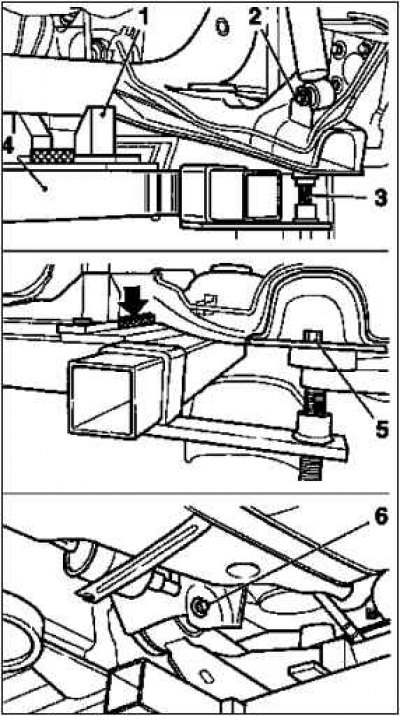
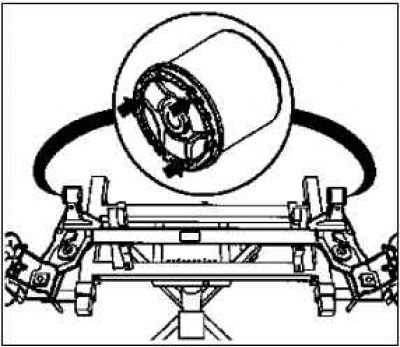
Install the hydraulic jack with tool KM-904 4, KM-6180-2 3 and KM-6180-1 1 under the rear axle.
Note. Make sure that on both sides the guide bolt 5 of the KM-6180-2 tool is correctly positioned in the guide hole of the rear axle
Remove the fixing screw 2 shock absorbers on both sides.
Raise the rear axle with a hydraulic jack until it rests on the KM-6180-1 (arrow).
Remove the fixing screw 6 of the rear axle trailing arm on both sides of the vehicle bottom.
Lower the rear axle slowly with a hydraulic jack and remove.
Note. When replacing the rear axle, it is necessary to rearrange all attachments.
Clean the outer sides of the damping bush. Apply red grease to the marked area (arrows).
Installation
Raise the rear axle with a hydraulic jack KM-904, KM-6180-1 and KM-6180-2.
Install the rear axle trailing arm on both sides of the vehicle bottom.
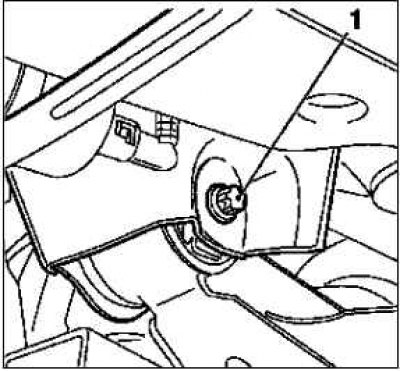
Use a new mounting screw and nuts 1.
Note. Fasten the fixing screws without tightening.
Note. In order not to create stress in the damping bushes in the trailing arm of the rear axle suspension in the bottom of the vehicle during vehicle operation, it is necessary to adjust dimension I for the rear axle before tightening the fixing screws with the required tightening torque.
Raise the rear axle with a hydraulic jack, KM-904 and KM-6180-2, until dimension I 100 mm±5 mm is established between the spring seat on the rear axle and the stringer at the rear (see picture).
Note. To measure, insert a ruler through the hole in the rear axle at the spring seat.
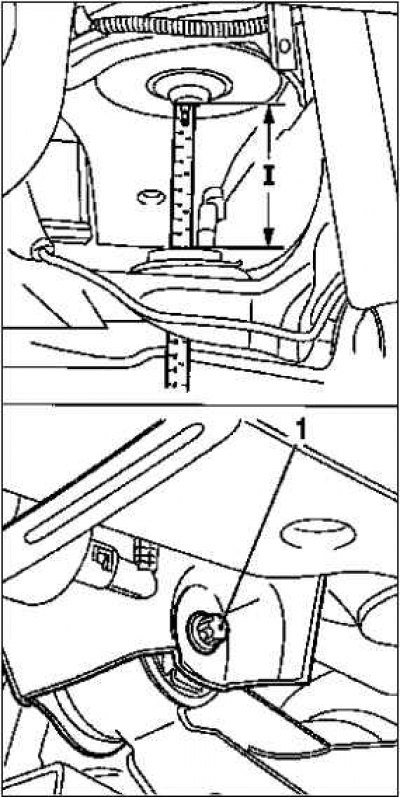
Tighten the fixing screws 1 of the rear axle in the bottom of the vehicle on both sides.
Tightening torque 50 Nm + 45°+15°.
Position the rear axle with a hydraulic jack, KM-904 and KM-6180-2, so that both shock absorbers can be installed on it.
Install the shock absorbers with fixing screws 1 on both sides of the rear axle.
Remove the hydraulic jack with tool KM-904, KM-6180-2 and KM-6180-1.
Install the rear springs by following the steps below.
Note. Rear springs are installed only separately, on each side of the car.
Support the rear axle with a hydraulic jack 3 on the assembly side under the trailing arm.
Remove the fixing screw 2 shock absorbers on the rear axle.
Slowly lower and remove the hydraulic jack.
On the assembly side, pull the rear axle down as far as (arrow), so that the rear spring 1 can be inserted.
Place the hydraulic jack under the rear axle trailing arm again.
Raise the rear axle with a hydraulic jack until the shock absorber can be installed on it.
Install the shock absorber with fixing screw 2 on the rear axle.
Tightening torque 65 Nm.
Install the rear spring on the other side.
Installation is done in the same way.
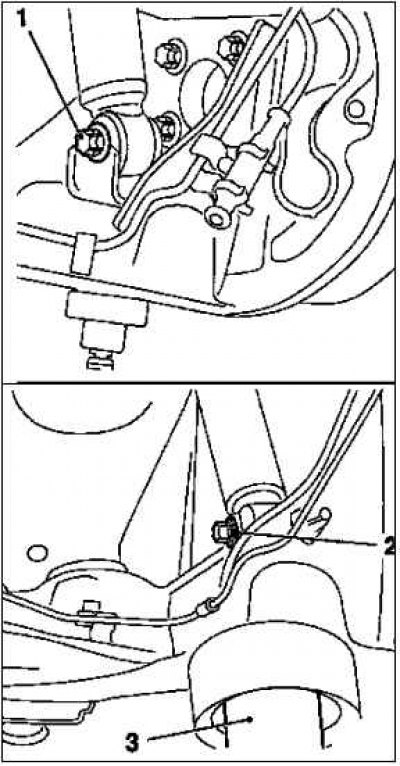
Insert the brake hose 1 on both sides into the holder on the rear axle.
Attach the brake pipe 2 with the locking clip 3 to the brake hoses.
Tightening torque 16 Nm.
Insert the parking brake cable in the middle and the parking brake cable at the rear into guide 4 on the rear axle.
Hook in connecting piece 5.
Attach the ABS harness to the holder 7 on the rear axle and at the brake pipe (arrows).
Make the electrical connection of the ABS wiring harness connector 6.
Install the headlight range control circuit sensor linkage on the holder at the rear axle.
Note. On vehicles with xenon headlights.
Tightening torque 5 Nm.
Install the rear wheels.
Tightening torque 110 Nm.
Remove tool MKM-558-10 1 from the brake fluid reservoir.
Bleed and check the brake system for leaks.
Close the cap on the brake fluid reservoir.
Pull down the safety valve 2 of the brake fluid reservoir.
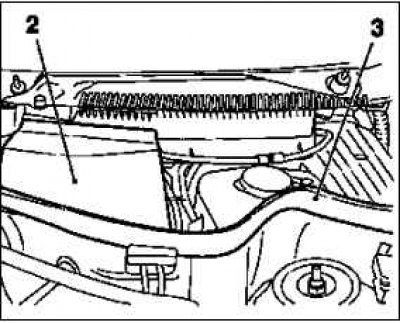
Put the gasket on the water tank 3.
Visitor comments