
Removing
1. Apply the parking brake, jack up the front of the vehicle and place it on jack stands. Remove the right front wheel and (with appropriate equipment) crankcase protection.
2. Remove the accessory drive belt (see chapter Current service), - first mark the direction of rotation on the belt tape.
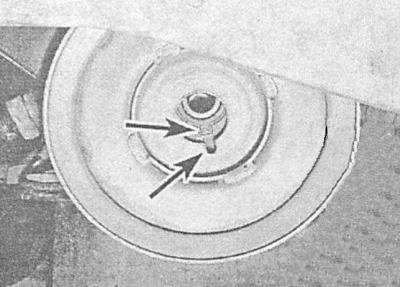
3. Loosen the bolt securing the crankshaft pulley - in order to block the crankshaft from turning, ask the assistant to turn on the highest gear and depress the foot brake pedal all the way. On AT models, loosen one of the torque converter mounting bolts and attach the drive plate to the transmission dome with a steel bar of a pair of suitable bolts equipped with washers. If the engine is removed from the vehicle, block the flywheel/drive plate (see Removal, condition check and installation of a flywheel / drive disk).
4. Turn out a fixing bolt (don't forget the puck) and remove the pulley from the crankshaft trunnion - try not to damage the crankshaft position sensor (CKP).
Installation
1. Gently seat the pulley on the crankshaft trunnion, making sure that the keyway fits correctly on the key. Make sure that the pulley is fully seated - try not to damage the CKP sensor. Screw in a new bolt with a washer seated on it.
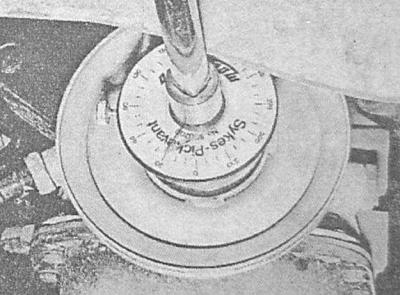
2. Block the crankshaft from turning by the same method as used for removal, tighten the mounting bolt to stage 1, then tighten it to the corners, stages 2 and 3 (use a goniometer, or apply reference marks with paint or a marker).
3. Install the accessory drive belt (see chapter Current service), — observe the original direction of rotation (see markings applied when removed).
4. Install the crankcase guard and front wheel.
5. Lower the vehicle to the ground, then tighten the wheel fasteners to the required torque.
Visitor comments