
Sedan and Hatchback Models
Removing
Disconnect the negative battery terminal.
Drain the fuel from the tank into a container. Raise the rear of the car with jack stands. Disconnect flexible connection of an exhaust highway. Hang it on a wire under the body.
Detach the rear section of the exhaust system from its rubber mounts and secure it to the rear suspension torsion bar.
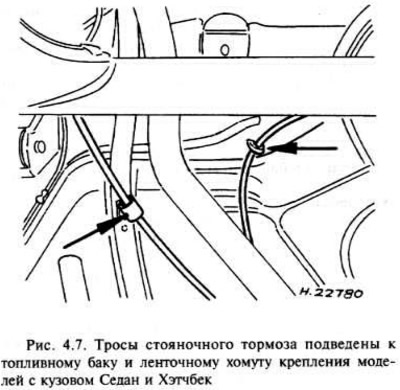
Release the parking brake cable from either the clip on the tank or the tank tie-down strap and move it aside.
If required, remove the fuel filter from the side of the fuel tank.
Clamp the fuel hose (And), which is connected to the measuring device (located on the right side of the tank), by placing a container for fuel that may leak out when the hose is disconnected.
Remove the plastic cover, then disconnect the hose (And) from the sensor. Considering the possibility of leakage, take fire safety measures.
Disconnect the wiring from the fuel level sensor.
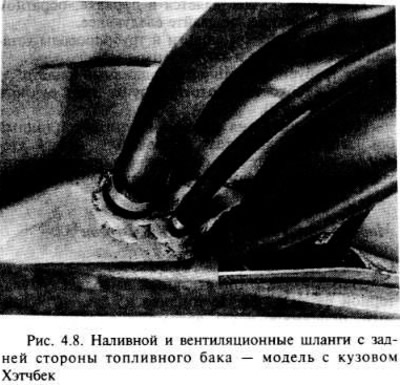
Disconnect the inlet hose and vent hoses from the back of the tank.
Jack up the fuel tank with a piece of wood underneath.
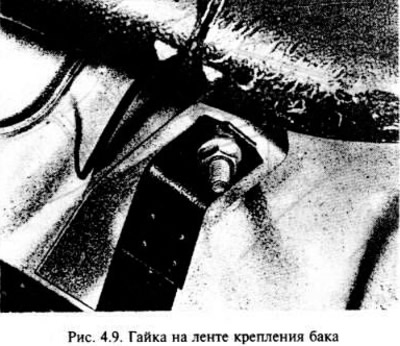
Unscrew the nuts at the tank mount, then remove and lower the tank just enough to remove the vent hose (And).
Together with an assistant, carefully lower the tank and remove it from under the car. Please note that the remaining fuel in the tank may leak out.
Installation
If there is sediment or water in the tank, it must be rinsed 2-3 times using clean fuel. Shake the tank vigorously to add more fuel, but remove the fuel gauge before doing so. The operation must be carried out in a well-ventilated area, observing fire safety measures.
Fuel tank repairs should be done by professionals. Do not attempt to weld or solder the tank. Removal of residual fuel vapors requires several hours of specialist work.
Installation is carried out in the reverse order of removal, but do not forget the following.
Check that all hoses and pipes are in place and secured
Install a fuel filter where required.
If necessary, adjust the handbrake cable (chapter 9).
After completing the work, fill the fuel tank, start the engine and check for leaks. If there is a leak, immediately stop the engine, find out the cause and correct the defects.
Station wagon and van models
Removal and installation
Disconnect the negative battery terminal, drain the fuel tank and raise the front of the vehicle with stands.
Disconnect the fill and vent hoses on the tank.
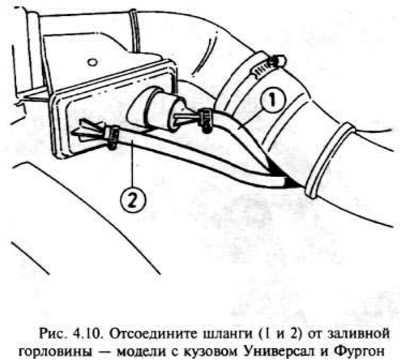
Disconnect the hoses shown in fig. 4.10, from the filler neck.
Hang the fuel tank on a jack by laying a wooden block.
Unscrew the bolts of the tank fastening tapes, then remove them, and together with the assistant carefully lower the tank and remove it from under the car. Be aware that there is fuel left in the tank that could spill out.
See the points in the previous subsection about rinsing the tank with clean fuel and not doing any tank repairs on your own.
Installation is carried out in the reverse order, with a check that all hoses and pipelines are securely fixed in their original places.
After completing the work, fill the fuel tank, start the engine and check for leaks. If there is a leak, stop the engine immediately. find out the cause and eliminate the defects.
Visitor comments