
Note: After adjusting, install a new plug in the adjuster hole in the gear selector cover. Purchase a new cork before starting work.
Adjustment
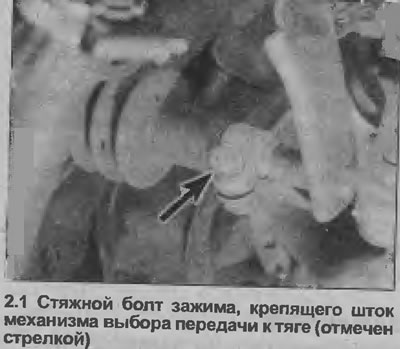
1. Working in the engine compartment, loosen the clamp bolt securing the gear selector rod to the linkage (see illustration). On models since 1993, the clip has been moved slightly and is now easily accessible from under the vehicle.
2. Remove the plug from the adjuster hole in the gear selector cover (see illustration).

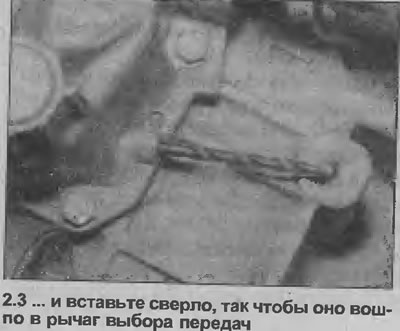
3. Grasp the gear selector shaft and turn it counterclockwise (when looking towards the front of the car), so that a 4.5 mm drill bit inserted into the adjuster hole in the gear selector cover enters the hole in the gear selector lever (see illustration).
4. While operating in the passenger compartment, pull back the front edge of the shift lever boot base and separate the boot from the center console to access the shift lever base.
5. Have an assistant hold the shift lever in neutral on the 1st/2nd gear engagement line. The lever must rest against the inadvertent reverse lock, and the arrow and notch must be located as shown (see illustration).

6. On late models (since 1993), With the shift lever in the desired position for adjustment, insert a second 4.5 mm drill bit into the hole in the shift lever. This will allow you to lock the lever for the duration of the adjustment, and you can do without the help of an assistant.
7. Without moving the shift lever, tighten the clamp bolt that secures the gear selector rod to the link in the engine compartment.
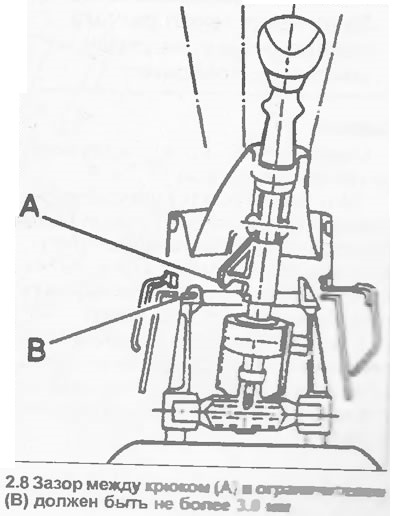
8. On pre-1993 models, check that the gap between the hook (A) and limiter (IN) at the base of the gear lever does not exceed 3 mm (see illustration).
9. Attach the shift lever cover to the center console.
10. Remove the drill bit from the adjuster hole in the gear selector cover and install a new plug in the hole.
11. Check up inclusion of all transfers idling.
Visitor comments