
For correct installation of the torsion bar, it is necessary to mark its position relative to the height adjustment lever and the lower wishbone. You can not use a center punch or chisel for this.
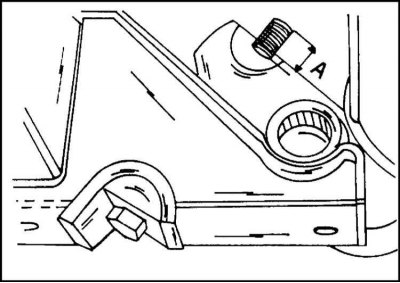
In addition, it is necessary to measure the protruding part of the thread of the torsion bar adjusting bolt in accordance with the illustration.
When installing, ensure the obtained value of the protruding part of the bolt thread.
Removing
1. Turn out an adjusting bolt of a torsion bar.
2. Disconnect the height adjustment lever from the clamp and remove the torsion bar from the lining on the lower transverse arm.
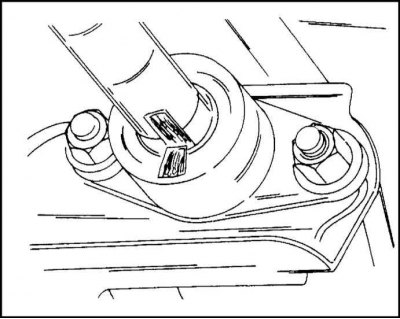
The torsion bar mounting is shown in the illustration. The illustration also shows the color coding of the torsion bar position.
Instruction. The torsion bars are marked to prevent confusion. The right torsion bar is marked on the end "R", left torsion bar marking "L". In addition, each torsion bar with the marked side must be installed towards the rear.
The splines of the torsion bar must be lubricated with universal grease before installation.
When assembling, the torsion bar is installed in the transverse suspension arm in compliance with the marking.
Installation
1. If a new torsion bar is being installed, slide the lever onto the torsion bar splines with the bottom side parallel to the top side of the compensation switch.
2. Tighten the adjusting bolt until the threaded end protrudes by the previously measured amount.
3. Lower the vehicle onto its wheels and "to live" several times the front of the car.
4. After that, adjust the clearance as described above. Be aware of design differences depending on the year of manufacture.
Visitor comments