


Contents: Removal ⬇ Installation ⬇
Many of the tasks listed below have already been described previously and should be performed in accordance with the directions given. Like many front suspension components, the design of the steering knuckles on cars produced since mid-1995 has been changed. New parts should not be confused with old ones.
Removal
1. Loosen the mounting bolts and remove the bracket from the steering knuckle.
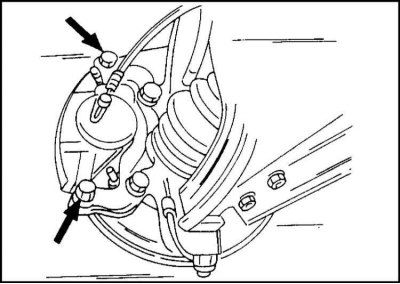
2. Tie the bracket to the chassis with wire.
3. Remove the hub lock (see corresponding description).
4. Remove the hub (see corresponding description).
5. Disconnect the torsion bar. To do this, unscrew the bolt on the clearance adjustment lever.
6. If there is ABS, unscrew the yaw rate sensor mounting bolt and remove the sensor.
7. Loosen the three mounting bolts and remove the brake disc protective cover from the steering knuckle.
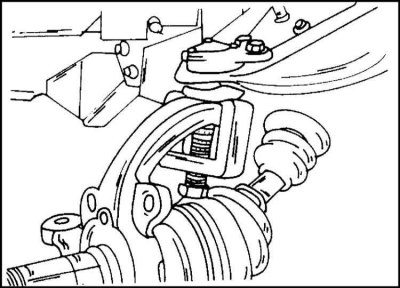
8. Unscrew the steering rod end from the steering arm and press it out using a suitable puller. A similar puller is shown in the illustration.
9. Disconnect the upper and lower ball joints from the steering knuckle as described when disassembling the control arm.
10. Disconnect the steering knuckle from the suspension arms.
11. Remove the sealing ring and washer from the steering knuckle.
12. From the inside of the steering knuckle, remove the sealing ring and needle bearing. For this purpose, a sliding hammer and an adapter are used.
11. Clean all parts thoroughly.
Installation
Now you can reassemble and install the steering knuckle back in place. The needle bearing, washer and seal ring are installed using a mandrel from the inside out.
1. Attach the steering knuckle to the upper and lower control arms.
2. Tighten the nut on the upper ball joint to a torque of 105 Nm, and on the lower one to a torque of 140 Nm.
3. Secure the nuts with cotter pins.
4. Install the protective cover on the steering knuckle.
5. Connect the tie rod end to the steering arm.
6. Install the wheel hub and hub lock as directed.
7. Perform other work in the reverse order of removal.
8. Finally, adjust the ground clearance as described above.
Visitor comments