
Removing
1. Remove the oil pan (see relevant chapter).
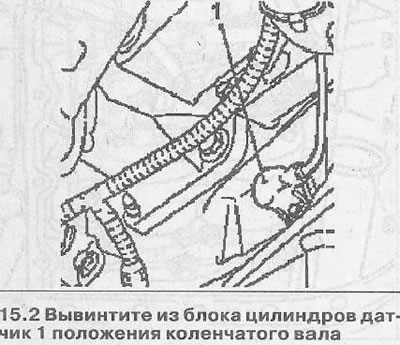
2. Unscrew the crankshaft position sensor 1 from the cylinder block together with the O-ring (see illustration).
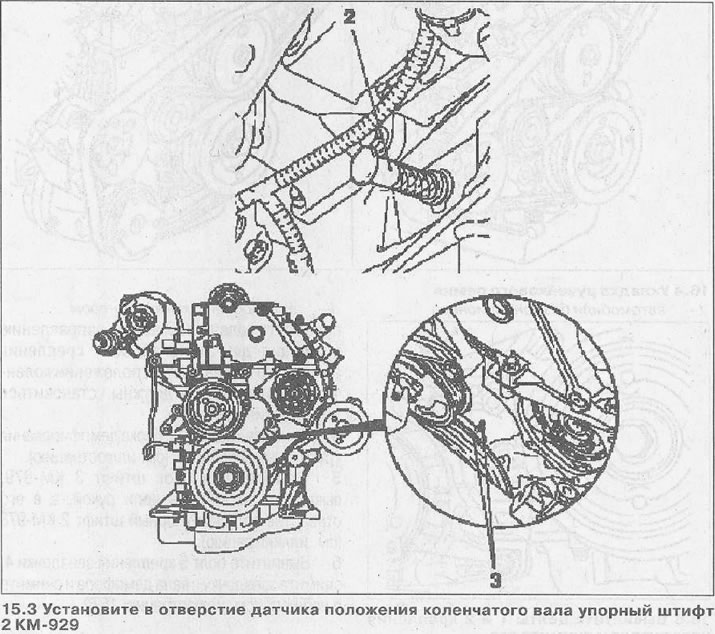
3. Install thrust pin 2 KM-929 into the crankshaft position sensor hole and block the crankshaft (see illustration). If necessary, slightly turn the crankshaft in the direction of engine rotation at the belt pulley bolt. In this position of the crankshaft, marks 3 should be set against each other.
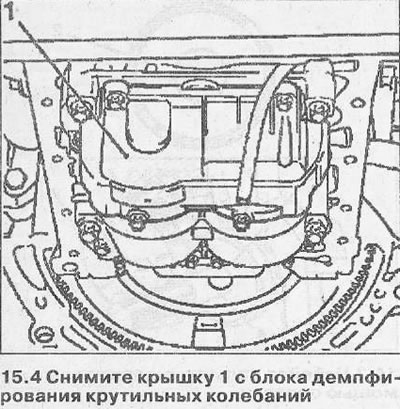
4. Remove cover 1 from the vibration damping unit (see illustration).
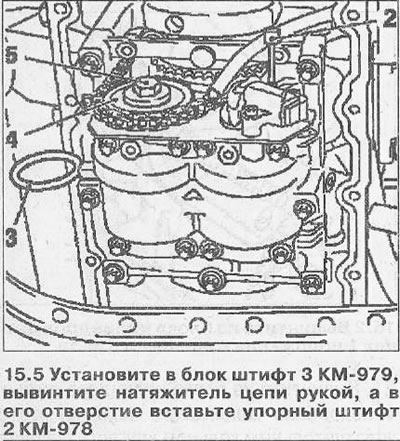
5. Install pin 3 KM-979 into the block, unscrew the chain tensioner by hand, and insert thrust pin 2 KM-978 into its hole (see illustration).
6. Unscrew the bolt 5 fastening the sprocket 4, remove the sprocket from the damper shaft and remove the chain from it (see illustration 15.5).
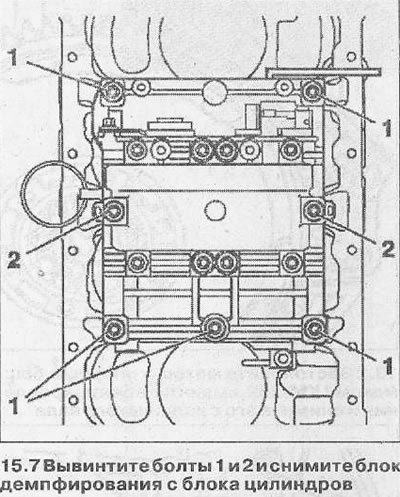
7. Unscrew bolts 1 and 2 and remove the damping block from the cylinder block (see illustration).
Installation
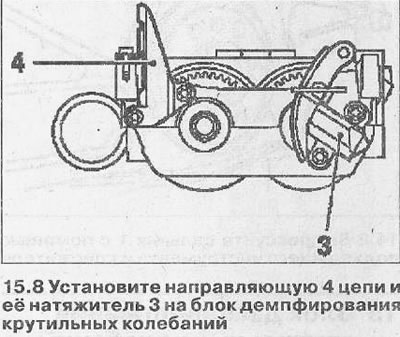
8. Install the chain guide 4 and its tensioner 3 on the vibration damping unit, securing them with a force of 9 Nm (see illustration).
9. Clean mating surfaces and remove any remaining seal.
10. Install the torsional vibration damping unit in place, having previously pulled out the thrust pin 3 KM-979 (see illustration 15.5), on the cylinder block.
11. Fasten the block with bolts 1 and 2, tightening them with a force of 20 Nm, and then tightening bolts 1 by 30°, bolts 2 by 60°.
12. Put the chain on the sprocket and secure the sprocket with a new bolt in the damping block, tightening it to 90 Nm and then turning it 30°.
13. Reinstall the crankshaft position sensor by tightening it to 8 Nm.
14. Close the damping block with a cover, tightening its fastening bolts with a force of 8 Nm.
15. Install the oil pan (see relevant chapter).
Visitor comments