
Corsa C, 5-door hatchback
1. Remove the rear seat back (see Section 55).
2. Turn out the screw of fastening of the back panel of finishing of a threshold (see resist. illustration) and disconnect the corresponding rear side seat belt from the bottom of the passenger compartment (see Section 52).
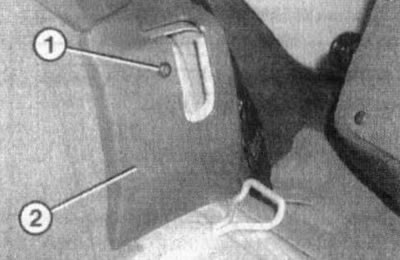
42.2. Screw (1) rear panel mounts (2) threshold finishes (5 door hatchback)
3. Separate the rubber seal of the rear door opening in the area of the threshold (see Section 30) and slide the front seat back as far as it will go.
4. Grasp the edge of the front sill trim panel on the carpet side, pull it up and release the clips from the mounting holes (see resist. illustration).
42.4. Front Panel (1) threshold finishes (5 door hatchback): 2. Front storage box holder
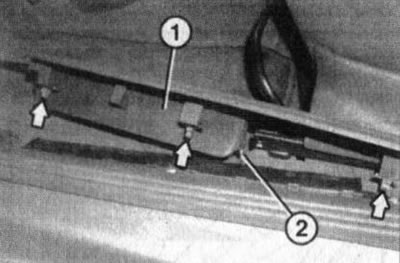
5. Separate the front hook of the lower glove box from the holder (see resist. illustration), slide the front seat forward and separate the box from the rear holder.
42.5. Front (2) and rear (3) bottom glove box hooks (1)
6. Remove the lower glove box from the sill trim upwards.
Warning: Never use a plastic wedge to separate the drawer!
7. Grasp the edge of the rear door sill trim panel on the carpeted side, pull it up and out of the holders.
8. Using a plastic wedge, separate the lower trim of the B-pillar from the trim of the sills (see Section 44).
9. Separate the sill trim panel from the luggage compartment sidewall trim, if necessary, slightly loosen the screw that secures the latter. Remove the panel.
10. Installation is made in an order, the return to an order of removal. Make sure that all fasteners on the underside of the sill trim panels fit into the mounting slots.
Corsa C, 3-door hatchback
11. Turn out 2 screws and remove a ware box from finishing of thresholds.
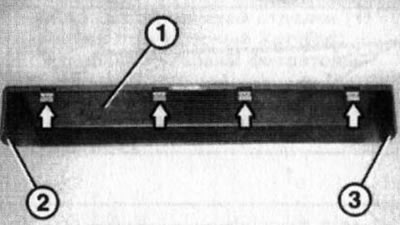
12. Grasp the edge of the front sill trim panel on the carpet side, pull it up and release the clips from the mounting holes (see resist. illustration).

42.12. Front Panel (1) threshold finishes (3 door hatchback) - Arrows indicate clamps
13. Installation is carried out in the reverse order.
Meriva Models
14. Remove the luggage compartment side trim (see Section 49).
15. Remove the sealant of the openings of the front and rear side doors from the area of the thresholds (see Section 30).
16. Separate the bottom finishing of a rack B.
17. Release the sill trim panel from the 10 clips on the sill channel (see resist. illustration).
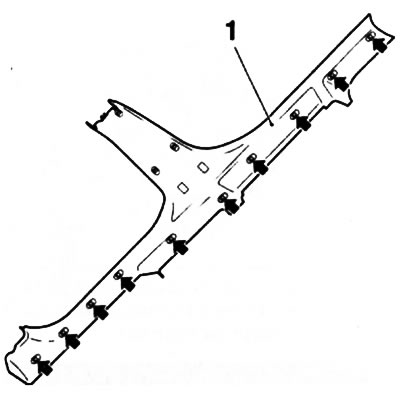
42.17. Panel (1) threshold finishes (Meriva models) - Arrows indicate clamps
18. Separate the bottom finishing of a rack In from the panel of finishing of thresholds.
19. Installation is carried out in the reverse order. When installed, the inside edge of the door seals must be positioned over the trim panels.
Visitor comments