
Top finish
Attention: When equipping a car with head airbags, strictly follow the safety precautions (see Chapter 10, Section 11)!
Corsa models
1. Disconnect the wires and insulate the battery terminals. Wait at least 1 minute for the SRS battery pack capacitor to fully discharge.
2. Separate the door seal from the A-pillar. On models equipped with head airbags, use a plastic wedge to pry off the service cover on the A-pillar trim and carefully separate it by gradually moving the wedge along the perimeter of the cover.
3. Insert a plastic wedge under the A-pillar trim, wring out the clips (see resist. illustration) and remove the trim from the post by pulling it up.
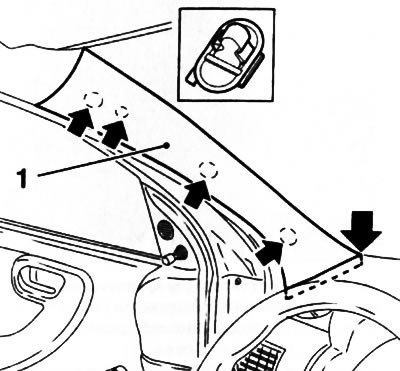
43.3. Removing the top trim (1) A-pillars (Corsa models) - Arrows indicate clamps
4. Install in the reverse order of removal, making sure that the inner edge of the seal is on top of the trim. Check the condition of the clamps, replace if necessary.
Meriva Models
5. Disconnect the wires and insulate the battery terminals. Wait at least 1 minute for the SRS battery pack capacitor to fully discharge.
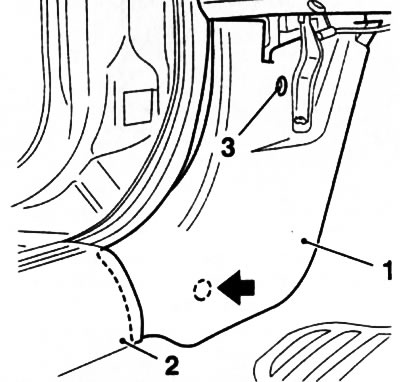
6. Using a plastic wedge, separate the decorative side cover of the front triangular window from the instrument panel (see resist. illustration). Remove the triangular window foam insert.
43.6. Decorative cover (1) front triangular window (Meriva models) - arrows indicate guides
7. Using a plastic wedge, separate the decorative plug from the trim panel and unscrew the fixing screw located under it (see resist. illustration).
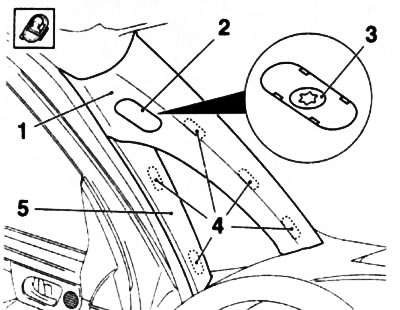
43.7. Fasteners (4) panel fixings (1 and 5) A-pillar top trim (Meriva models with head airbags): 2. Decorative cap; 3. Fixing screw
8. Using a plastic wedge, wring out the latches of the top trim and remove it from the pillar A (see illustration 43.7).
Note: On models equipped with head airbags, the A-pillar top trim consists of two panels. First you need to separate the top panel (1), and then the bottom (5).
9. Installation is carried out in the reverse order.
Bottom trim
Note: Removal/installation of A-pillar lower trim is the same on all models.
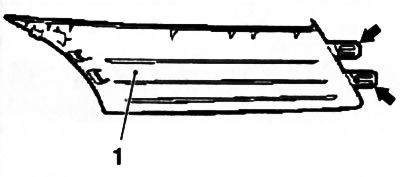
10. Separate the front end edge of the inner sill trim panel from the body (see Section 42).
11. Remove the fixing screw and, using a plastic wedge, press out the lower trim retainer (see resist. illustration), remove the A-pillar lower trim and remove it from the footwell.
43.11. Bottom trim (1) A-pillars (on the example of the Corsa model) - the arrows indicate the fixing screws: 2. Inner sill trim panel; 3. Fixing screw
12. Install in the reverse order of removal, making sure that the inner edge of the seal is on top of the trim.
Visitor comments