
For this purpose, a glow plug is screwed into the combustion chamber of each cylinder. The glow plug is a housing with a pressed glow plug. When voltage is applied, the spiral inside the pin heats up within a few seconds to a temperature above +850°C. This temperature provides a short pre-heating of the engine before starting it. As a rule, the warm-up lasts no longer than 5 seconds. As soon as the preheat indicator light on the instrument panel goes out, the engine can be started.
Duration of preheating of the engine, as well as automatic follow-up of warming up after starting the engine (up to 20 seconds) for cars with a 2.5 liter engine, the preheating relay is controlled, for cars with a 2.0 / 2.2 liter engine, by the corresponding control unit.
If you have difficulty starting the engine, it is recommended that you first check the compression. If the compression pressure is low, the engine will not start at low ambient temperatures.
Attention! The engine control unit has a self-diagnosis function that registers failures and malfunctions of the electrical equipment of the fuel injection system. A log of registered faults can be printed out by contacting a workshop in order to rectify them in a targeted manner.
Checking glow plugs
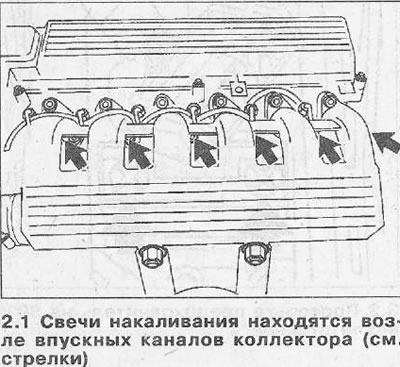
1. Remove the protective cover from the engine and disconnect the boost air line above the glow plugs. The glow plugs are located near the intake ports of the manifold (see arrows in illustration).
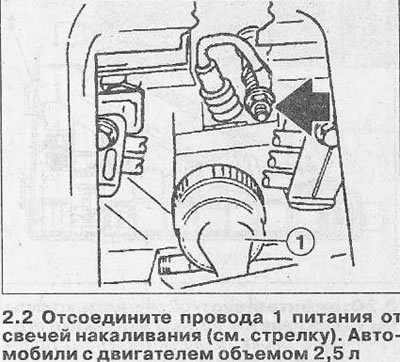
2. Vehicles with a 2.5L engine. Disconnect power wires 1 from glow plugs (see arrow in illustration).
3. Vehicles with 2.0-/2.2L engine. Disconnect wire ends from spark plugs.
4. Connect a power test light to the positive (+) battery terminal and check each glow plug.
If the LED lights up, then the spark plug is good. For a more accurate check, you must use an ammeter.
If the LED does not light up, the spark plug is faulty and needs to be replaced.
Removing
5. Cars with a 2.5 liter engine. Remove intake manifold (see relevant chapter).
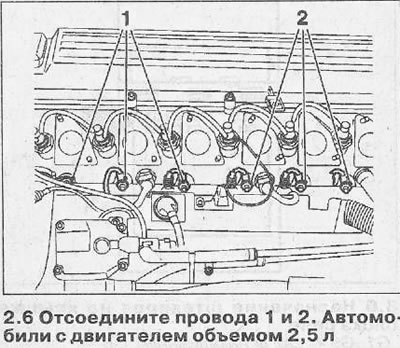
6. Vehicles with 2.5L engine. Disconnect wires 1 and 2 (see illustration).
7. Remove the glow plugs and inspect them.
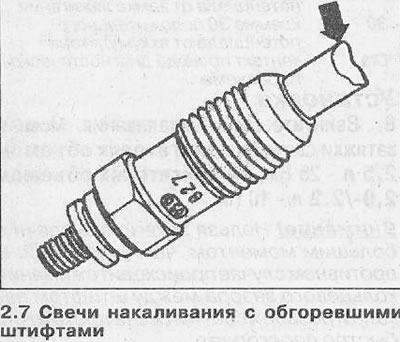
Burnt glow plug pins are often the result of injector malfunctions. Such damage cannot be attributed to defects or malfunction of the spark plug itself. If such candles are found during the check (see arrow in illustration), it is not enough just to replace them. Injectors should be checked for injection pressure and tightness (work is done in the workshop).
Installation
8. Screw in the glow plugs. The tightening torque of the spark plugs on engines with a volume of 2.5 liters is 25 Nm, on engines with a volume of 2.0-/2.2 liters is 10 Nm.
Attention! Do not tighten candles with more torque than specified. Otherwise, the annular gap between the glow plug and the thread of the candle is compressed and the candle burns out quickly enough.
9. Connect the glow plug power wires. For vehicles with a 2.5 liter engine, tighten the union nut of the spark plug tip to 5 Nm.
10. Cars with a 2.5 liter engine. Fasten the intake manifold to the cylinder head with a tightening torque of 25 Nm, replacing all seals with new ones. The oil filter bracket and the exhaust gas recirculation pipe are attached to the intake manifold with a force of 25 Nm.
11. Reinstall the engine top cover and charge air line.
Visitor comments