
If the ignition has just been switched on or the engine has just been running, the spark plug may still be very hot!
Removing
Engines 1.7 l SOHC
1. Disconnect the negative cable from the battery.
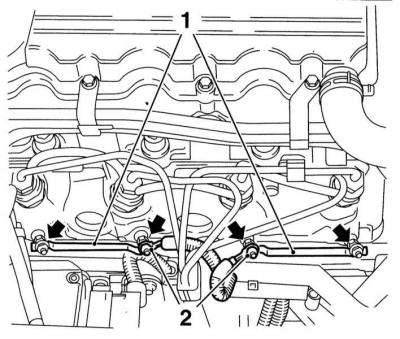
2. Loosen the nuts of the electrical wiring of the spark plugs of the 2nd and 3rd cylinders (1) and contact tires of candles of the 1st and 4th cylinders (1). Remove the tire from the spark plugs.
3. Turn out candles and remove them from a head of cylinders.
Engines 1.7 L DOHC
1. Remove air cleaner and engine ECM with support bracket (see chapter Power and exhaust systems).
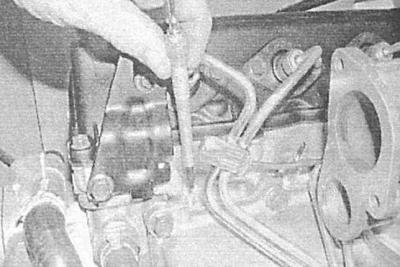
2. Disconnect the electrical wiring from the spark plugs, - squeeze the locking tabs with your thumb and forefinger and remove the tip from the spark plug shank.
3. Turn out candles and remove them from the engine.
Engines 2.0 l
1. Disconnect the negative cable from the battery. On high pressure turbocharged engines (Y20DTH) release the fasteners and remove the boost pipe from the turbocharger above the exhaust manifold.
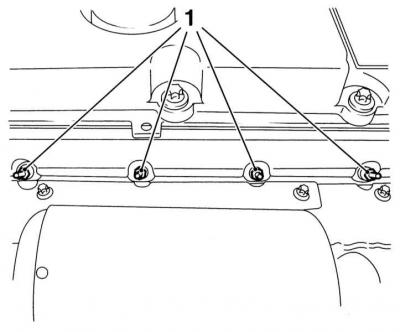
2. On early model years give fixing nuts (1), remove the washers, disconnect the electrical wiring and remove the glow plug supply contact bus. On models of recent years of production, simply disconnect the wiring from the candles.
3. Turn out candles and remove them from the engine.
Examination
1. Check the spark plugs for mechanical damage. Burnouts or tip erosion can be the result of a malfunction of the injector nozzles. Check the condition of the injectors, replace defective components.
2. Make sure that there is no burn-out of the tips of the candles, - if necessary, replace. If the spark plugs look good on the outside, check them with an ohmmeter (see Removal and installation of the emergency oil pressure sensor).
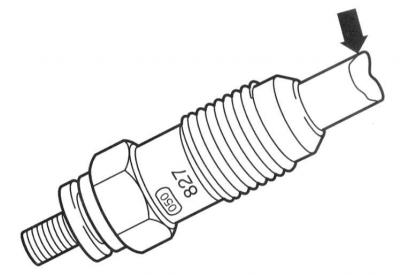
3. Checking the performance of a glow plug can be checked by applying a voltage of 12 V to it, - a serviceable candle should heat up in a timely manner (be careful not to burn yourself):
- The power supply must be equipped with a fuse for short circuit protection.
- Clamp the candle in a vise with soft sponges - do not forget that its working element is red-hot.
- After checking, let the candle cool for a few minutes so as not to burn yourself.
The working element of a serviceable candle should glow red-hot no later than after 5 seconds. If it takes noticeably longer to warm up the candle, or if the tip only glows in the middle, the candle must be replaced.
Installation
Engines 1.7 l SOHC
1. Carefully screw in the spark plugs and tighten them to the required torque - remember that overtightening the spark plugs can damage the threads.
2. Put the power bus on the central terminals of the candles and securely tighten the nuts on the candles of the 1st and 2nd cylinders.
3. Connect the electrical wiring to the candles of the 2nd and 3rd cylinders, tighten the fixing nuts.
4. Connect the negative cable to the battery.
Engines 1.7 L DOHC
1. Carefully screw in the spark plugs and tighten them to the required torque - remember that overtightening the spark plugs can damage the threads.
2. Connect the power supply wiring to the spark plugs.
3. Install ECM, with support bracket and air cleaner (see chapter Power and exhaust systems).
Engines 2.0 l
1. Carefully screw in the spark plugs and tighten them to the required torque - remember that overtightening the spark plugs can damage the threads.
2. On models of early years of release, put the power rail on the plug leads, attach the electrical wiring, install the washers, then screw on and securely tighten the fixing nuts. On models of recent years of production, simply connect the wiring to the candles.
3. If removed, install the turbocharger metal tube, then connect the negative cable to the battery and check the glow plugs for proper operation.
Visitor comments