
OpelBook.ru
Cars AvtoVAZ Cars Mitsubishi Cars BMW Cars Mercedes Cars Nissan Cars Toyota Cars Chevrolet
English Русский
Български
Беларускі
Український
Српски
Hrvatski
Română
Polski
Slovenský
Magyar
 |  Sitemap  |  Contacts  |    


Main Astra Corsa Insignia Kadett Omega Vectra Zafira Others Articles
Astra F (1991-1998, petrol) Astra G (1998-2004, petrol) Astra G (1998-2004) Astra H (2004-2009) Astra J (2009-2015, petrol)
  • Main
  • Astra
  • Astra J
  • Transmission
  • Car gearbox
  • Removal and installation the gearbox

Removal and installation the gearbox (Opel Astra J)

            0

The main faults that require removing the manual transmission from the vehicle to fix are:
  • elevated (compared to the usual) noise;
  • difficult gear shifting;
  • spontaneous disengagement or unclear engagement of gears;
  • oil leakage through seals and gaskets.

In addition, the gearbox is removed to replace the clutch, flywheel and rear crankshaft oil seal of the engine.

An automatic transmission is removed for almost the same reasons as a manual transmission, except for the need to replace the clutch and flywheel, which are absent in this case. The methods for removing and installing manual and automatic transmissions are almost the same and are described using a manual transmission as an example. The difference lies in the design of the transmission control drive and the need to unscrew the torque converter mounting nuts.

Helpful tips:
  • The work of removing and installing the gearbox is very labor-intensive, so first make sure that its malfunctions are not caused by other reasons (insufficient oil level, clutch drive defects, loose gearbox mounts, etc.).
  • The gearbox is quite heavy and its shape is not convenient for holding, so we recommend removing the gearbox with an assistant.


You will need: keys "14", "18" and TORX E18, a screwdriver with a flat blade.
You will need: keys «14», «18» and TORX E18, a screwdriver with a flat blade.


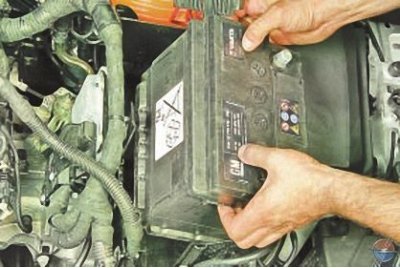
1. Remove the battery (see Removal and installation the battery).


1. Remove the battery (see Removal and installation the battery).


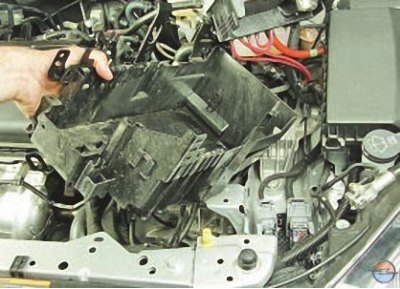
2. Remove the battery mounting shelf (see Removal and installation the battery mounting shelf).

2. Remove the battery mounting shelf (see Removal and installation the battery mounting shelf).
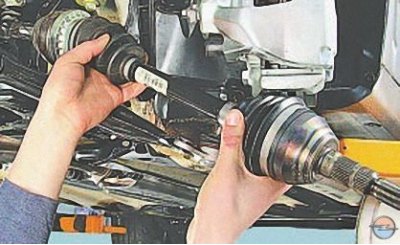

3. Remove the front wheel drives (see Removal and installation front wheel drives).
3. Remove the front wheel drives (see Removal and installation front wheel drives).


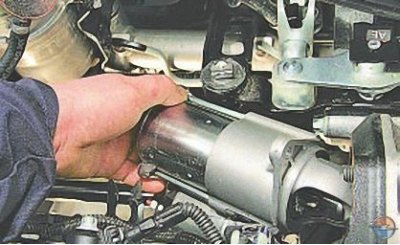
4. Remove the starter (see Removal and installation the starter).
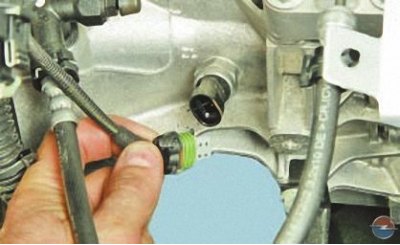
4. Remove the starter (see Removal and installation the starter).


5. Disconnect the wiring harness connector from the reverse gear sensor.
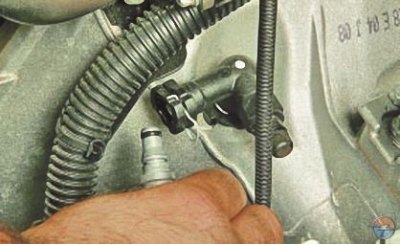


5. Disconnect the wiring harness connector from the reverse gear sensor.


6. Remove the retainer and disconnect the hose tip from the clutch release hydraulic drive intermediate pipe adapter.
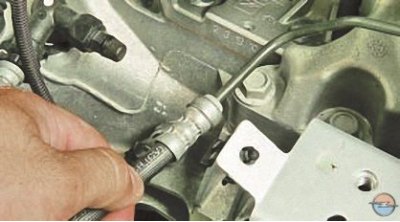
6. Remove the retainer and disconnect the hose tip from the clutch release hydraulic drive…


7. Remove the clutch release hydraulic drive line from the holder on the body bracket and move it to the side.
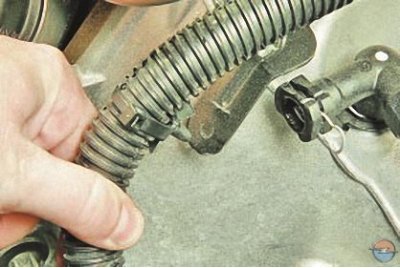
7. Remove the clutch release hydraulic drive line from the holder on the body bracket and move it…


8. Disconnect the wire harness holders from the transmission brackets and move the harness to the side.
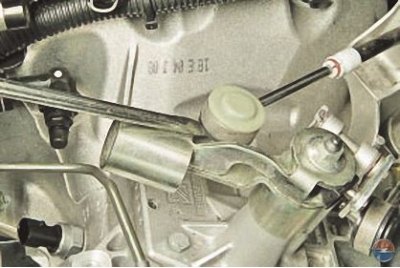


8. Disconnect the wire harness holders from the transmission brackets and move the harness to the…


9. Use a screwdriver to pry up the tip of the gear shift cable…
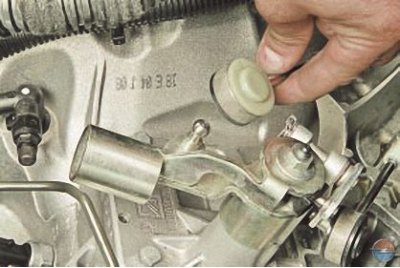
9. Use a screwdriver to pry up the tip of the gear shift cable…


10. …and disconnect the cable end from the gearbox lever, overcoming the elastic resistance of its spring retainer.
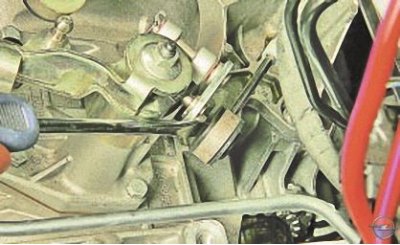
10. …and disconnect the cable end from the gearbox lever, overcoming the elastic resistance of its…


11. Use a screwdriver to pry up the tip of the gear selection cable…
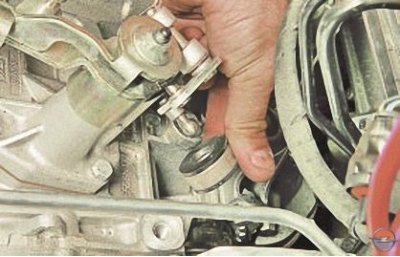
11. Use a screwdriver to pry up the tip of the gear selection cable…


12. …and disconnect it from the gearbox lever, overcoming the elastic resistance of the spring retainer.
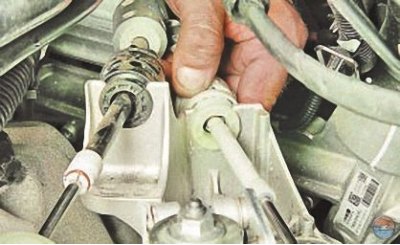


12. …and disconnect it from the gearbox lever, overcoming the elastic resistance of the spring…


13. Move the gear selector cable housing stop lock back…
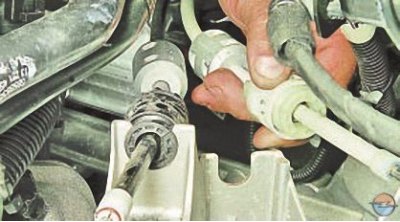
13. Move the gear selector cable housing stop lock back…


14. …and remove the stop from the bracket on the gearbox.
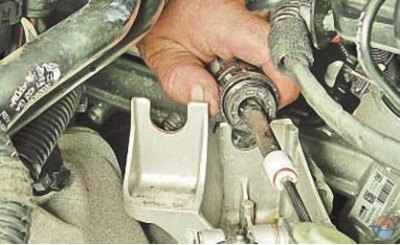
14. …and remove the stop from the bracket on the gearbox.


15. Similarly, disconnect the gear selection cable stop from the bracket.
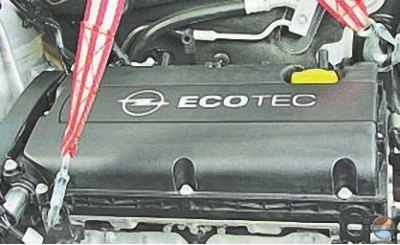
15. Similarly, disconnect the gear selection cable stop from the bracket.


16. Attach the lifting gear slings to the front and rear transport eyes of the power unit and tighten the slings.
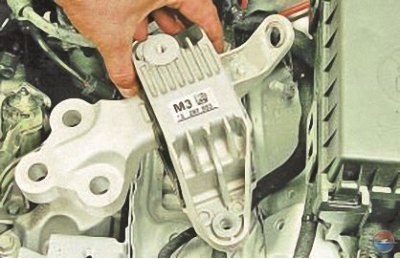


16. Attach the lifting gear slings to the front and rear transport eyes of the power unit and…


17. Remove the left powertrain suspension support (see Replacing the left support of the powertrain suspension).
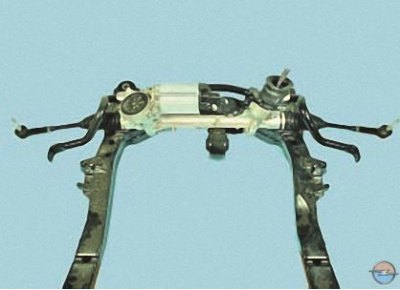
17. Remove the left powertrain suspension support (see Replacing the left support of the powertrain…


18. Remove the front suspension subframe (see Removal and installation the front suspension subframe).

19. Install a support under the gearbox and engine housings.
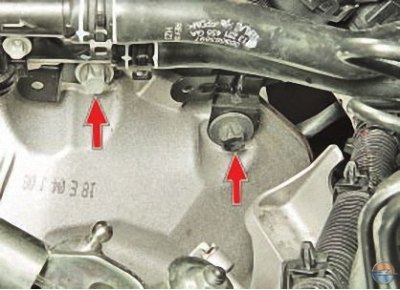
19. Install a support under the gearbox and engine housings.


20. Unscrew the two upper bolts securing the gearbox to the engine cylinder block on the right…
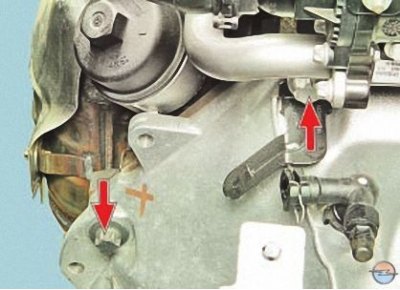


20. Unscrew the two upper bolts securing the gearbox to the engine cylinder block on the right…


21. …and on the left.
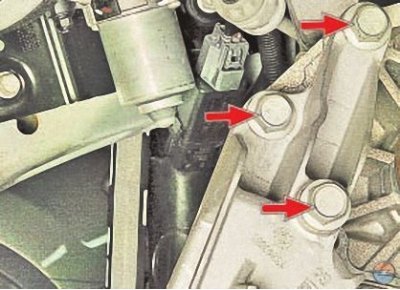
21. …and on the left.


22. Unscrew the three bolts securing the front powertrain suspension bracket to the gearbox and remove the bracket.
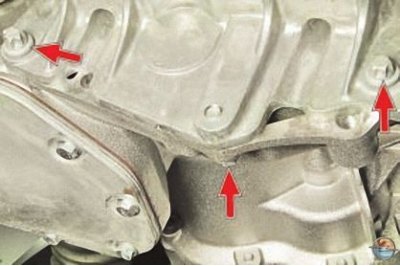
22. Unscrew the three bolts securing the front powertrain suspension bracket to the gearbox and…


23. Remove the three bolts securing the clutch oil pan to the engine oil pan.
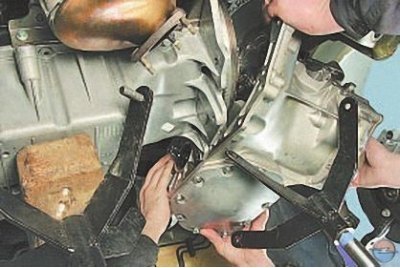
23. Remove the three bolts securing the clutch oil pan to the engine oil pan.


24. Move the gearbox as far back as possible (the primary shaft must disengage from the clutch driven disk hub), remove the support from underneath it and remove the gearbox from the car.


Caution! When removing the gearbox, do not rest the end of the input shaft against the diaphragm spring petals to avoid deforming them.


25. Install the gearbox and all removed parts and assemblies in the reverse order of removal.

Helpful tips:
  • Before installing the gearbox, we recommend lubricating the splines of the input shaft with a thin layer of high-melting consistent grease.
  • Check the alignment of the clutch driven disc using a special mandrel (see Removal and installation the clutch).
  • Before connecting the front wheel drives to the gearbox, replace the retaining rings on the splined tails of the inner joints with new ones. Otherwise, there is a risk of disconnecting the drives from the gearbox while driving.


26. Fill the gearbox with oil (see Checking the level, topping up and replacing oil in a manual gearbox and working fluid in an automatic gearbox).

27. If necessary, adjust the gearbox control drive (see Adjusting the gearbox control drive).

28. Pour the working fluid into the reservoir of the master brake cylinder (in its section intended for supplying the hydraulic clutch release drive) and remove air from the clutch release hydraulic drive (see Bleeding the clutch release hydraulic drive).


This article is available at russian, bulgarian, belarusian, ukrainian, serbian, croatian, romanian, polish, slovak, hungarian
Checking the article: Trifonova Emilia

Share information:

Previous articles
Opel Astra J: Car gearbox
Next articles

Replacing gearbox seals
Checking the level, topping up and replacing oil in the gearbox
Features of the design of an automatic transmission
Possible malfunctions of a manual transmission
Design features of a manual gearbox
Disassembly and assembly of a manual gearbox
Repair of secondary shaft of manual transmission
Repair of synchronizer of manual transmission
Repair of differential of manual transmission
Replacing gearbox control cables
Removal and installation the gearbox control lever linkage


See similar ones from other Opel car manuals:
▶ Easytronic gearbox Opel Corsa C (2000-2006, petrol)
▶ Replacing transmission oil in a manual gearbox M32-6 Opel Insignia A (2008-2017)
▶ Removal and installation the gearbox Opel Kadett E (1984-1995)
▶ Manual gearbox — removal and installation Opel Omega A (1986-1993)
▶ Removal and installation the gearbox Opel Vectra A (1988-1995)
Link to this page in different formats

Visitor comments


No comments yet


How much will 14 + 21 =


Astra J (2009-2015, petrol) 
  • General information
  • Vehicle device
  • User manual
  • Faults en route
  • Maintenance
  • Power unit
  • Engine repair
  • Cooling and lubrication system
  • Engine power system
  • Exhaust system
  • Transmission
  • Clutch
  • Car gearbox
  • Drive shafts
  • Chassis
  • Front suspension
  • Rear suspension
  • Steering
  • Brake system
  • Wheels and tires
  • Body
  • Exterior
  • Interior
  • Doors and windows
  • Body Care
  • Heating and air conditioning
  • Security systems
  • Electrical equipment
  • Equipment and devices
  • Lighting and signaling
  • Power devices
  • Electrical circuits
Astra H (2004-2009) 
  • General information
  • Introduction to the guide
  • Troubleshooting
  • User manual
  • Maintenance
  • Power unit
  • Engine repair
  • Cooling and heating
  • Power and exhaust system
  • Ignition system
  • Launch and charge system
  • Transmission
  • Mechanical gearbox
  • Automatic gearbox
  • Drive shafts
  • Chassis
  • Brake system
  • Car suspension
  • Steering
  • Body
  • Interior
  • Exterior
  • Electrical equipment
  • Equipment and devices
  • Electrical circuits
Astra G (1998-2004) 
  • General information
  • Introduction to manual
  • User manual
  • Maintenance
  • Power unit
  • SOHC gasoline engines
  • DOHC gasoline engines
  • Diesel engines 1.7 and 2.0
  • Engine repair
  • Cooling system
  • Supply system
  • Injection system (gasoline)
  • Injection system (diesel)
  • Exhaust system
  • Charge and launch system
  • Ignition system (gasoline)
  • Preheat system (diesel)
  • Transmission
  • Manual gearbox
  • Automatic gearbox
  • Clutch
  • Drive shafts
  • Chassis
  • Brake system
  • Wheel suspension
  • Steering
  • Body
  • Exterior
  • Interior
  • Doors and windows
  • Ventilation and heating
  • Electrical equipment
  • Equipment and devices
  • Electrical circuits
Astra G (1998-2004, petrol) 
  • General information
  • User manual
  • Car care
  • Maintenance
  • Power unit
  • Single shaft engines
  • Twin shaft engines
  • Engine repair
  • Cooling and heating
  • Fuel and exhaust systems
  • Starting and charging system
  • Ignition system
  • Transmission
  • Clutch
  • Mechanical gearbox
  • Automatic gearbox
  • Drive shafts
  • Chassis
  • Brake system
  • Car suspension
  • Steering
  • Body
  • Interior
  • Exterior
  • Electrical equipment
  • Equipment and devices
  • Wiring diagrams Opel Astra
  • Wiring diagrams Opel Zafira
Astra F (1991-1998, petrol) 
  • General information
  • Maintenance
  • Power unit
  • Engine in car
  • Engine removed
  • Cooling system
  • Heating and ventilation
  • Fuel supply (carburetor)
  • Fuel supply (injector)
  • Emission control
  • Ignition system
  • Transmission
  • Clutch
  • Mechanical gearbox
  • Automatic gearbox
  • Drive shafts
  • Chassis
  • Brake system
  • Car suspension
  • Steering
  • Body
  • Exterior
  • Interior
  • Electrical equipment
  • Equipment and devices
  • Electrical circuits
OpelBook.ru © 2017–2026 · Mobile version · · Sitemap: EN BG BY UA RS HR RO PL SK HU · Feedback · Site search
Astra F, petrol · Astra G, petrol · Astra G · Astra H · Astra J, petrol · Corsa B · Corsa C, petrol · Corsa C · Insignia A · Kadett D · Kadett E · Omega A · Omega B · Omega B2 · Vectra A, petrol · Vectra A · Vectra B, petrol · Vectra B · Vectra C · Zafira A, petrol · Frontera A, petrol · Frontera B · Ascona C · Vivaro A ·
We want your visit to be comfortable 🤝! We use cookies 🍪 to make that happen.