OpelBook.ru
Cars AvtoVAZ Cars Mitsubishi Cars BMW Cars Mercedes Cars Nissan Cars Toyota Cars Chevrolet
English Русский
Български
Беларускі
Український
Српски
Hrvatski
Română
Polski
Slovenský
Magyar
 |  Sitemap  |  Contacts  |    


Main Astra Corsa Insignia Kadett Omega Vectra Zafira Others Articles
Astra F (1991-1998, petrol) Astra G (1998-2004, petrol) Astra G (1998-2004) Astra H (2004-2009) Astra J (2009-2015, petrol)
  • Main
  • Astra
  • Astra J
  • Transmission
  • Car gearbox
  • Repair of secondary shaft of manual transmission

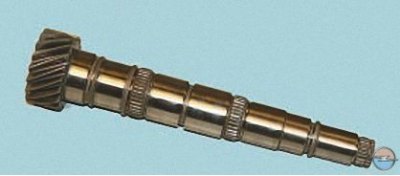
Repair of secondary shaft of manual transmission (Opel Astra J)

            0

You will need: snap ring pliers, screwdriver, round-nose pliers, universal puller.

You will need: snap ring pliers, screwdriver, round-nose pliers, universal puller.


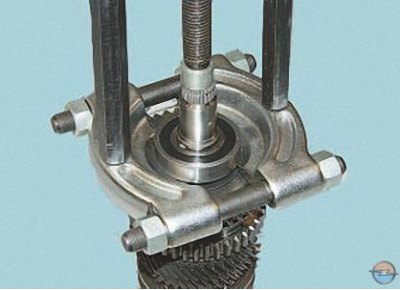
1. Press the rear bearing off the secondary shaft...
1. Press the rear bearing off the secondary shaft...


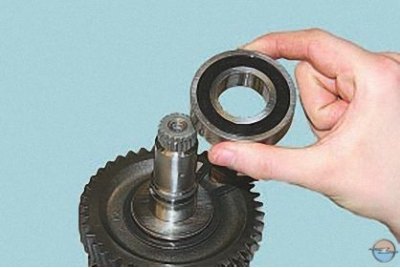
2. …and take it off.

2. …and take it off.


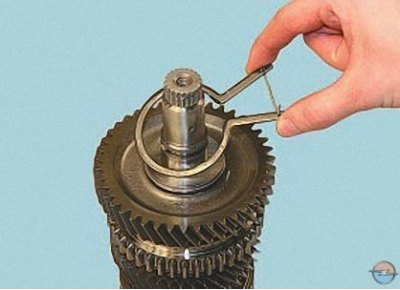
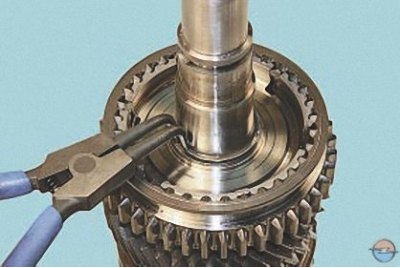
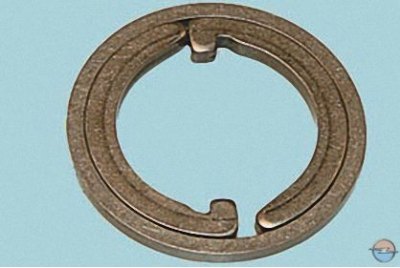
3. Remove the spring retaining ring by squeezing the tabs…

3. Remove the spring retaining ring by squeezing the tabs…


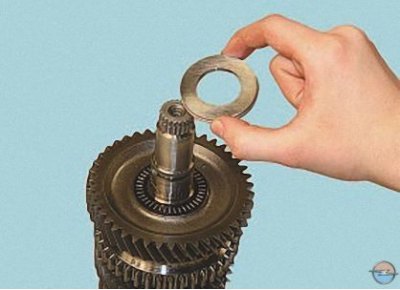
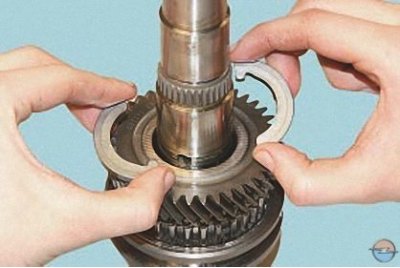
4. …support washer…


4. …support washer…


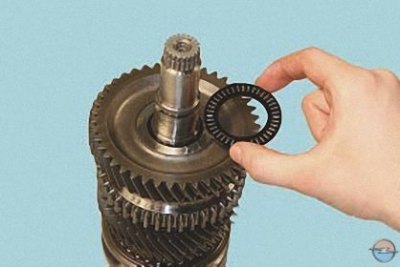
5. … thrust needle bearing…

5. … thrust needle bearing…


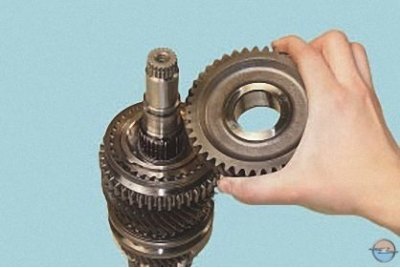
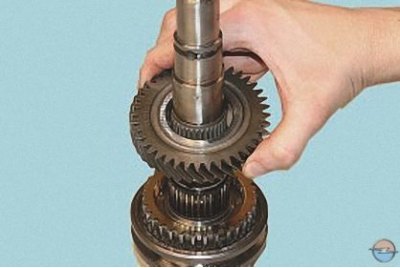
6. …driven gear of 1st gear…

6. …driven gear of 1st gear…


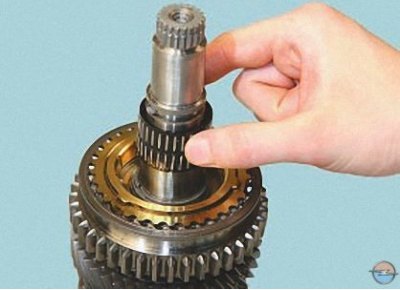
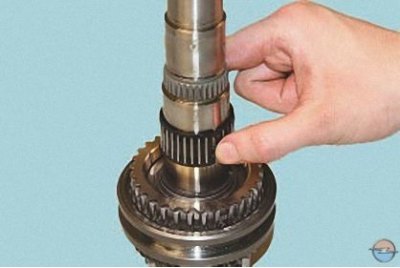
7. … needle bearing of the driven gear of the 1st gear…

7. … needle bearing of the driven gear of the 1st gear…


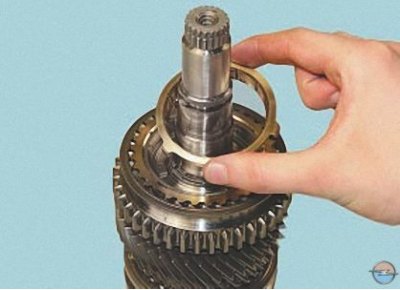
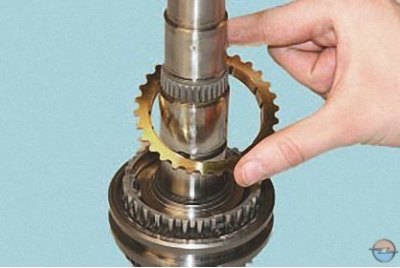
8. …internal blocking ring…


8. …internal blocking ring…


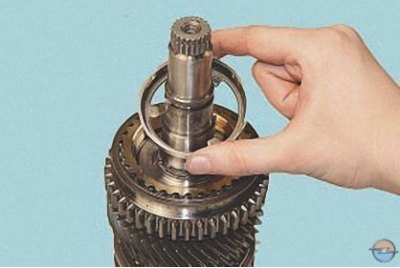
9. …intermediate ring…

9. …intermediate ring…


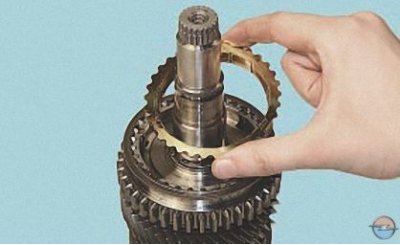
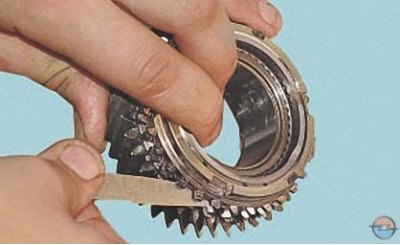
10. …and the outer locking ring of the 1st gear synchronizer.

10. …and the outer locking ring of the 1st gear synchronizer.


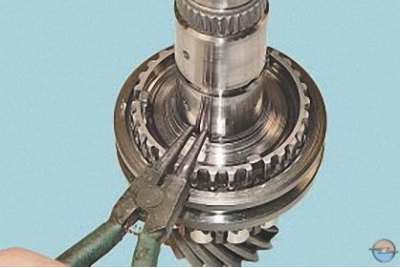
11. Having loosened the puller…

11. Having loosened the puller…


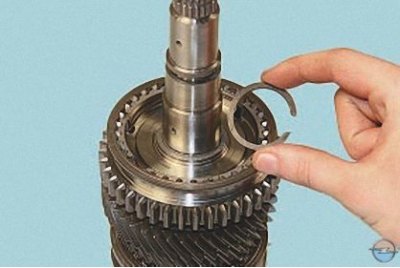
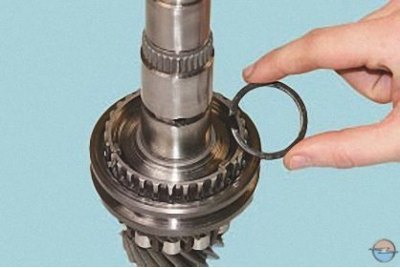
12. …remove the retaining ring…


12. …remove the retaining ring…


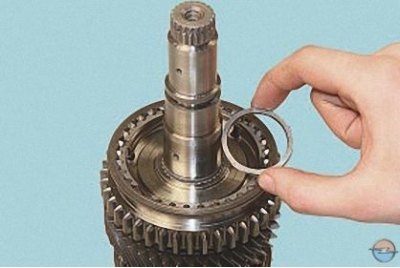
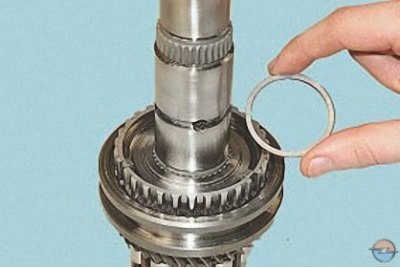
13. …and a thrust washer.

13. …and a thrust washer.


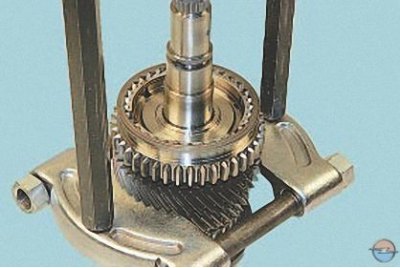
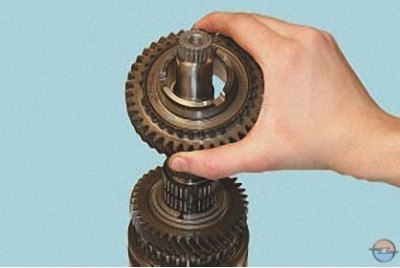
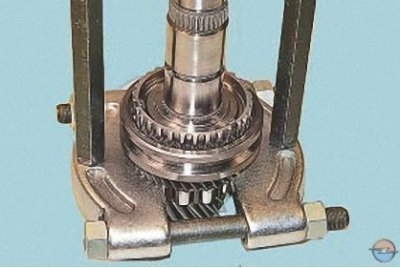
14. Press the synchronizer of the 1st and 2nd gears together with the driven gear of the 2nd gear from the shaft splines, applying force to the end of the gear..
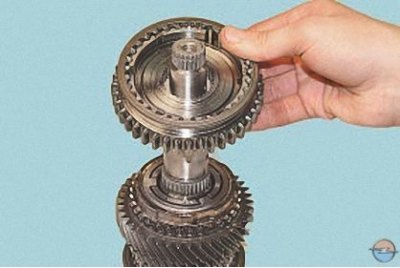
14. Press the synchronizer of the 1st and 2nd gears together with the driven gear of the 2nd gear…


15. …and remove the synchronizer from the shaft.
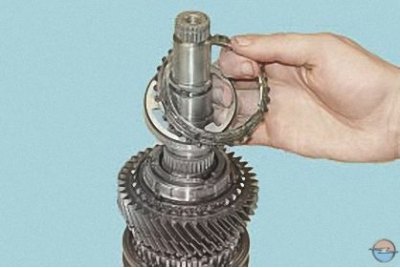
15. …and remove the synchronizer from the shaft.


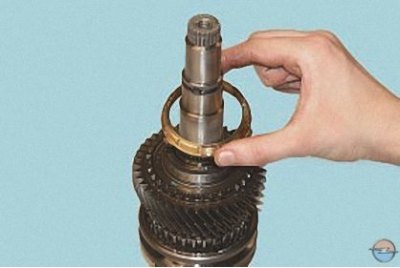
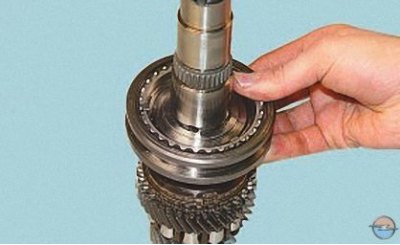
16. Remove the outer locking ring, intermediate ring…


16. Remove the outer locking ring, intermediate ring…


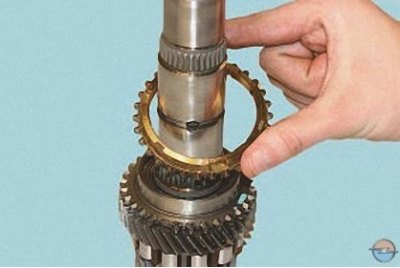
17. …internal locking ring of the 2nd gear synchronizer…

17. …internal locking ring of the 2nd gear synchronizer…


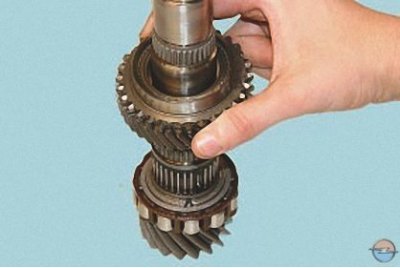
18. …and the driven gear of the 2nd gear.

18. …and the driven gear of the 2nd gear.


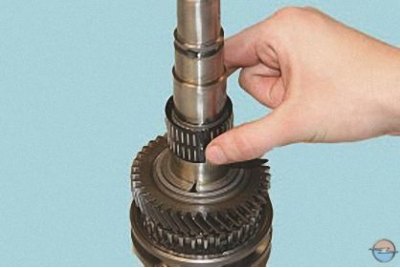
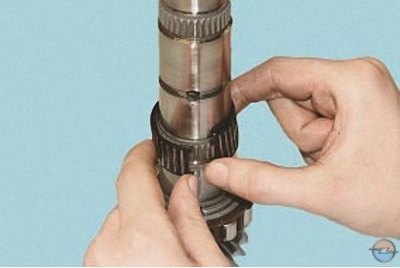
19. Remove the needle bearing of the 2nd gear driven gear.

19. Remove the needle bearing of the 2nd gear driven gear.


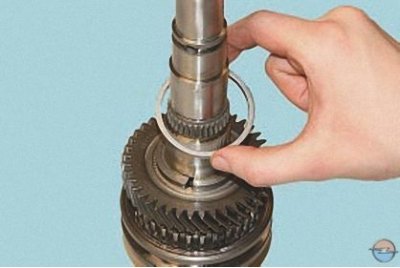
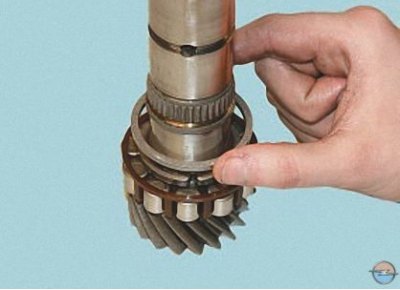
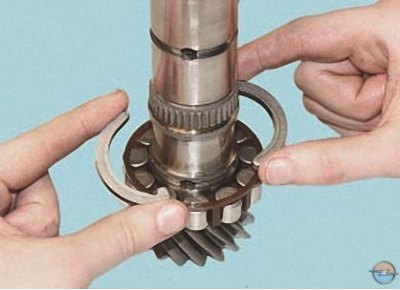
20. Remove the retaining ring…


20. Remove the retaining ring…


21. …and two thrust half rings.

21. …and two thrust half rings.


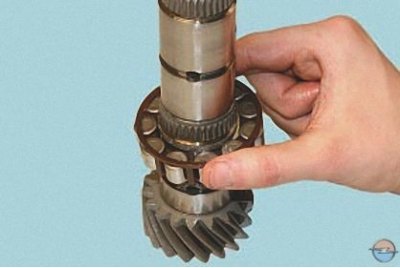
22. Remove the driven gear of the 3rd gear from the shaft…

22. Remove the driven gear of the 3rd gear from the shaft…


23. … needle bearing of the driven gear of the 3rd gear…

23. … needle bearing of the driven gear of the 3rd gear…


24. …and the locking ring of the synchronizer of the third gear.


24. …and the locking ring of the synchronizer of the third gear.


25. Having loosened the retaining ring of the synchronizer hub of the III and IV gears with a puller…

25. Having loosened the retaining ring of the synchronizer hub of the III and IV gears with a…


26….remove the retaining ring from the shaft…

26….remove the retaining ring from the shaft…


27. …and a thrust washer.

27. …and a thrust washer.


28. Press the synchronizer of the III and IV gears off the shaft splines, applying force to the end of the driven gear of the IV gear.


28. Press the synchronizer of the III and IV gears off the shaft splines, applying force to the end…


29. Remove the synchronizer of III and IV gears from the shaft…

29. Remove the synchronizer of III and IV gears from the shaft…


30. …synchronizer locking ring…

30. …synchronizer locking ring…


31. …driven gear of the 4th gear…

31. …driven gear of the 4th gear…


32. …and a split needle bearing of the driven gear of the 4th gear.

32. …and a split needle bearing of the driven gear of the 4th gear.


33. Remove the retaining ring from the shaft…

33. Remove the retaining ring from the shaft…


34. …two half rings…

34. …two half rings…


35. …and the secondary shaft rear roller bearing.

35. …and the secondary shaft rear roller bearing.


36. Inspect the secondary shaft and its parts:
  • there should be no signs of fatigue damage on the journals for needle bearings, and no nicks or crushing on the splines for installing synchronizer clutches;

there should be no signs of fatigue damage on the journals for needle bearings, and no nicks or…

  • there should be no signs of wear or scoring on the end surfaces of the thrust half rings and locking rings;
  • there should be no nicks or signs of wear on the synchronizer hubs;
  • there should be no dents or chipping on the ends of the splines of the synchronizer clutches and blocking rings;

there should be no dents or chipping on the ends of the splines of the synchronizer clutches and…

  • when installing the synchronizer locking ring on the cone of the corresponding gear, the gap between the ends of the ring and the gear ring must be at least 1 mm. Otherwise, replace the locking ring.

37. Assemble the secondary shaft in the reverse order of disassembly, taking into account the following:
  • before pressing onto the shaft, heat the synchronizer hubs in an oil bath to a temperature of 100°C;
  • when pressing on the synchronizer hubs, make sure that the crackers fit into the grooves of the locking rings;
  • after assembling the secondary shaft, check the rotation of all gears: they should rotate freely.


This article is available at russian, bulgarian, belarusian, ukrainian, serbian, croatian, romanian, polish, slovak, hungarian
Checking the article: Trifonova Emilia

Share information:

Previous articles
Opel Astra J: Car gearbox
Next articles

Disassembly and assembly of a manual gearbox
Removal and installation the gearbox
Replacing gearbox seals
Checking the level, topping up and replacing oil in the gearbox
Features of the design of an automatic transmission
Possible malfunctions of a manual transmission
Repair of synchronizer of manual transmission
Repair of differential of manual transmission
Replacing gearbox control cables
Removal and installation the gearbox control lever linkage
Adjusting the gearbox control drive


See similar ones from other Opel car manuals:
▶ Manual transmission repair — general information Opel Corsa B (1993-2000)
▶ Input shaft of a manual transmission — disassembly and… Opel Omega A (1986-1993)
▶ Introduction to the operation and repair manual Insignia A Opel Insignia A (2008-2017)
▶ Manual transmission Opel Kadett E (1984-1995)
▶ Manual transmission Opel Vectra A (1988-1995, petrol)
Link to this page in different formats

Visitor comments


No comments yet


How much will 34 + 20 =


Astra J (2009-2015, petrol) 
  • General information
  • Vehicle device
  • User manual
  • Faults en route
  • Maintenance
  • Power unit
  • Engine repair
  • Cooling and lubrication system
  • Engine power system
  • Exhaust system
  • Transmission
  • Clutch
  • Car gearbox
  • Drive shafts
  • Chassis
  • Front suspension
  • Rear suspension
  • Steering
  • Brake system
  • Wheels and tires
  • Body
  • Exterior
  • Interior
  • Doors and windows
  • Body Care
  • Heating and air conditioning
  • Security systems
  • Electrical equipment
  • Equipment and devices
  • Lighting and signaling
  • Power devices
  • Electrical circuits
Astra H (2004-2009) 
  • General information
  • Introduction to the guide
  • Troubleshooting
  • User manual
  • Maintenance
  • Power unit
  • Engine repair
  • Cooling and heating
  • Power and exhaust system
  • Ignition system
  • Launch and charge system
  • Transmission
  • Mechanical gearbox
  • Automatic gearbox
  • Drive shafts
  • Chassis
  • Brake system
  • Car suspension
  • Steering
  • Body
  • Interior
  • Exterior
  • Electrical equipment
  • Equipment and devices
  • Electrical circuits
Astra G (1998-2004) 
  • General information
  • Introduction to manual
  • User manual
  • Maintenance
  • Power unit
  • SOHC gasoline engines
  • DOHC gasoline engines
  • Diesel engines 1.7 and 2.0
  • Engine repair
  • Cooling system
  • Supply system
  • Injection system (gasoline)
  • Injection system (diesel)
  • Exhaust system
  • Charge and launch system
  • Ignition system (gasoline)
  • Preheat system (diesel)
  • Transmission
  • Manual gearbox
  • Automatic gearbox
  • Clutch
  • Drive shafts
  • Chassis
  • Brake system
  • Wheel suspension
  • Steering
  • Body
  • Exterior
  • Interior
  • Doors and windows
  • Ventilation and heating
  • Electrical equipment
  • Equipment and devices
  • Electrical circuits
Astra G (1998-2004, petrol) 
  • General information
  • User manual
  • Car care
  • Maintenance
  • Power unit
  • Single shaft engines
  • Twin shaft engines
  • Engine repair
  • Cooling and heating
  • Fuel and exhaust systems
  • Starting and charging system
  • Ignition system
  • Transmission
  • Clutch
  • Mechanical gearbox
  • Automatic gearbox
  • Drive shafts
  • Chassis
  • Brake system
  • Car suspension
  • Steering
  • Body
  • Interior
  • Exterior
  • Electrical equipment
  • Equipment and devices
  • Wiring diagrams Opel Astra
  • Wiring diagrams Opel Zafira
Astra F (1991-1998, petrol) 
  • General information
  • Maintenance
  • Power unit
  • Engine in car
  • Engine removed
  • Cooling system
  • Heating and ventilation
  • Fuel supply (carburetor)
  • Fuel supply (injector)
  • Emission control
  • Ignition system
  • Transmission
  • Clutch
  • Mechanical gearbox
  • Automatic gearbox
  • Drive shafts
  • Chassis
  • Brake system
  • Car suspension
  • Steering
  • Body
  • Exterior
  • Interior
  • Electrical equipment
  • Equipment and devices
  • Electrical circuits
OpelBook.ru © 2017–2026 · Mobile version · · Sitemap: EN BG BY UA RS HR RO PL SK HU · Feedback · Site search
Astra F, petrol · Astra G, petrol · Astra G · Astra H · Astra J, petrol · Corsa B · Corsa C, petrol · Corsa C · Insignia A · Kadett D · Kadett E · Omega A · Omega B · Omega B2 · Vectra A, petrol · Vectra A · Vectra B, petrol · Vectra B · Vectra C · Zafira A, petrol · Frontera A, petrol · Frontera B · Ascona C · Vivaro A ·
We want your visit to be comfortable 🤝! We use cookies 🍪 to make that happen.